- BizDataX
- Installation guide
- Requirements
- BizDataX Designer installation
- BizDataX Designer version upgrade
- BizDataX Designer advanced settings
- BizDataX Portal installation
- BizDataX Portal version upgrade
- BizDataX Portal advanced settings
- NuGet packages installation
- Start guide
- Creating a data model (BizDataX Portal)
- Finding sensitive data
- Creating a new Visual Studio BizDataX project
- Creating a data model (BizDataX Designer)
- Creating a simple masking flow
- Creating a simple masking on Portal
- Publishing package to BizDataX Portal
- Executing package
- BizDataX Portal
- User manual
- Home
- Project Dashboard
- Data management
- Subsetting
- Sensitive data Discovery
- Data masking
- Design Data Masking Plan
- Functions
- BizDataX Designer
- Workflow
- Creating a new Visual Studio BizDataX project
- User interface elements
- Creating a data model
- Toolbox items
- Masking activities
- BizDataX Masking Control Flow
- BizDataX Country BE
- BizDataX Country CH
- Generate AHV (Sozialversicherungsnummer)
- Generate CH IBAN
- Pick CH address from list
- Pick CH bank from list
- Pick CH company from list
- Pick CH first name from list
- Pick CH last name from list
- Pick CH place from list
- Pick CH street from list
- BizDataX Country DE
- Generate DE IBAN
- Pick DE address from list
- Pick DE bank from list
- Pick DE company from list
- Pick DE first name from list
- Pick DE last name from list
- Pick DE place from list
- Pick DE street from list
- BizDataX Country HR
- Generate HR bank account
- Generate HR BBAN
- Generate HR IBAN
- Generate JMBG
- Generate maticni broj
- Generate OIB
- Generate porezni broj
- Pick HR address from list
- Pick HR bank from list
- Pick HR company from list
- Pick HR first name from list
- Pick HR last name from list
- Pick HR place from list
- Pick HR street from list
- BizDataX Country US
- Generate US SSN
- Pick US address from list
- Pick US company from list
- Pick US first name from list
- Pick US last name from list
- Pick US place from list
- Pick US street from list
- BizDataX Data Processing
- BizDataX Database
- BizDataX Generators
- Generate and convert
- Generate and convert to number
- Generate and convert to text
- Generate business name
- Generate credit card number
- Generate date
- Generate date in range
- Generate decimal number in range
- Generate double number in range
- Generate Email
- Generate fixed digit number
- Generate IBAN
- Generate items
- Generate items in random order
- Generate number in range
- Generate number sequence
- Generate numbered string
- Generate PAN
- Generate phone number
- Generate text
- Generate value
- BizDataX Monitoring
- BizDataX Pick Data From List
- Pick address from list
- Pick bank from list
- Pick company from list
- Pick first name from list
- Pick last name from list
- Pick place from list
- Pick street from list
- Pick value from list
- BizDataX Primitives
- API masking
- Assign date
- Assign number
- Assign text
- Assign value
- Clear value
- Evaluate date function
- Evaluate function
- Evaluate numeric function
- Evaluate text function
- Format properties
- BizDataX Repeating
- Assign repeating value
- Clear repeater
- Load repeaters
- Load single repeater
- Repeating of any value condition branch
- Repeating of boolean condition branch
- Repeating of date condition branch
- Repeating of number condition branch
- Repeating of text condition branch
- Save repeaters
- Save single repeater
- Set any repeating value
- Set boolean repeating value
- Set date repeating value
- Set number repeating value
- Set text repeating value
- Fluent Handler API
- Package steps
- Package parameters
- Publishing package to BizDataX Portal
- Package execution
- Masking-examples
- Logging
- Functions
- Custom code
- Picklists
- Addresses
- Banks
- Business suffixes
- Companies
- Domain names
- First names
- Last names
- Phone codes
- Places
- Streets
- Data generators
- Lambda expressions
- Synthetic data generation
- Repeaters
- Restartability
- Masking conditioned by data from related entities
- File masking
- Advanced
- Supported data sets
- Oracle
- Oracle database analyzer
- Oracle database handler
- Repeaters persistence
- Restartability store configuration
- Oracle database subsetting
- Microsoft SQL Server
- SQL Server database analyzer
- SQL Server database handler
- Repeaters persistence
- Restartability store configuration
- DB2
- Informix
- Sybase
- PostgreSQL
- Glossary
- Release notes
Add-on registration for Portal
Add-ons are packages that are required to work with supported databases, find specific sensitive data or generate data. Their content consists of support for database analyzers, discoverers and generators (used by BizDataX Portal), and for database handlers (used by BizDataX Designer).
| Table of contents |
|---|
| Add-ons page |
| Add-on from feed |
| Add-on to upload |
| Video steps |
Add-ons page
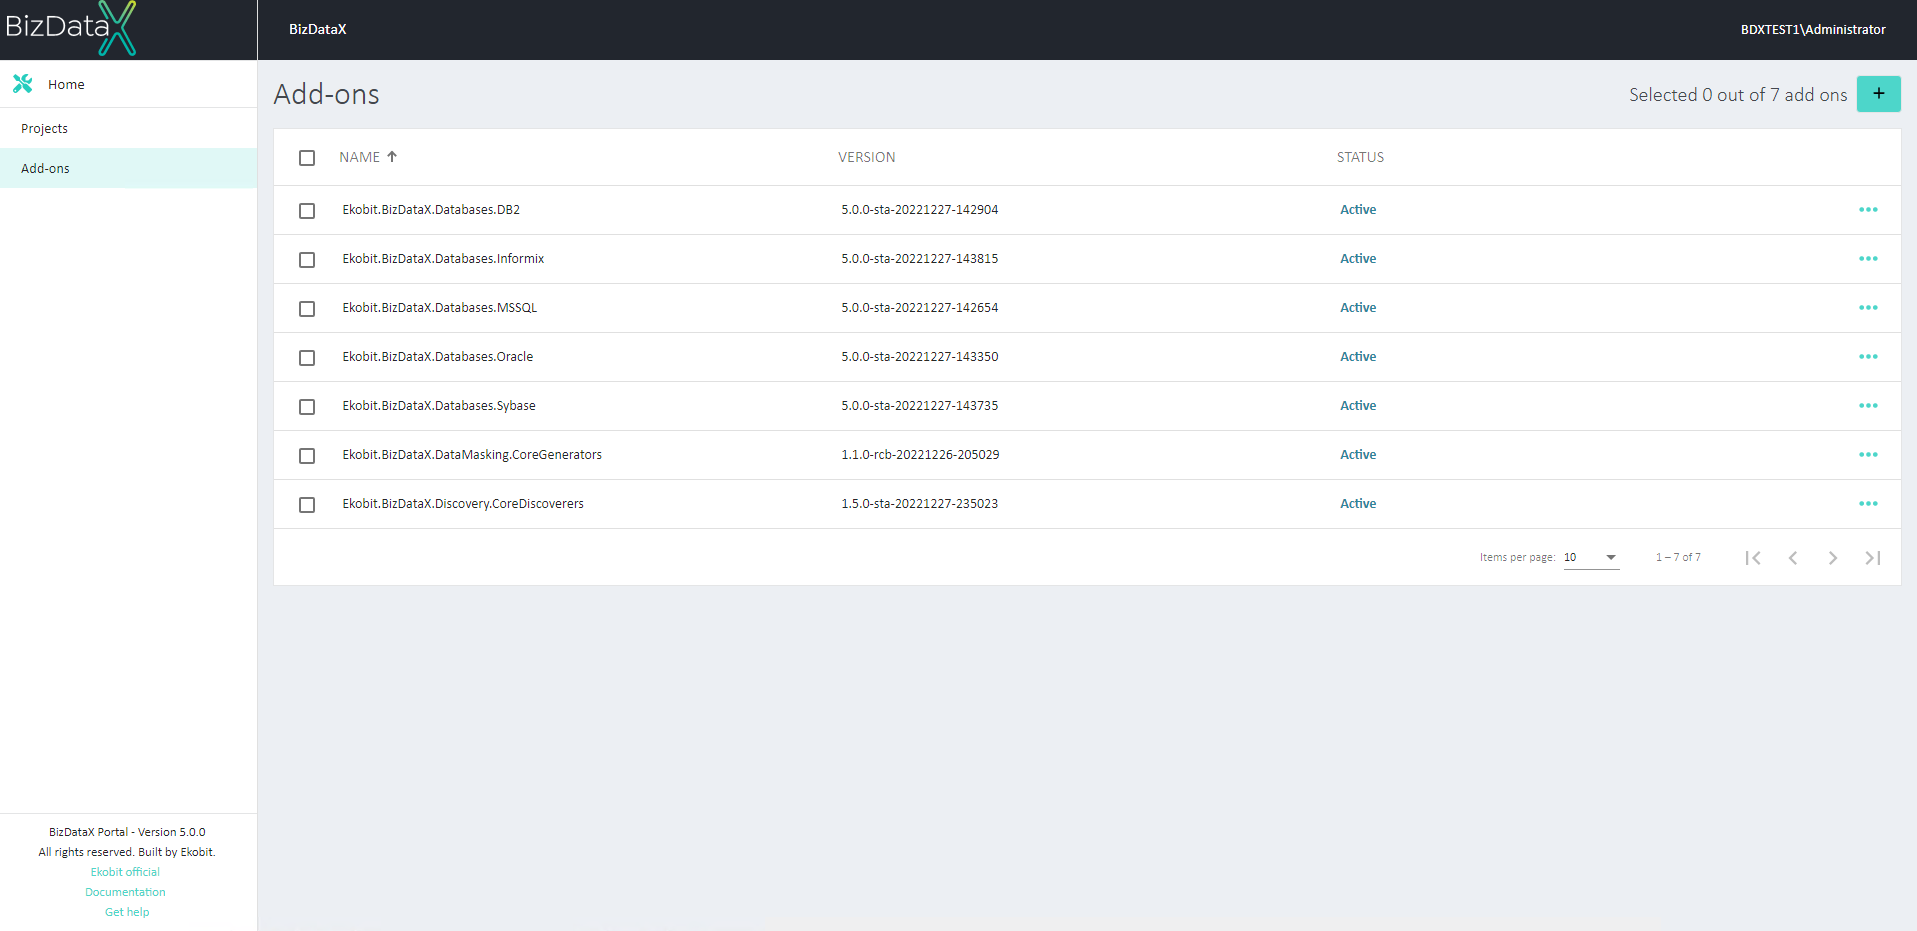
In the main navigation, when on the Home page, the Add-ons page can be found under the Add-ons navigation item. It displays the Add-ons overview list.

All installed Add-ons can be viewed on this Installed Add-ons overview list screen. The overview will be by default ordered by Add-on name.

There are two ways a new Add-on can be registered:
- from a feed and
- by uploading an Add-on from disk.
Add-on from feed
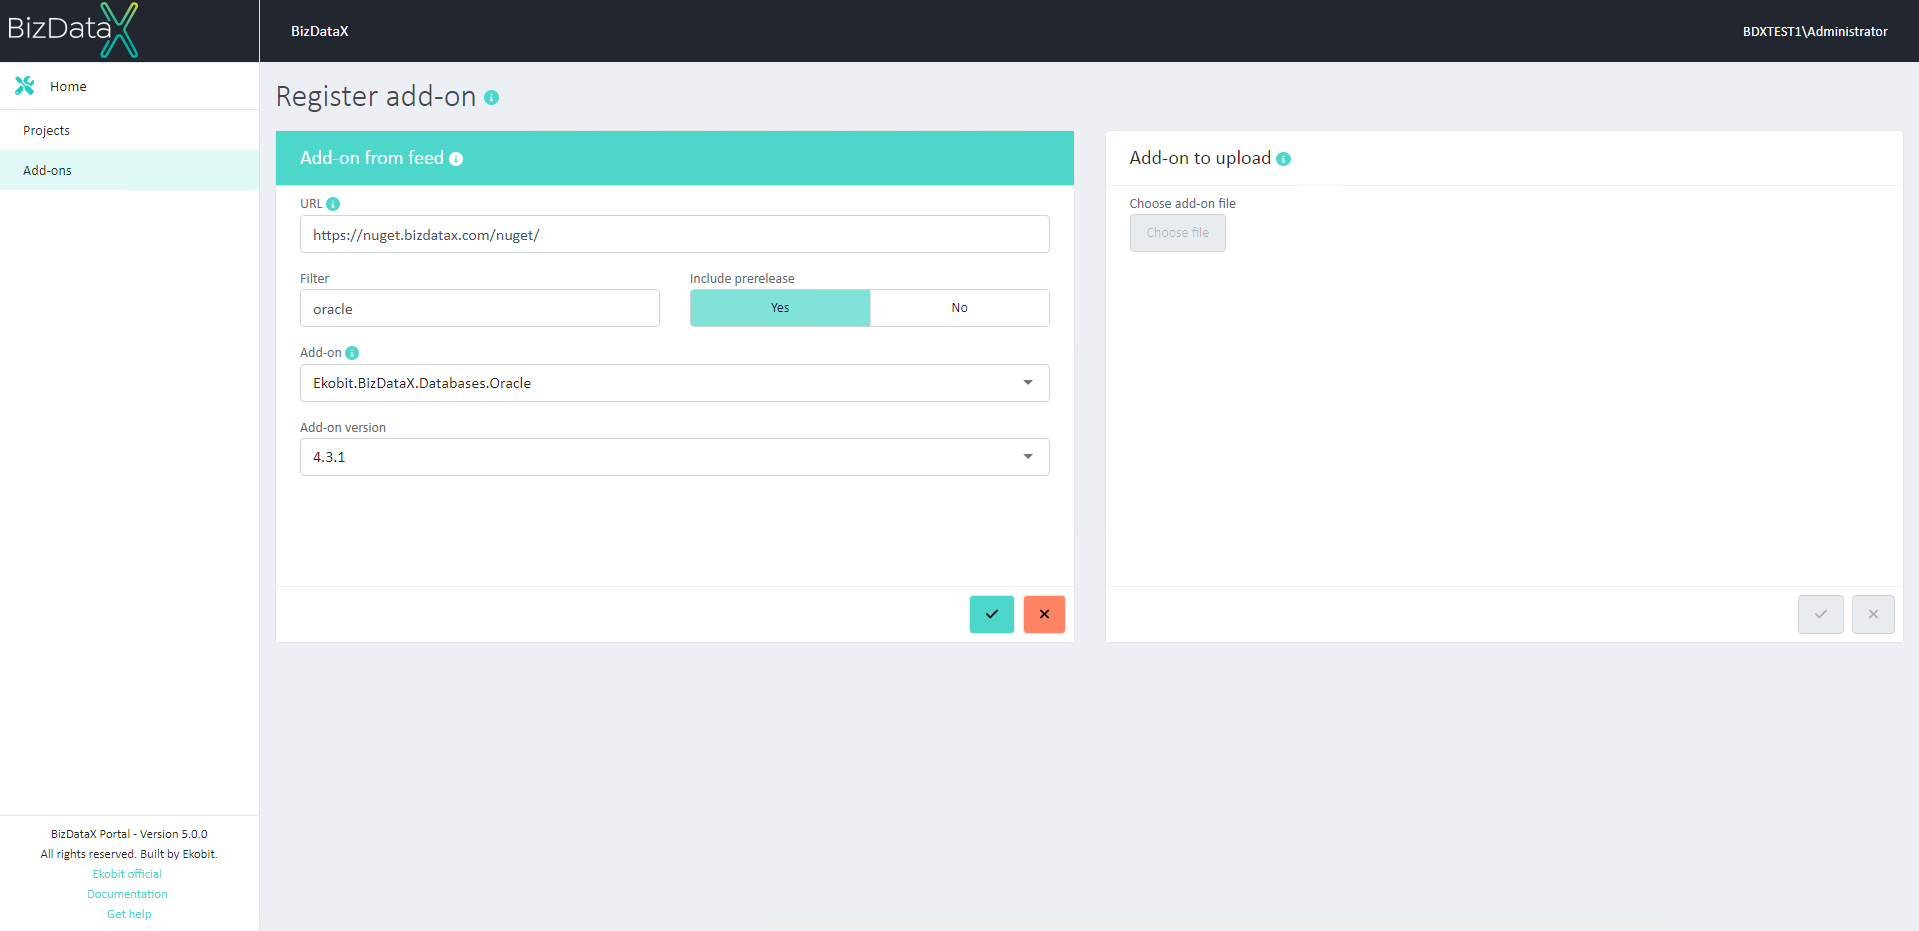
The steps for registering an Add-on from the feed are:
- Enter Remote feed URL.
When ‘Add-on from feed’ is chosen as Source, field ‘URL’ is by default populated with BDX feed with released nuggets: “http://nuget.bizdatax.com/nuget”.
- Filter Add-ons by their name or description.
This field is optional.
- Include pre-released versions of Add-ons.
Only released versions are displayed by default.
- Select wanted Add-on from Add-ons drop-down list.
Details of chosen Add-on will be displayed in the tooltip.
- Select the wanted Add-on version from the Add-on version drop-down list.
Displayed versions depend on the choice made in step 2.
- Click the 'Confirm' button.
Add-on is now registered and ready for use.

Add-on to upload
If the Add-on is saved to disk, the user can choose the Add-on from disk to add via the browser.
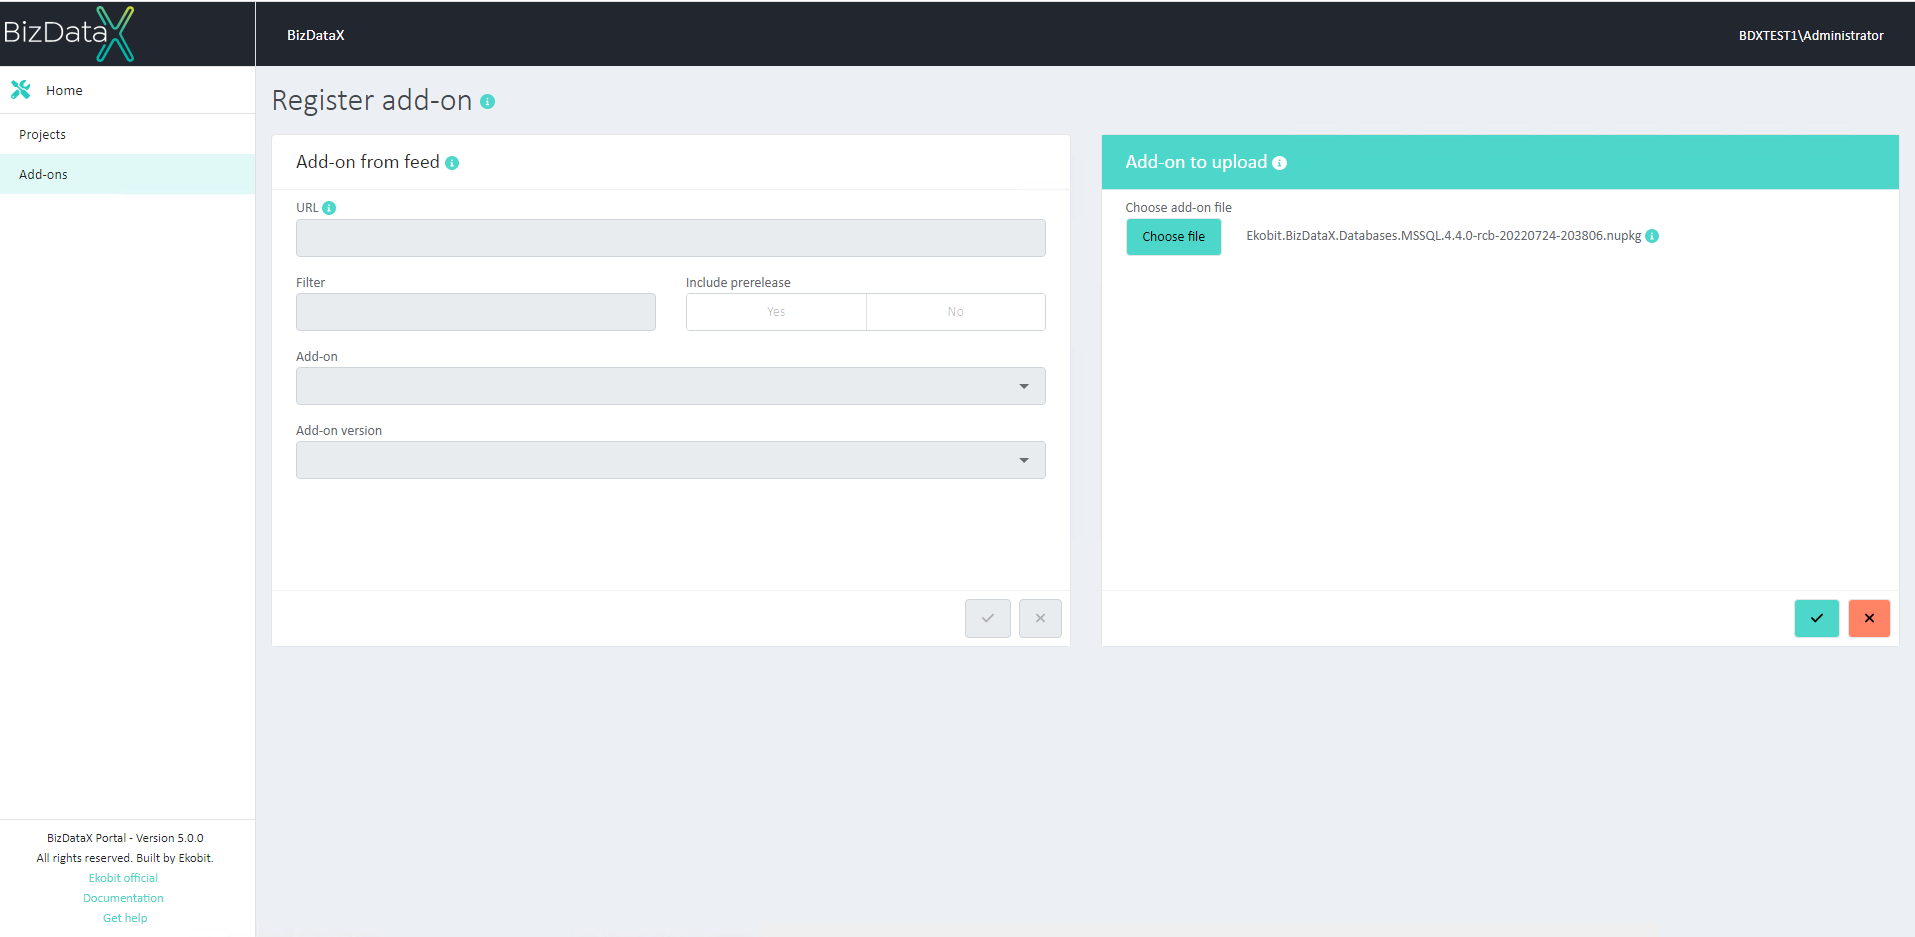
The steps for registering an Add-on to upload are:
- Select the 'Add-on to upload' header.
The 'Choose file' button will be enabled.
- Click the' Choose file' button.
A browser window will be displayed.
- Choose and select the wanted file.
Files are filtered by the file format .nupkg. Only that format is accepted as a valid Add-on. Details of chosen Add-on will be displayed in the tooltip.
- Click the 'Confirm' button.
Add-on is now registered and ready for use.

Video steps
BizDataX Documentation © Built by Ekobit. All rights reserved.
https://www.ekobit.com/ https://bizdatax.com/ https://bizdatax.com/support/