- BizDataX
- Installation guide
- Requirements
- BizDataX Designer installation
- BizDataX Designer version upgrade
- BizDataX Designer advanced settings
- BizDataX Portal installation
- BizDataX Portal version upgrade
- BizDataX Portal advanced settings
- NuGet packages installation
- Start guide
- Creating a data model (BizDataX Portal)
- Finding sensitive data
- Creating a new Visual Studio BizDataX project
- Creating a data model (BizDataX Designer)
- Creating a simple masking flow
- Creating a simple masking on Portal
- Publishing package to BizDataX Portal
- Executing package
- BizDataX Portal
- User manual
- Home
- Project Dashboard
- Data management
- Subsetting
- Sensitive data Discovery
- Data masking
- Design Data Masking Plan
- Functions
- BizDataX Designer
- Workflow
- Creating a new Visual Studio BizDataX project
- User interface elements
- Creating a data model
- Toolbox items
- Masking activities
- BizDataX Masking Control Flow
- BizDataX Country BE
- BizDataX Country CH
- Generate AHV (Sozialversicherungsnummer)
- Generate CH IBAN
- Pick CH address from list
- Pick CH bank from list
- Pick CH company from list
- Pick CH first name from list
- Pick CH last name from list
- Pick CH place from list
- Pick CH street from list
- BizDataX Country DE
- Generate DE IBAN
- Pick DE address from list
- Pick DE bank from list
- Pick DE company from list
- Pick DE first name from list
- Pick DE last name from list
- Pick DE place from list
- Pick DE street from list
- BizDataX Country HR
- Generate HR bank account
- Generate HR BBAN
- Generate HR IBAN
- Generate JMBG
- Generate maticni broj
- Generate OIB
- Generate porezni broj
- Pick HR address from list
- Pick HR bank from list
- Pick HR company from list
- Pick HR first name from list
- Pick HR last name from list
- Pick HR place from list
- Pick HR street from list
- BizDataX Country US
- Generate US SSN
- Pick US address from list
- Pick US company from list
- Pick US first name from list
- Pick US last name from list
- Pick US place from list
- Pick US street from list
- BizDataX Data Processing
- BizDataX Database
- BizDataX Generators
- Generate and convert
- Generate and convert to number
- Generate and convert to text
- Generate business name
- Generate credit card number
- Generate date
- Generate date in range
- Generate decimal number in range
- Generate double number in range
- Generate Email
- Generate fixed digit number
- Generate IBAN
- Generate items
- Generate items in random order
- Generate number in range
- Generate number sequence
- Generate numbered string
- Generate PAN
- Generate phone number
- Generate text
- Generate value
- BizDataX Monitoring
- BizDataX Pick Data From List
- Pick address from list
- Pick bank from list
- Pick company from list
- Pick first name from list
- Pick last name from list
- Pick place from list
- Pick street from list
- Pick value from list
- BizDataX Primitives
- API masking
- Assign date
- Assign number
- Assign text
- Assign value
- Clear value
- Evaluate date function
- Evaluate function
- Evaluate numeric function
- Evaluate text function
- Format properties
- BizDataX Repeating
- Assign repeating value
- Clear repeater
- Load repeaters
- Load single repeater
- Repeating of any value condition branch
- Repeating of boolean condition branch
- Repeating of date condition branch
- Repeating of number condition branch
- Repeating of text condition branch
- Save repeaters
- Save single repeater
- Set any repeating value
- Set boolean repeating value
- Set date repeating value
- Set number repeating value
- Set text repeating value
- Fluent Handler API
- Package steps
- Package parameters
- Publishing package to BizDataX Portal
- Package execution
- Masking-examples
- Logging
- Functions
- Custom code
- Picklists
- Addresses
- Banks
- Business suffixes
- Companies
- Domain names
- First names
- Last names
- Phone codes
- Places
- Streets
- Data generators
- Lambda expressions
- Synthetic data generation
- Repeaters
- Restartability
- Masking conditioned by data from related entities
- File masking
- Advanced
- Supported data sets
- Oracle
- Oracle database analyzer
- Oracle database handler
- Repeaters persistence
- Restartability store configuration
- Oracle database subsetting
- Microsoft SQL Server
- SQL Server database analyzer
- SQL Server database handler
- Repeaters persistence
- Restartability store configuration
- DB2
- Informix
- Sybase
- PostgreSQL
- Glossary
- Release notes
Plans
A Data masking plan is a container for one specific data masking process. It contains all information needed for creating a package. The ending result is a published Plan, i.e. created Package that can then be executed.
| Table of contents |
|---|
| Plans overview list |
| Create data masking plan |
| Design plan |
| Edit plan |
| Publish plan |
| Delete plan |
Plans overview list
All created Plans can be viewed on this Data Masking Plans overview list screen. Only basic information is shown so you can identify the Plan at a glance. Information necessary for quickly identifying Plans are Plan name, version and note. The overview will be by default ordered by Name. There is a possibility to change the order of all columns descending or ascending.
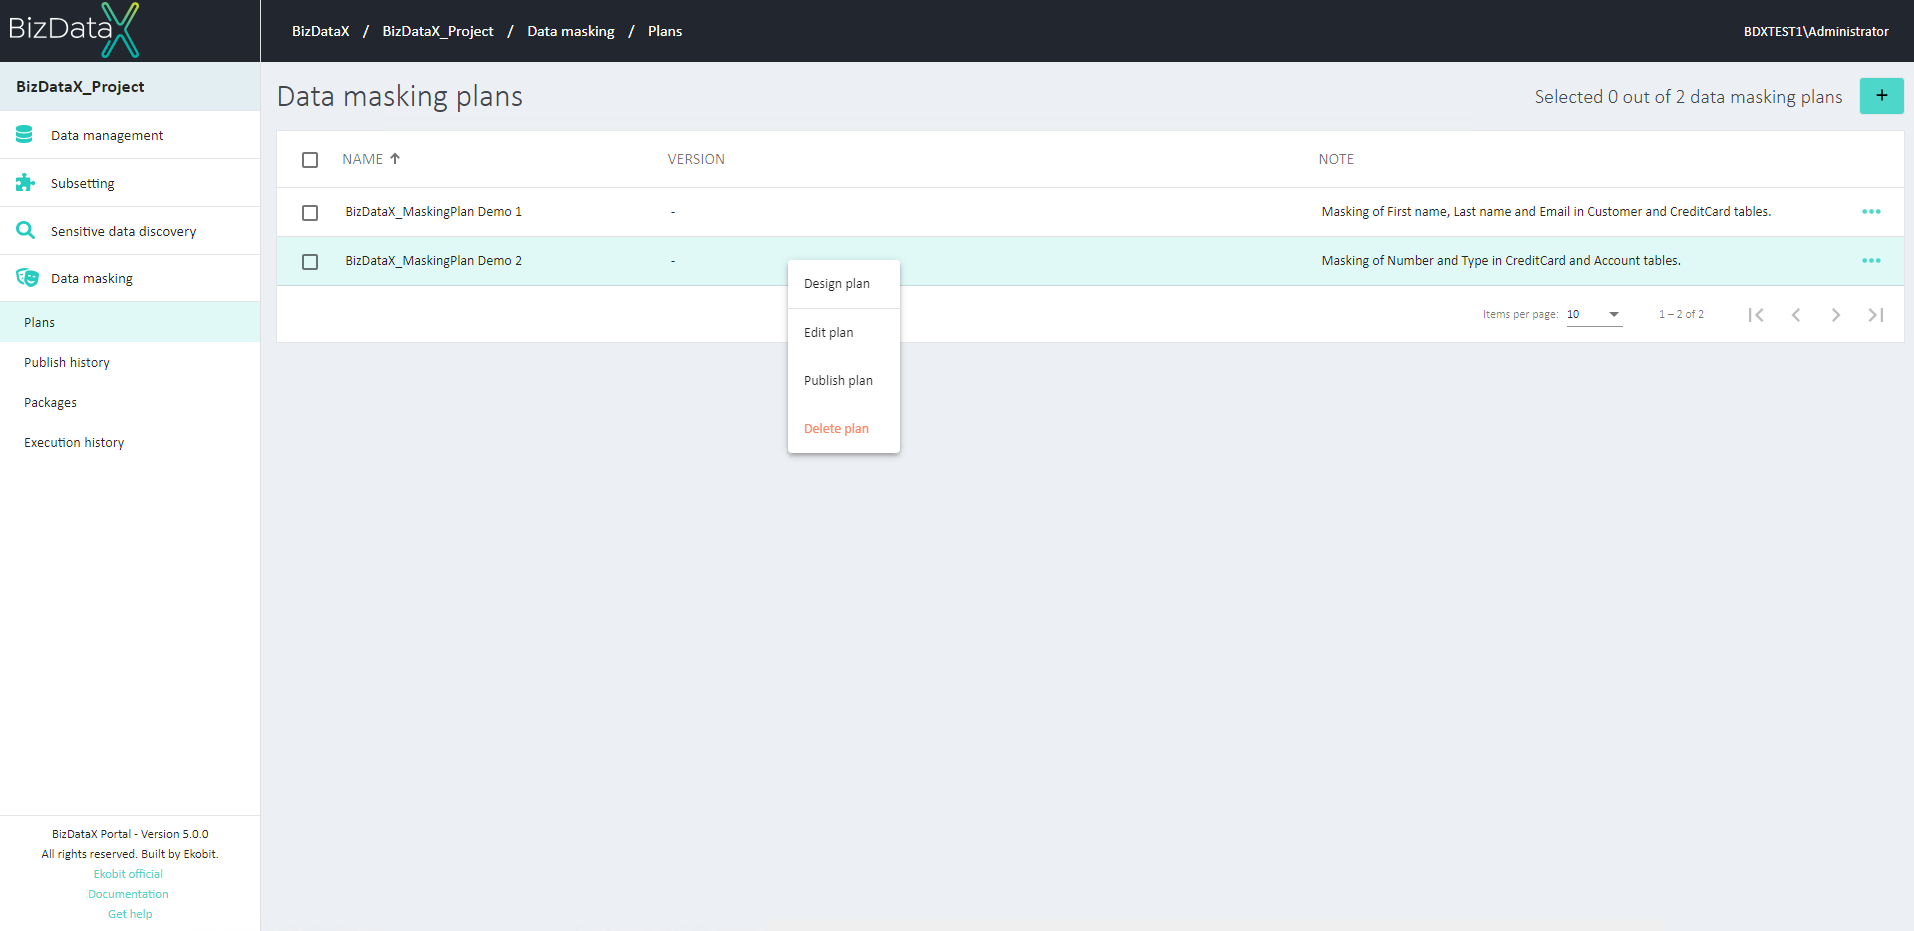 Figure 1: Plans overview list
If there are no registered Plans, the Plans overview list will be empty. When the list of registered Plans is displayed the user can select one Plan to do next actions:
Create data masking plan
To start designing a data masking plan, the first Plan needs to be Created. By choosing to Create data masking plan button it will open a new screen that allows you to enter the information about the new plan.
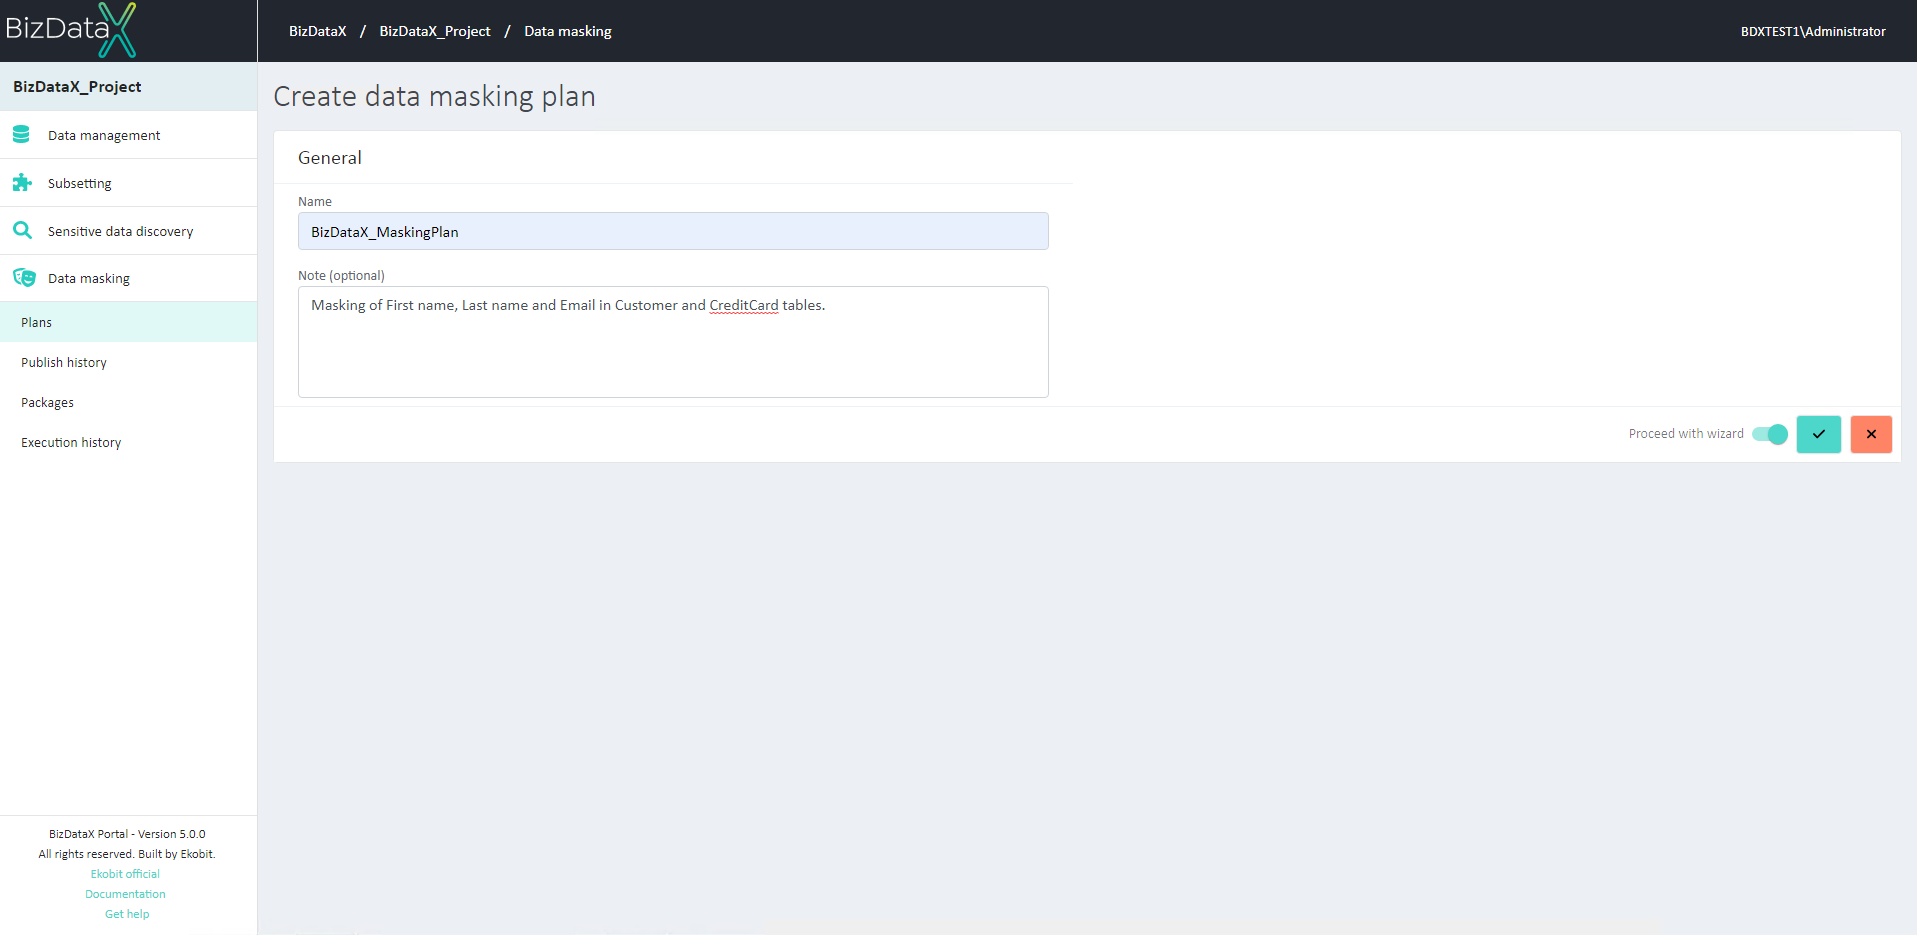 Figure 2: Create data masking plan
When creating a new plan, the following information can be entered:
General options
- Name - Unique name of the plan (mandatory)
- Note - Description of the project (optional). It is advisable to enter a description as well to differentiate the plans from each other and provide further information about the plan.
Once the information about the new Masking Plan is entered, there is a possibility to:
- Proceed with Wizard – if 'Proceed with wizard' toggle button is set to on, confirming the process of creating plan will redirect to the first step of the Wizard.
- Proceed without Wizard – if 'Proceed with wizard' toggle button is set to off, confirming the process of creating plan will create an empty plan and redirect to the 'Overview' page of Data Masking Plan where user can Design Masking Plan manually.
Selecting Confirm button confirms creating the plan. The system will redirect to appropriate page, based on the state of the 'Proceed with wizard' toggle.
To cancel the process of creating a new plan, click on the Cancel button. The system will be redirected to the 'Data masking plans' overview page.
Design plan
Design plan - Designing a Masking plan represents a process of configuring specific data masking defined inside one Masking plan. The process is defined through Steps with Jobs that define masking activities. The goal of this process is to publish a Masking Plan, which creates a Package that can then be executed. By choosing the option Design plan system will be redirected to the new Navigation level, where the user can design the plan.
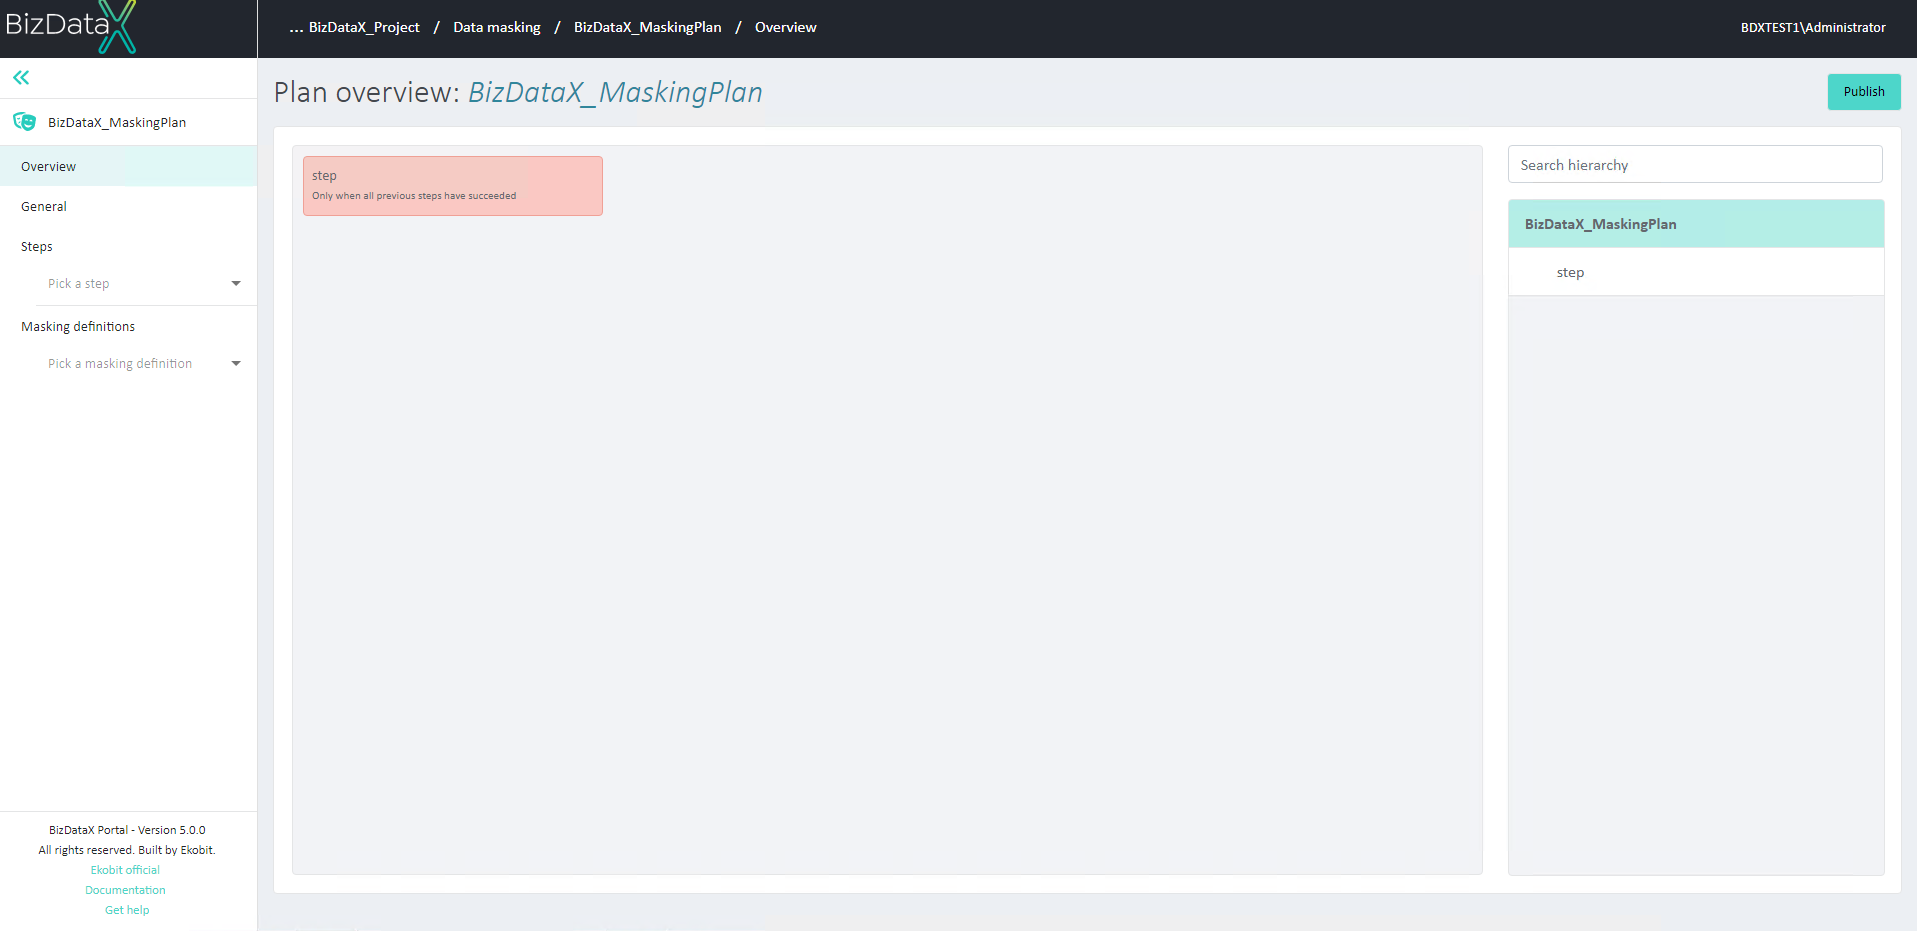 Figure 3: Design plan
Edit plan
Once the plan is created, the general information can still be edited. Choose on table menu option Edit plan and the Edit plan screen will open. In the Edit context all fields are editable.
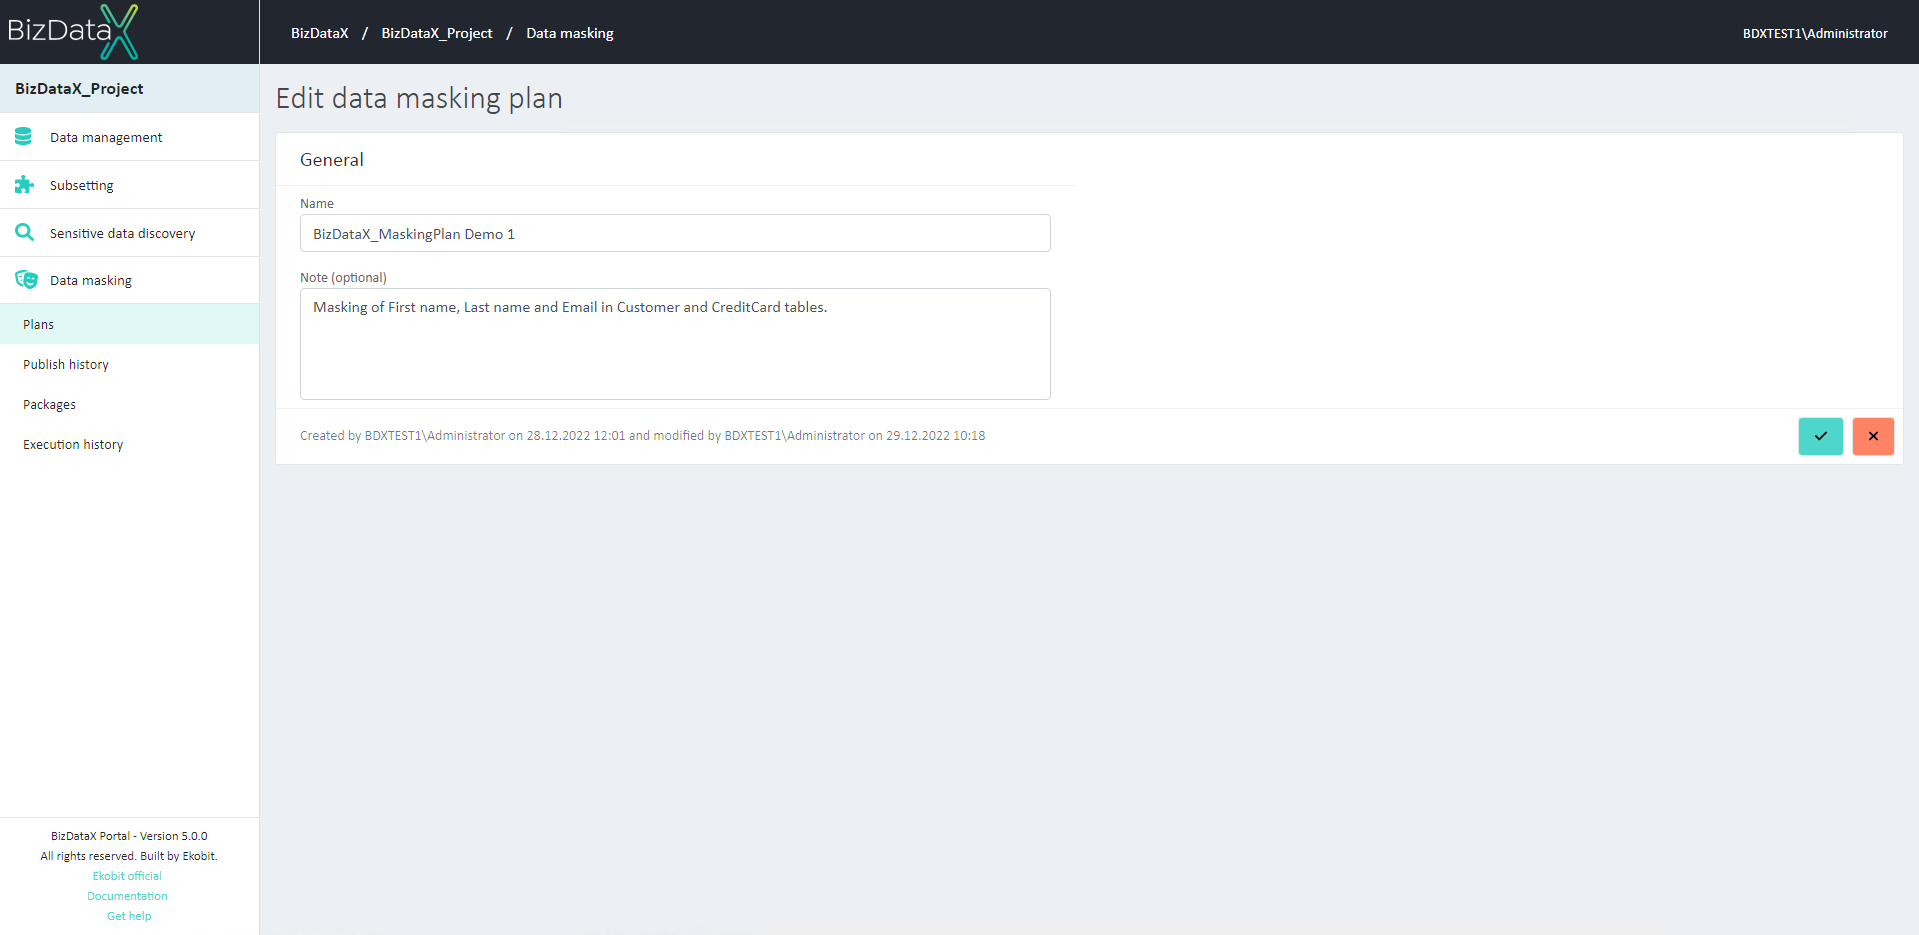 Figure 4: Edit plan
The Edit plan screen can be also opened from the View plan details screen by choosing the Edit plan button.
Publish plan
When the plan is ready, it can be published by choosing Publish plan from the table menu options. A pop-up window with Publish version will show up and it needs to be confirmed.
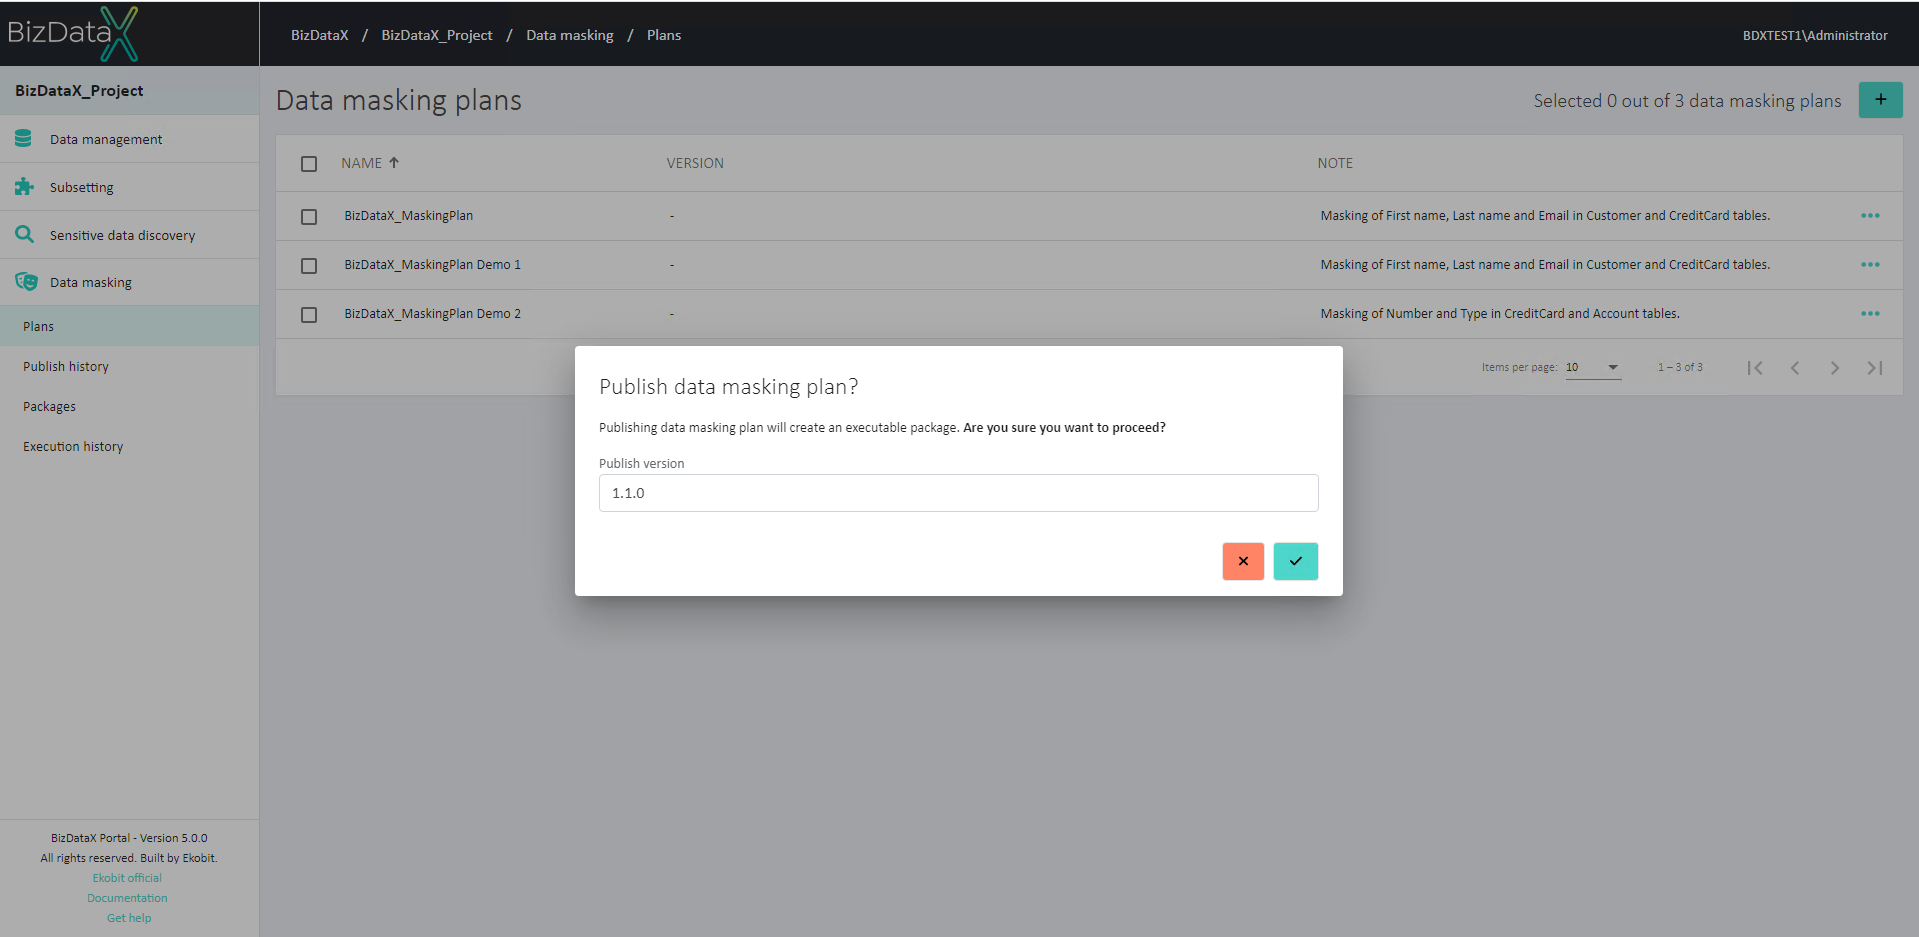 Figure 5: Publish plan
Once it is confirmed, it will be redirected to Publish History Details page. If it has error it will stay on same page. If 'Publish plan' has been successfully completed it will be redirected to 'View package details' page from where package execution can be started.
Delete plan
Once the Delete plan button is pressed, the Delete plan confirmation dialog pops up asking the user to confirm if he really wants to delete the plan. After confirming with the Confirm button, the plan is permanently deleted.
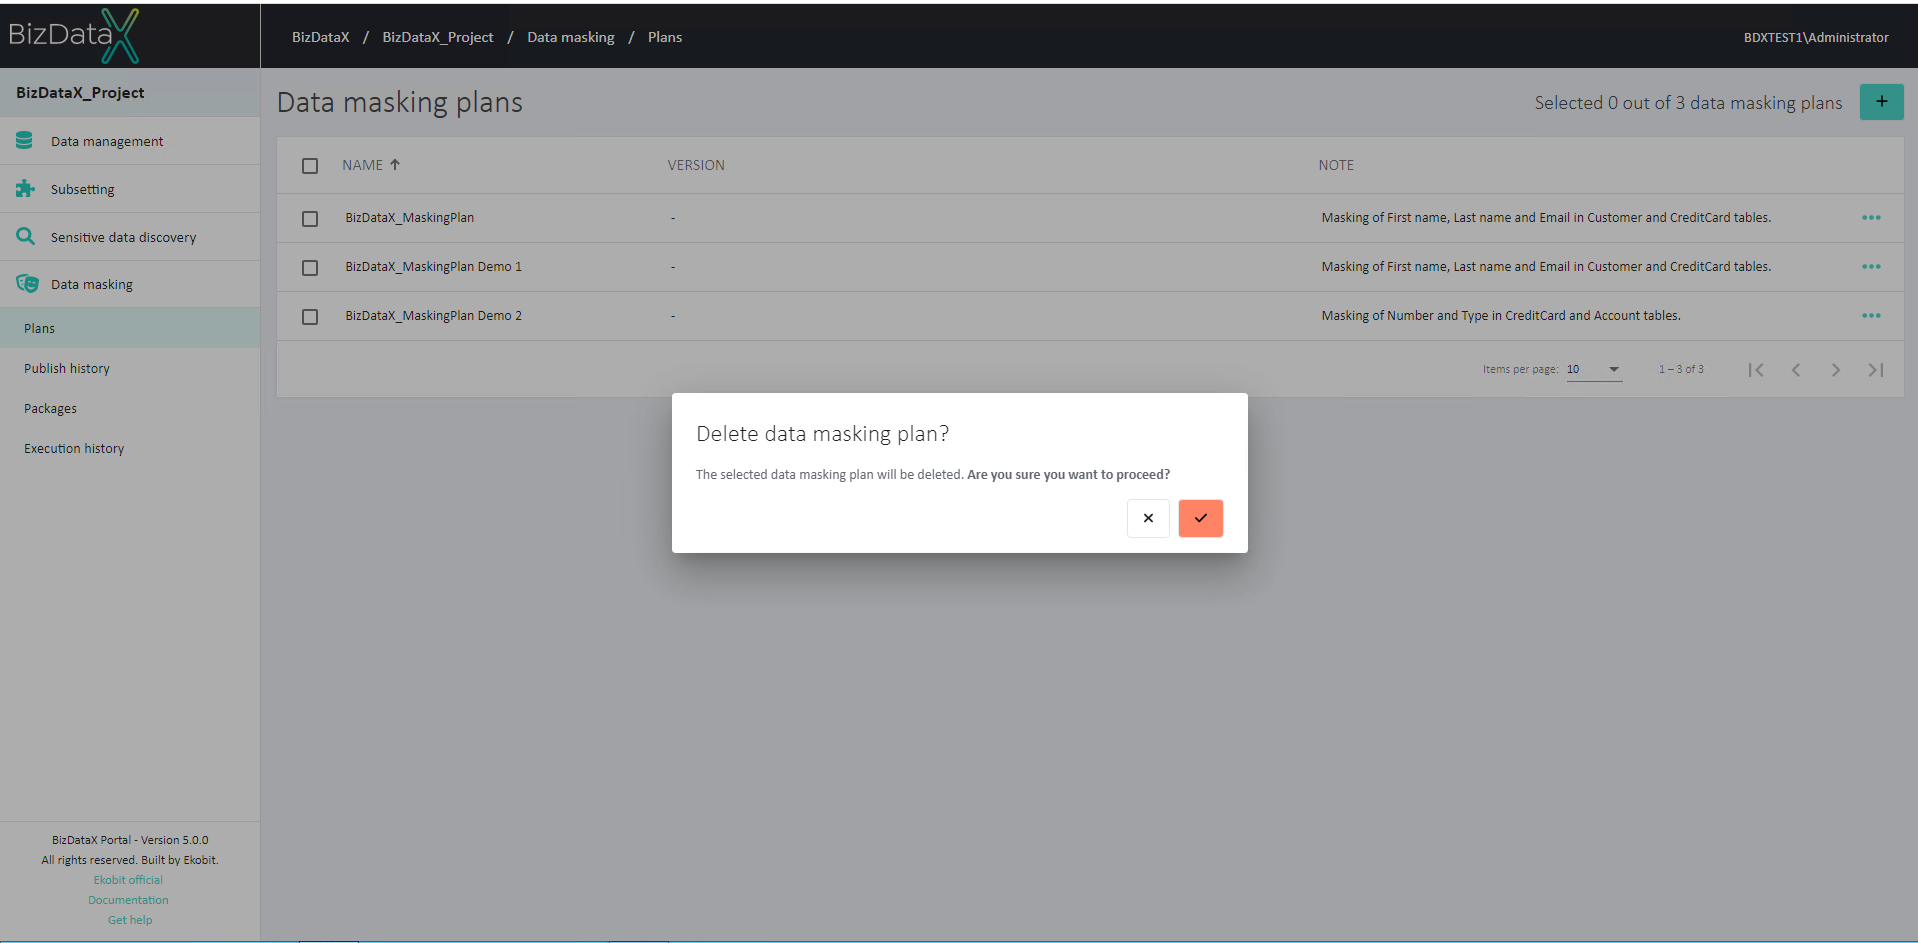 Figure 5: Delete plan
Use checkboxes to delete more than one Plan at once.
BizDataX Documentation © Built by Ekobit. All rights reserved.
https://www.ekobit.com/ https://bizdatax.com/ https://bizdatax.com/support/