Blocks
Details of highlighted Block are shown on this page. In the details section, Name, Note and Run condition can be seen.
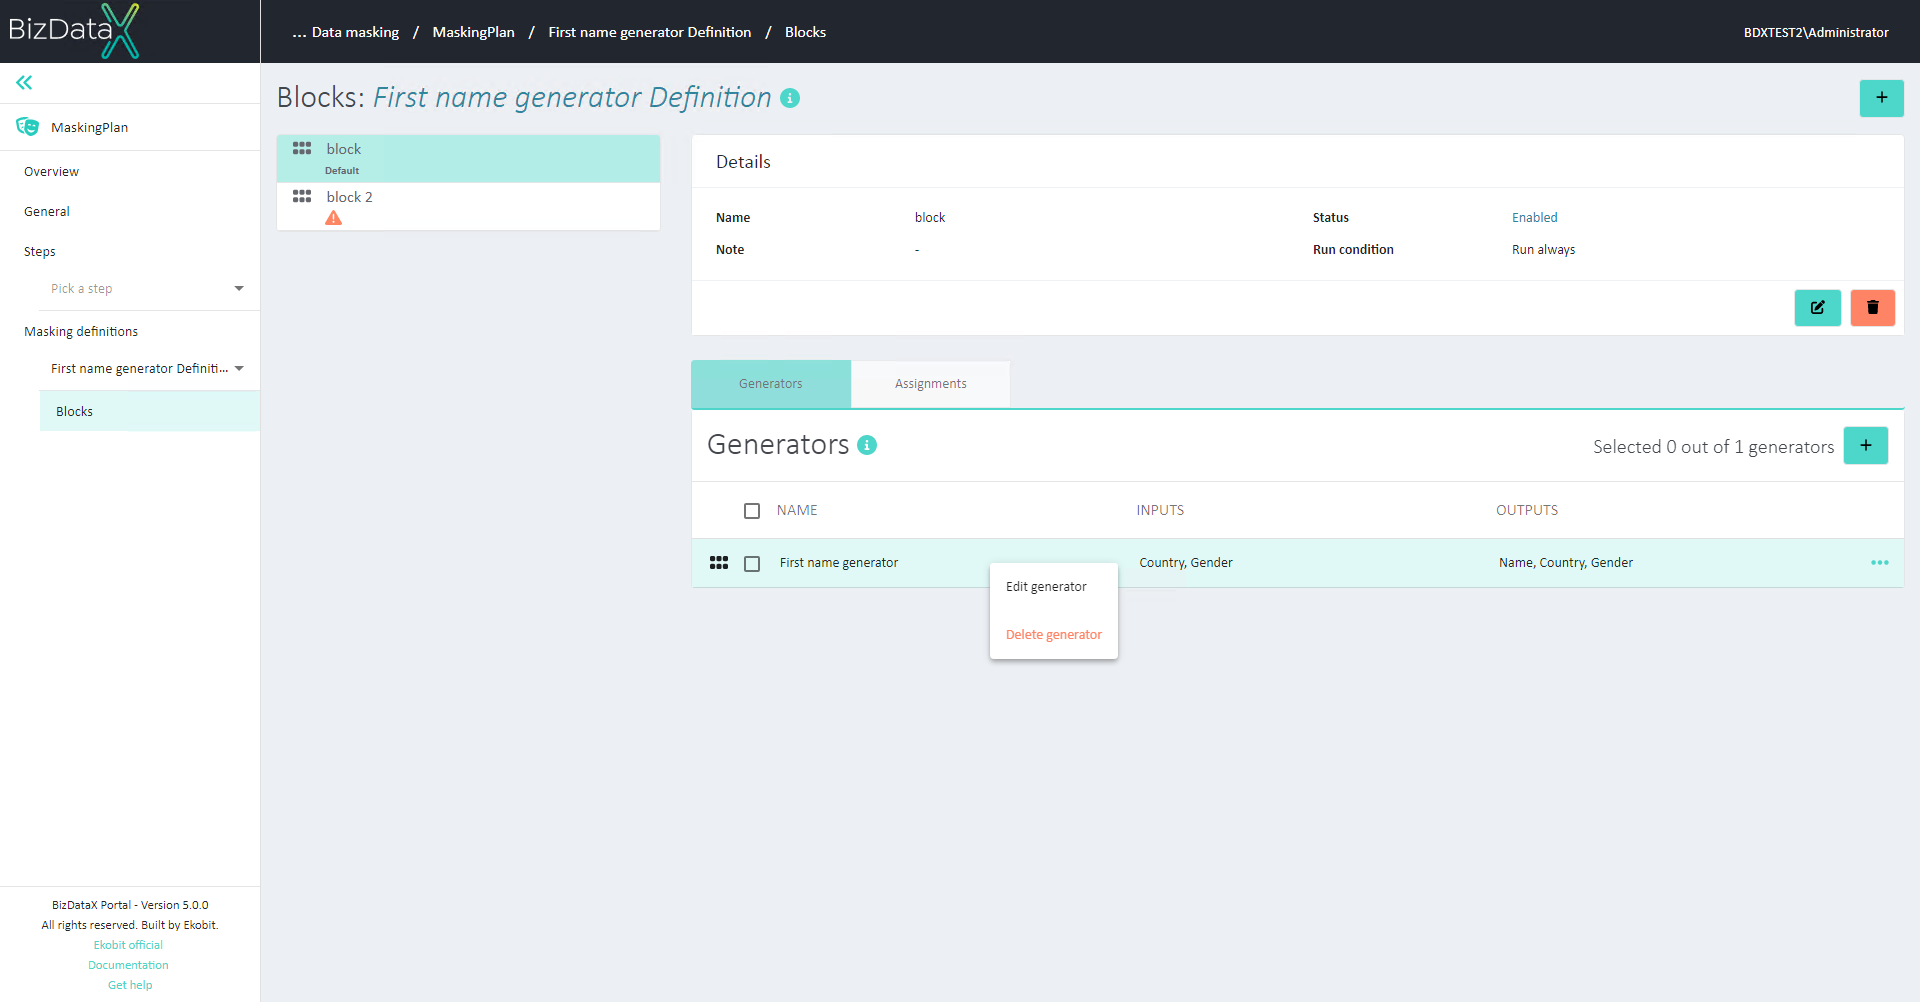 Figure 1: View Block details
To see the Block definition go to the previous page.
| Table of contents |
|---|
| Block list and details |
| Create Block |
| Edit Block |
| Delete Block |
| Generators |
| Register generator |
| Edit generator |
| Delete generators |
| Assignments |
| Design Assignments |
Block list and details
A list of all blocks that have been created, together with their names, may be seen on the left side of this page (Figure 1: View Block details). Block can be set as Default. If Block is Default label ‘Default’ will be shown on the Block list.
The order of Block components in the overview list can be changed by the drag & drop method. To drag a component, hold the left mouse button on the component row and drag it to the desired order. If the order of components is changed in the list on the components overview list, their order is also changed in the database and execution list.
For each block, their Details are shown in the ‘Details’ section after selecting Block from the list. It contains information:
Name - Unique Block name
Note - Note with a description of the selected Block
Run condition - Condition that needs to be set for the block to execute. Possible Block run condition options are:
- Run always - First enabled block in order with a run condition that evaluates to true will be executed.
- Custom condition - By choosing "Custom condition" user can specify more complex conditions and expressions. Use C# code to specify the expression.
If no block run condition is evaluated to true, the default block will be executed (Run if no other blocks qualify). The default block run condition is ‘Run always’ and its custom condition is automatically set to ‘true’.
Status - Possible statuses:
- Enabled - Enabled Blocks will be executed if their run condition is evaluated to be true.
- Disabled - Disabled block will never be executed. If Block is Disabled, the label ‘Disabled’ will be shown on the Block list. All Blocks can’t be set to the status ‘Disabled’, at least one Block must always be ‘Enabled’.
Create Block
Block can be created from the Masking definition page and also from this, View block details, page.
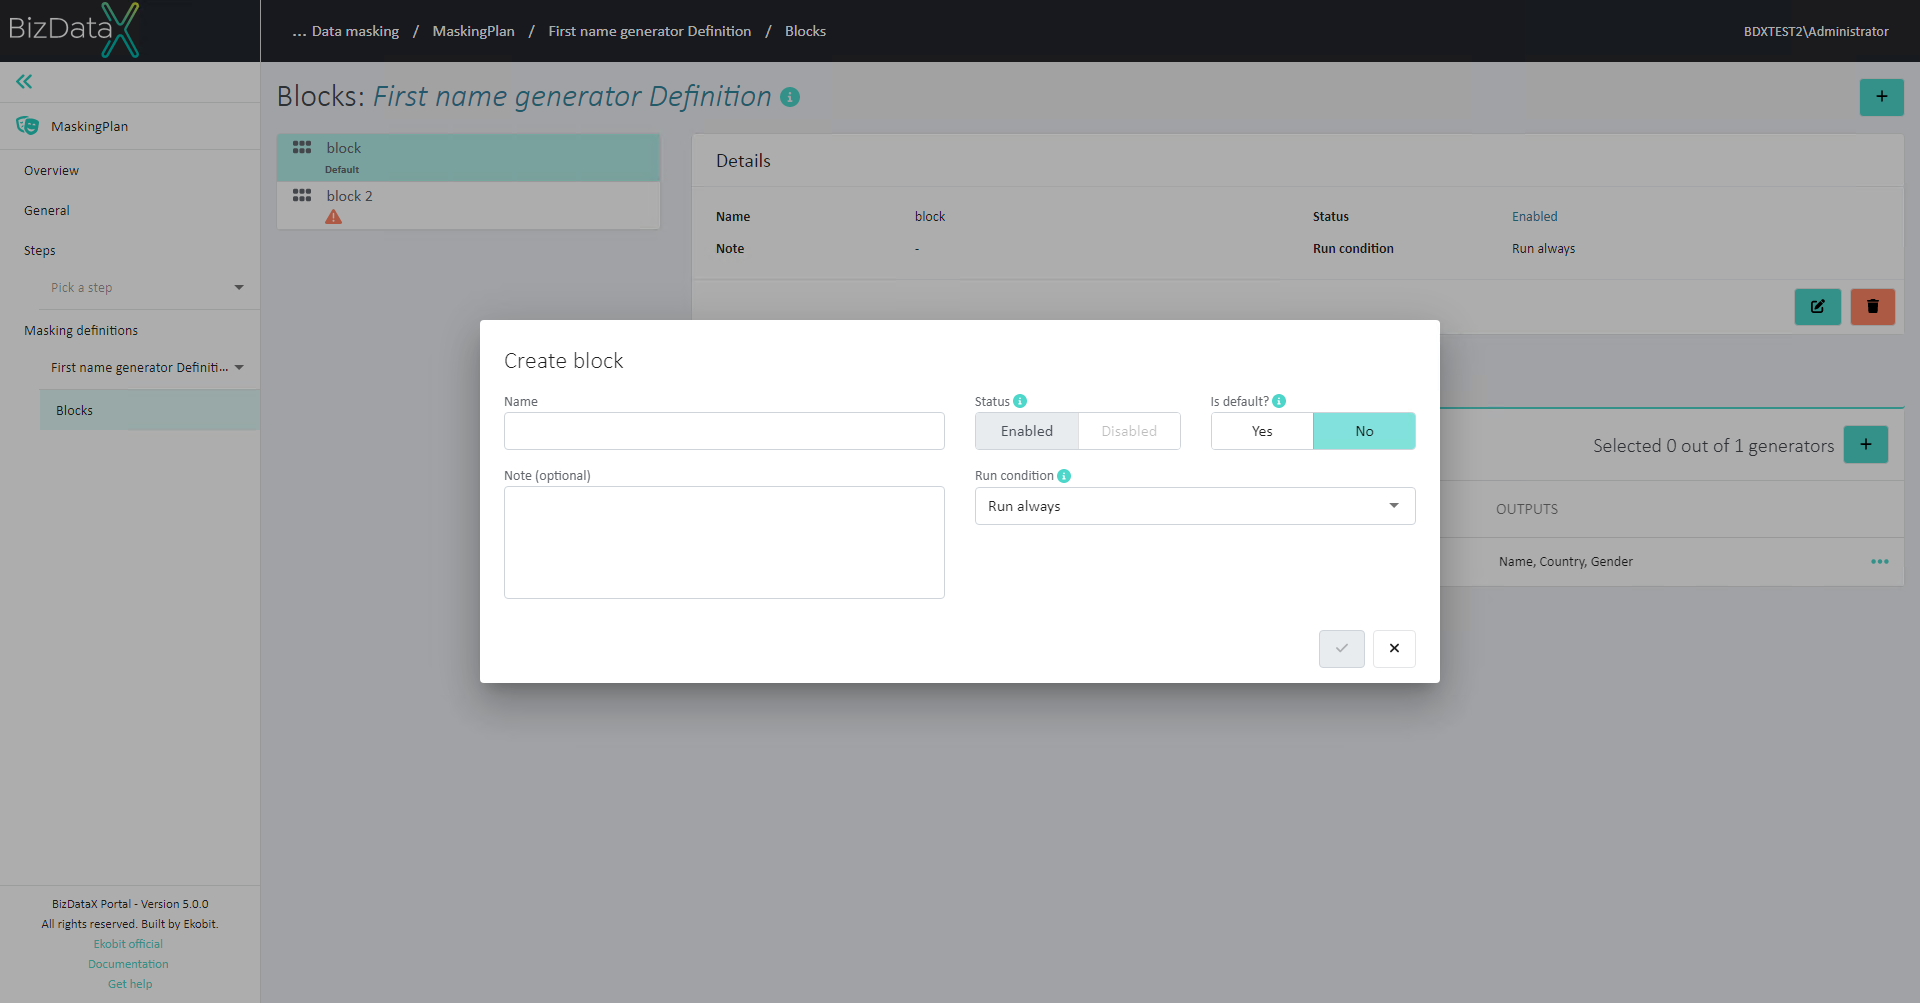 Figure 2: Create Block
Details for creating a new Block are described in the Masking definition - Create Block chapter.
Edit Block
All created Blocks can be edited. Details for editing Block are described in the Masking definition - Edit Block chapter.
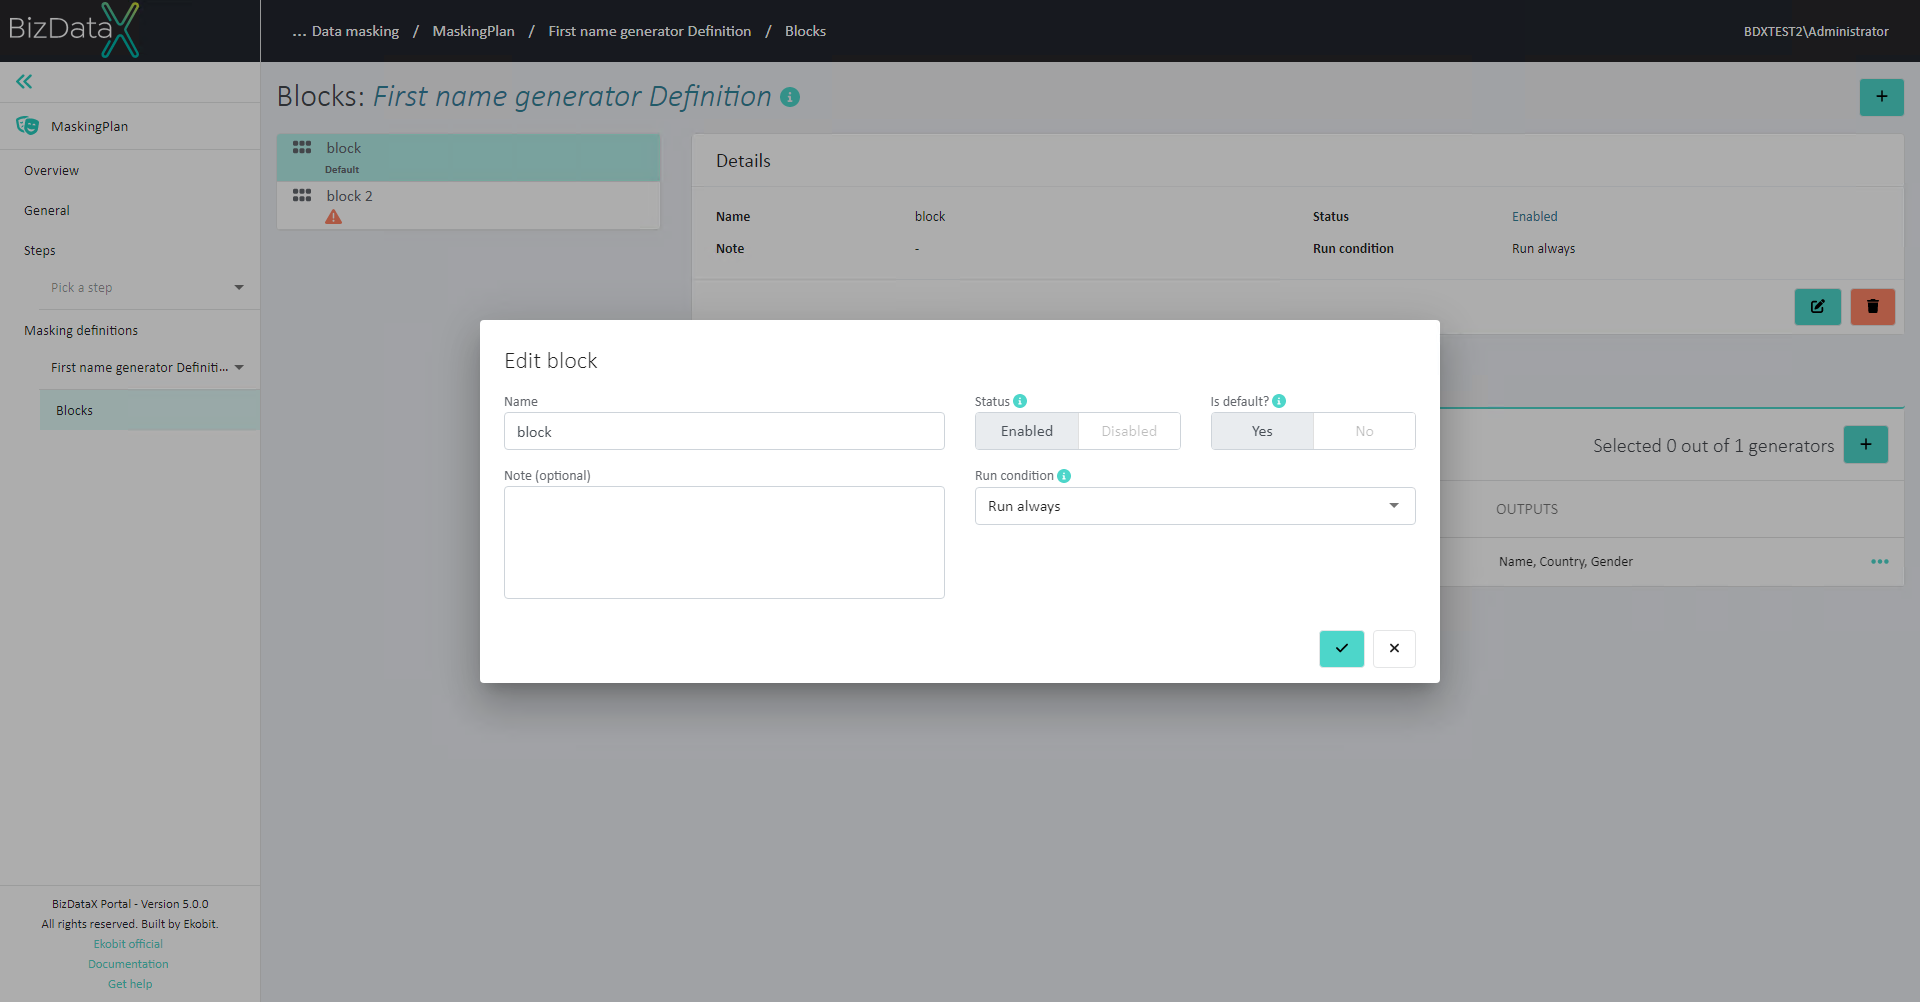 Figure 3: Edit Block
Delete Block
If Block is not needed, it can be deleted. A confirmation message appears before deleting.
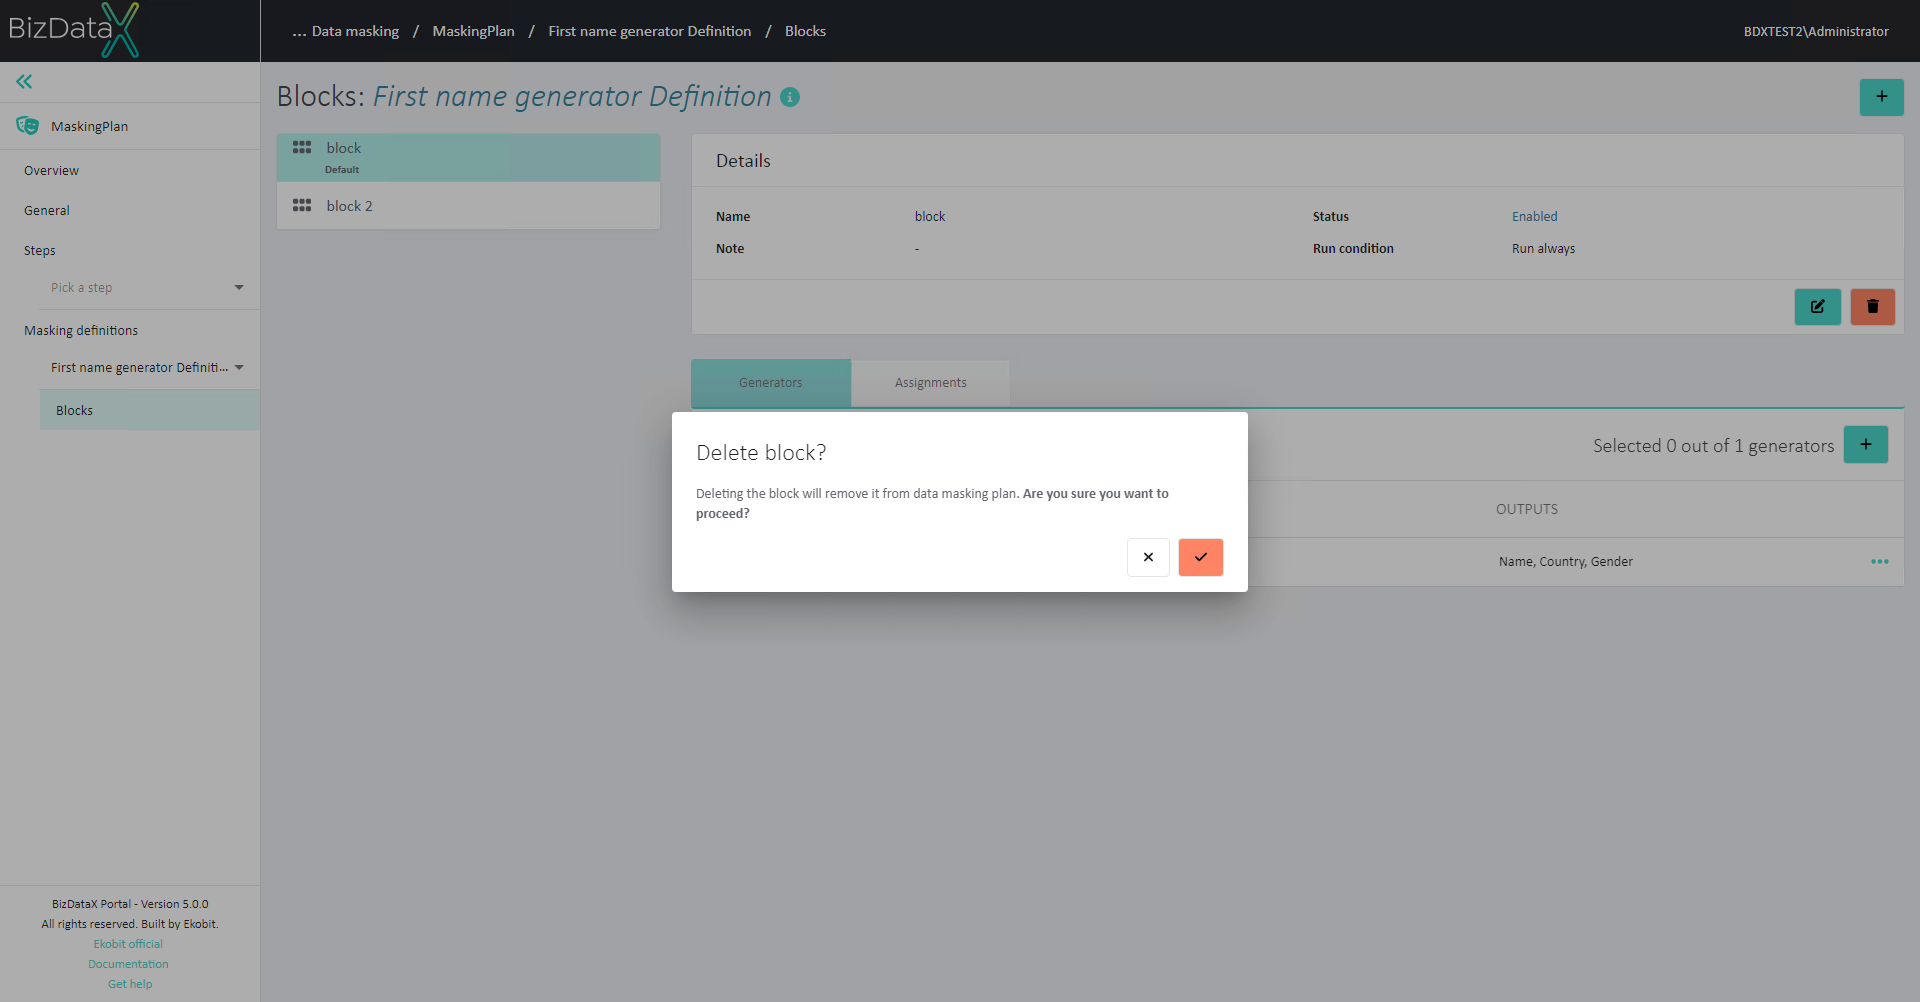 Figure 4: Delete Block
Generators
Each Block can be defined by one or multiple Generators (Figure 1.). A generator is a tool for generating data of various content and type. They have predefined inputs and outputs. A list of existing Generators can be found here.
On the Generators Overview List, basic information about the Generators of selected Block can be seen:
- Name - Unique Generator name
- Inputs - When registering/editing the generator, input fields are defined by inputs of the Masking definition/Add-on generator chosen in the 'Masking definition/Generator:' field.
- Outputs - When registering/editing the generator, outputs are defined by outputs of the Masking definition/Add-on generator chosen in the 'Masking definition/Generator:' field.
In the table menu, there are options to:
The order of Generators in the overview list can be changed by the drag & drop method. To drag a component, hold the left mouse button on the component row and drag it to the desired order. If the order of components is changed in the list on the components overview list, their order is also changed in the database and execution list.
Register generator
A new generator can be registered by selecting the ‘Register generator’ button in the upper right corner of the section. It opens a pop-up window (Figure 5) for registering a new generator.
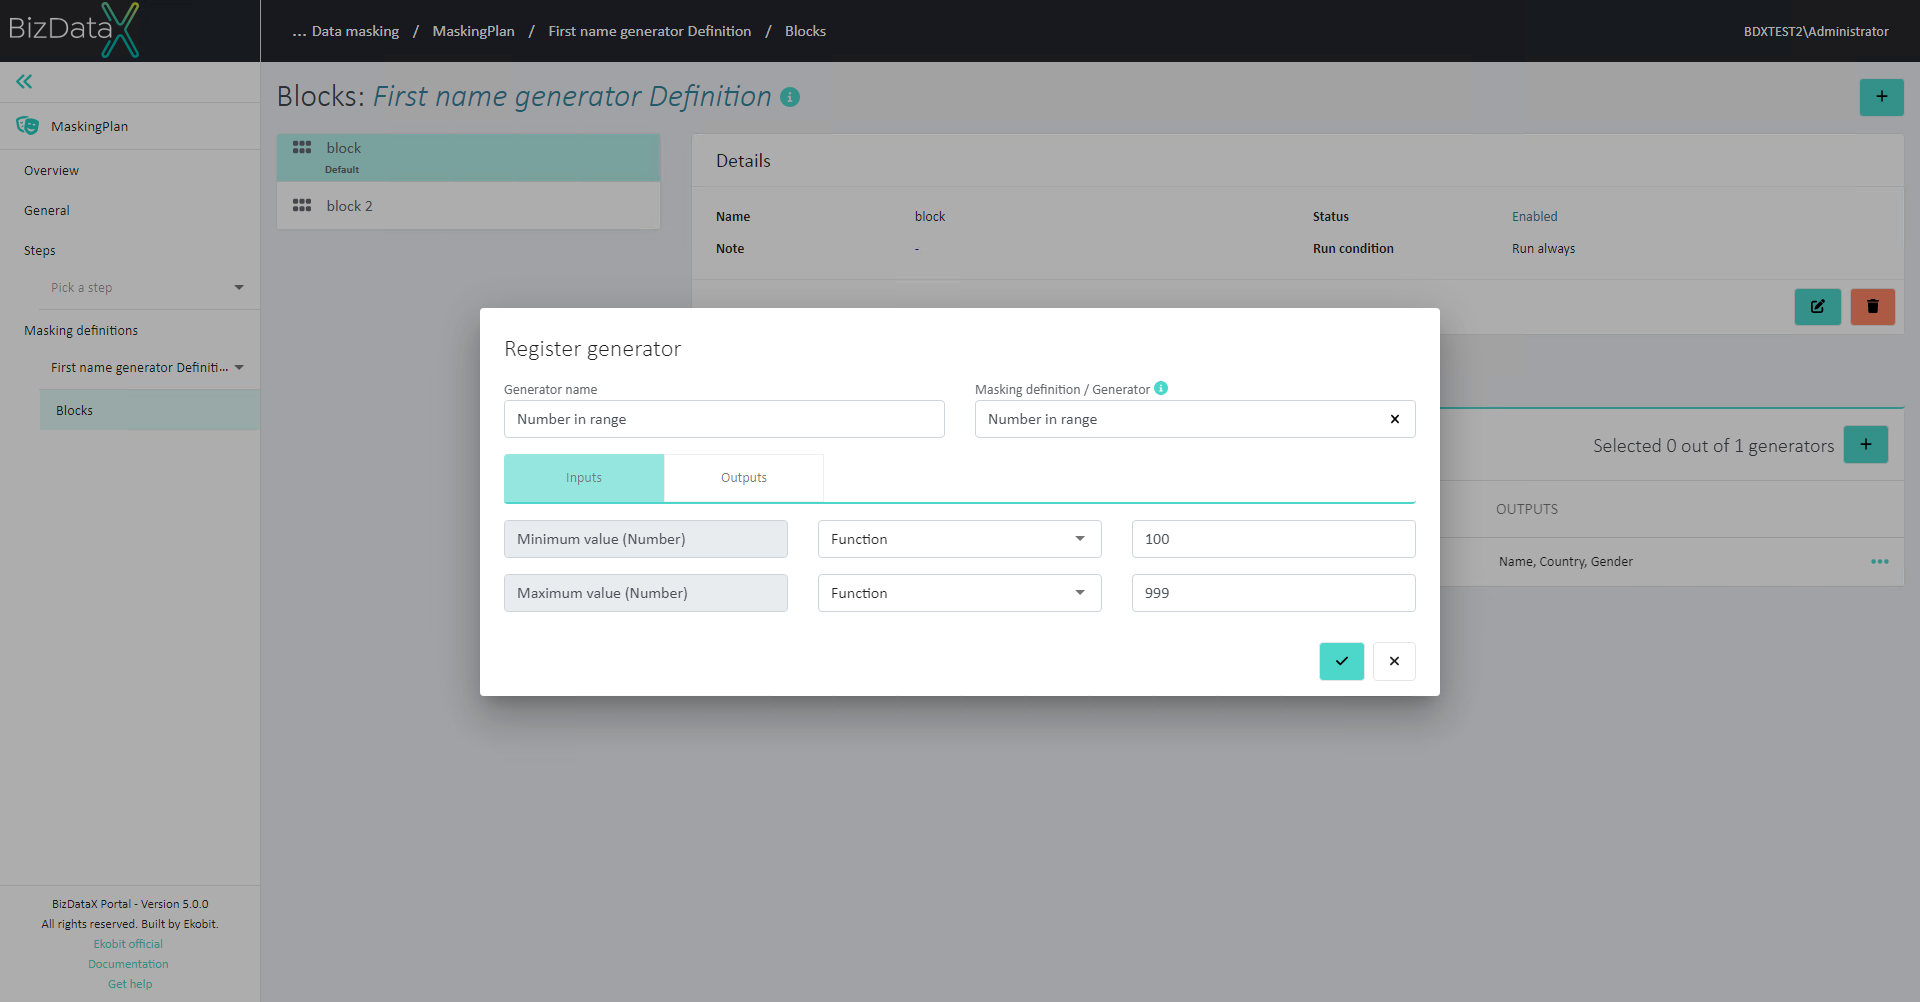 Figure 5: Register generator
To register a ‘Generator’, first populate mandatory fields: Generator name and choose Masking Definition or Add-on generator from the drop-down list:
- Generator name - Unique Generator name
- Masking Definition / Generator - The masking definition defines what type of masking will be used in the Masking task. The Add-on generator defines the generator that will be used to generate data.
When 'Masking Definition / Generator' is chosen from the drop-down list, Inputs and Outputs tabs will be open to entry fields that refine the process of the registered generator.
INPUTS:
- Original value - Displays the original value of the Masking Definition / Add-on generator that was chosen
- Input Category - User first chooses the Input category. Possible options are:
- Ignore input
- Masking definition inputs
- Generator outputs
- Constants
- Custom
- Input Value - Depends on chosen Input Category:
- Ignore input - no need for the Input value
- Masking definition inputs - dropdown with all inputs of the current Masking definition
- Generator outputs - dropdown with outputs of already created Generators inside the same Block.
- Constants category options are:
- Null
- Empty string
- Custom - displays an empty input field
Once all information about the new Generator is entered, with the Confirm button Generator will be registered. To cancel the process of registering a new Generator, select the Cancel button.
Edit generator
Once Generator is created it can still be edited. Choose on table menu option Edit generator and the Edit generator screen will open. All fields are editable.
 Figure 6: Edit generator
Delete generators
Once the Delete generator option is pressed, the Delete generator confirmation dialog pops up asking the user to confirm if he wants to delete the generator. After confirming with the Confirm button, the generator is permanently deleted.
 Figure 7: Delete generator
Assignments
Design assignments for Block is an action of linking generated data (Generator output, constant or custom) with the output of chosen Masking definition. Chosen masking value (masked data) then can be used in the masking process through Masking tasks.
Assignments are displayed by selecting the ‘Assignments’ tab.
In 'Figure 8.', Assignments of the selected Block are only displayed as read-only data in a form of a table. It contains information:
- Masking definition output - Automatically filled with ‘Masking Definition’ data
- Masking category - Masking value - Automatically filled with chosen masking category and Masking value in Design assignments
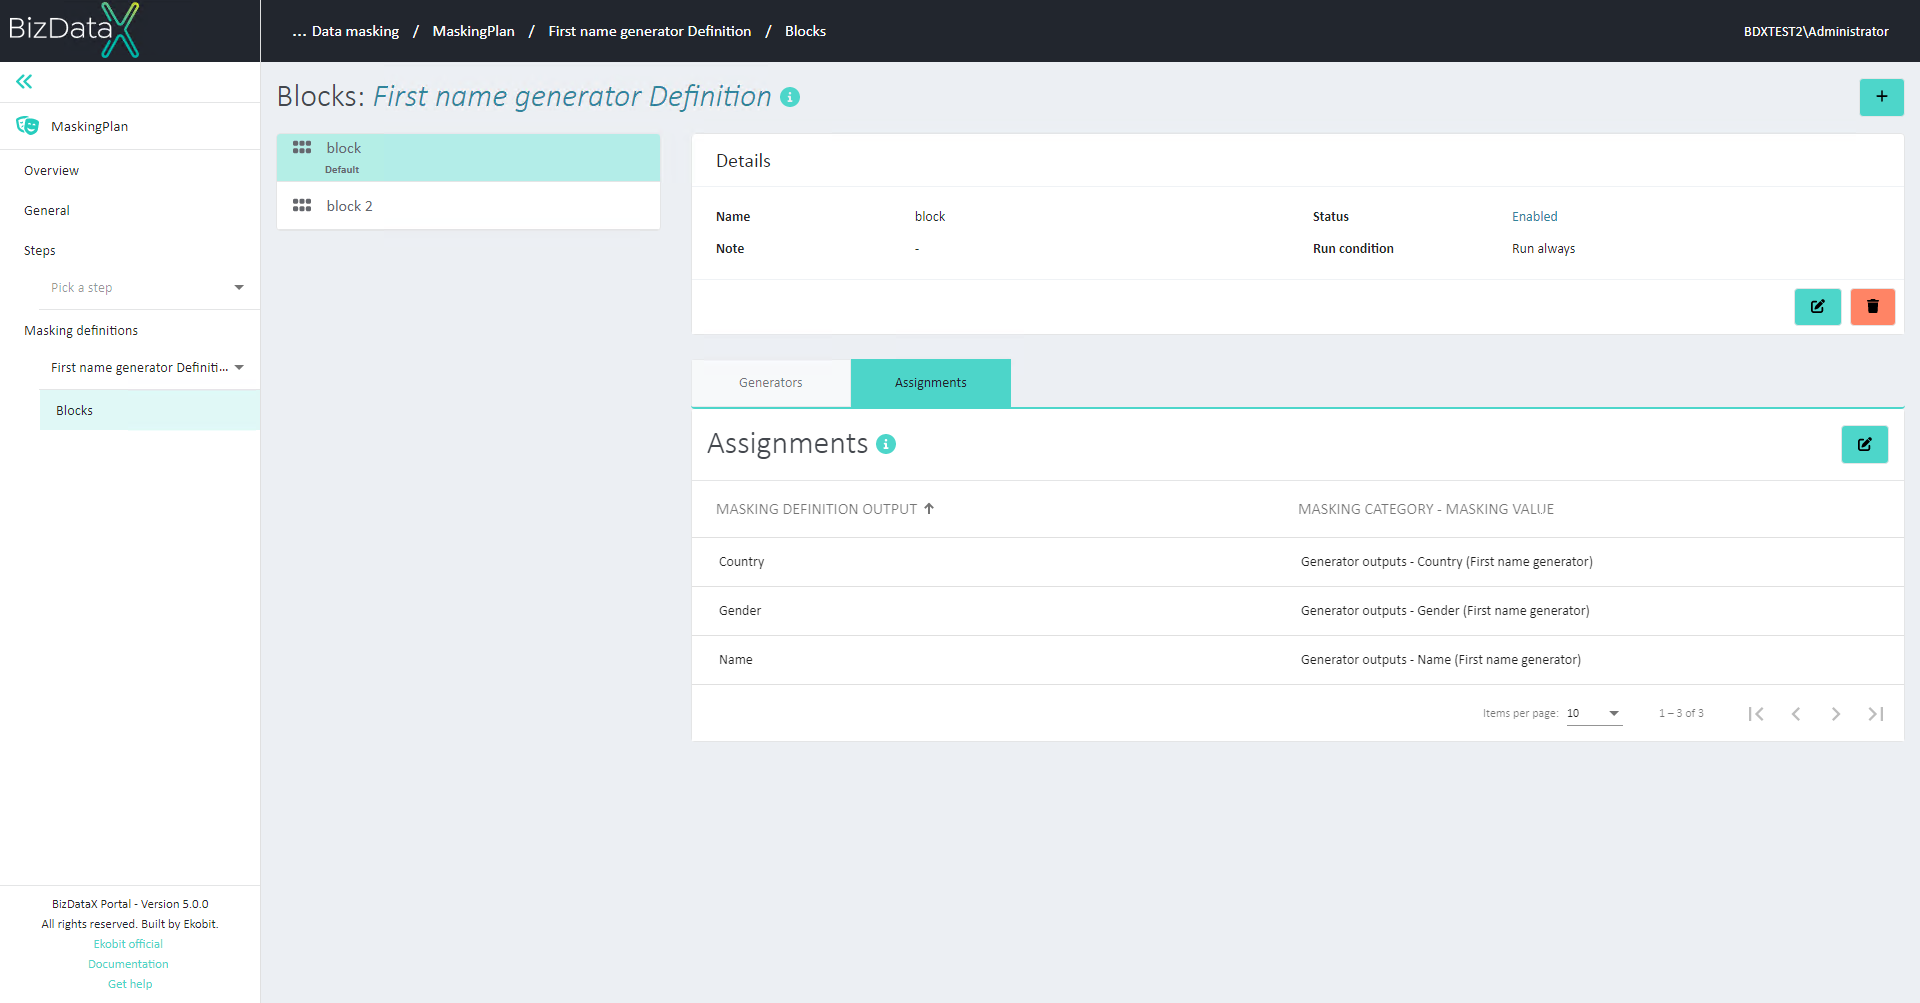 Figure 8: Assignments
Design Assignments
Assignments can be designed by selecting the ‘Design assignments’ button in the right corner of the ‘Assignments’ section. This page contains a list of outputs of the Masking definition and a corresponding number of fields for assigning values to them.
Masking definition outputs can:
- Be populated with values generated by Generator
- Be populated with Constants
- Be populated with custom input.
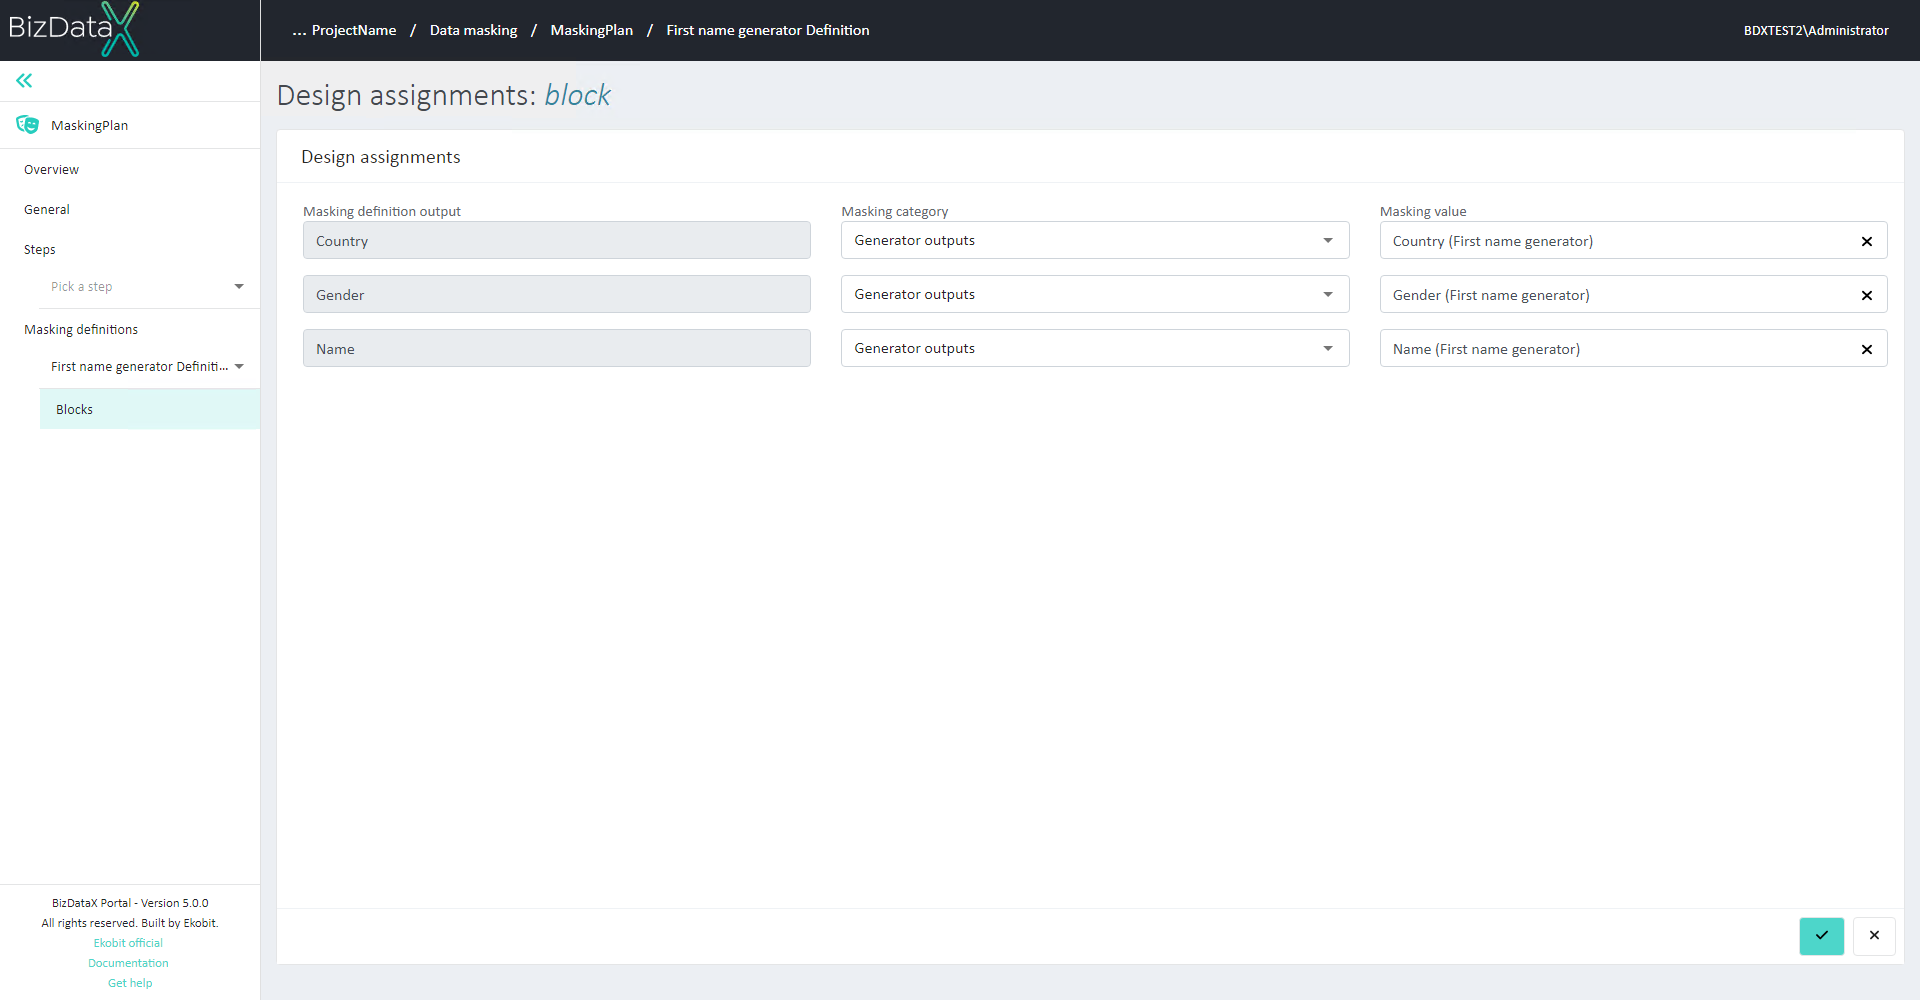 Figure 9: Design Assignments
- Masking definition output - List of outputs of the Masking definition. Data is displayed in read-only format.
- Masking category - the user assigns a value for each output of the Masking definition. User first chooses the Masking category. Possible options are:
- Generator outputs – if there are no registered generators inside the Block, this category is not displayed
- Constants (selected by default)
- Custom
- Masking value - The user chooses the output they want to assign to the output of the Masking definition. Options are:
- For Generator outputs category: outputs of all generators of the Block
- For Constants category: empty (selected by default) and null
- For Custom category: empty input field.