- BizDataX
- Start guide
- Creating a data model (BizDataX Portal)
- Finding sensitive data
- Producing a specification
- Creating a new Visual Studio BizDataX project
- Creating a data model (BizDataX Designer)
- Creating a simple masking flow
- Publishing package to BizDataX Portal
- Executing package
- BizDataX Portal
- Installation guide
- User manual
- BizDataX Designer
- Installation guide
- Workflow
- Creating a new Visual Studio BizDataX project
- User interface elements
- Creating a data model
- Toolbox items
- Masking activities
- BizDataX Masking Control Flow
- BizDataX Country CH
- Generate AHV (Sozialversicherungsnummer)
- Generate CH IBAN
- Pick CH address from list
- Pick CH bank from list
- Pick CH company from list
- Pick CH first name from list
- Pick CH last name from list
- Pick CH place from list
- Pick CH street from list
- BizDataX Country DE
- Generate DE IBAN
- Pick DE address from list
- Pick DE bank from list
- Pick DE company from list
- Pick DE first name from list
- Pick DE last name from list
- Pick DE place from list
- Pick DE street from list
- BizDataX Country HR
- Generate HR bank account
- Generate HR BBAN
- Generate HR IBAN
- Generate JMBG
- Generate maticni broj
- Generate OIB
- Generate porezni broj
- Pick HR address from list
- Pick HR bank from list
- Pick HR company from list
- Pick HR first name from list
- Pick HR last name from list
- Pick HR place from list
- Pick HR street from list
- BizDataX Country US
- Generate US SSN
- Pick US address from list
- Pick US company from list
- Pick US first name from list
- Pick US last name from list
- Pick US place from list
- Pick US street from list
- BizDataX Data Processing
- BizDataX Database
- BizDataX Generators
- Generate and convert
- Generate and convert to number
- Generate and convert to text
- Generate business name
- Generate credit card number
- Generate date
- Generate date in range
- Generate fixed digit number
- Generate IBAN
- Generate items
- Generate items in random order
- Generate number in range
- Generate number sequence
- Generate numbered string
- Generate PAN
- Generate phone number
- Generate text
- Generate value
- BizDataX Monitoring
- BizDataX Pick Data From List
- Pick address from list
- Pick bank from list
- Pick company from list
- Pick first name from list
- Pick last name from list
- Pick place from list
- Pick street from list
- Pick value from list
- BizDataX Primitives
- API masking
- Assign date
- Assign number
- Assign text
- Assign value
- Clear value
- Evaluate date function
- Evaluate function
- Evaluate numeric function
- Evaluate text function
- Format properties
- BizDataX Repeating
- Assign repeating value
- Clear repeater
- Load repeaters
- Load single repeater
- Repeating of any value condition branch
- Repeating of boolean condition branch
- Repeating of date condition branch
- Repeating of number condition branch
- Repeating of text condition branch
- Save repeaters
- Save single repeater
- Set any repeating value
- Set boolean repeating value
- Set date repeating value
- Set number repeating value
- Set text repeating value
- Fluent Handler API
- Package steps
- Package parameters
- Publishing package to BizDataX Portal
- Package execution
- Masking-examples
- Logging
- Functions
- Custom code
- Picklists
- Addresses
- Banks
- Business suffixes
- Companies
- Domain names
- First names
- Last names
- Phone codes
- Places
- Streets
- Data generators
- Lambda expressions
- Synthetic data generation
- Repeaters
- Restartability
- File masking
- Advanced
- Supported data sets
- Oracle
- Oracle database analyzer
- Oracle database handler
- Repeaters persistence
- Restartability store configuration
- MSSQL
- MSSQL database analyzer
- MSSQL database handler
- Repeaters persistence
- Restartability store configuration
- DB2
- Informix
- Sybase
- Release notes
Creating custom activity items
This walkthrough explains how to create a custom masking activity in your BizDataX project.
If you have a big and complex main workflow, custom activities allow you to break down your workflow into small segments (activities) or to reuse the same activity multiple times in your workflows. Your main workflow will be easier to understand and manage.
| Table of contents |
|---|
| Preconditions |
| Creating custom activities |
| Using custom activities |
Preconditions
- BizDataX Package (Visual Studio project) is created
- Portal data import is done (MSSQL database BizDataXDemo)
Creating custom activities
Select your project in the Solution Explorer. Right-click Add -> New item -> BizDataX group -> BizDataX Masking Activity. Enter a name for the new custom masking activity.
The Type selection dialog, as shown on Figure 1, appears. Select the table you want to create a custom masking activity for and click OK.

Figure 1: Type Selection dialog
- This generates a new XAML file with a masking iterator for the table you selected in the last step. The generated file should look similar to the one shown on Figure 2. Now you can add masking activities to generated the Masking block. Build the solution to register changes.
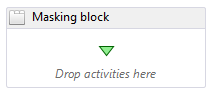
Figure 2: New custom masking activity
Using custom activities
- Open your main workflow file (Package.xaml). You should see the new custom activity in a new group with the name of the project, as shown on Figure 3.

Figure 3: Custom activity in a new group
- Add a table masking activity of the same type as your new custom activity to the workflow. Add your new custom activity inside the table masking activity. The workflow should now look similar to the one shown on Figure 4.

Figure 4: Main workflow
The entire masking logic is implemented in the custom activity and is used inside the handler of the table.
BizDataX Documentation © Built by Ekobit. All rights reserved.
https://www.ekobit.com/ https://bizdatax.com/ https://bizdatax.com/support/