User interface elements
User interface is based on the Windows Workflow Foundation Workflow Designer with the Toolbox - Design surface - Properties UI concept well-known to users of Visual Studio.
| Table of contents |
|---|
| Toolbox |
| Design surface |
| Properties |
By default, the Toolbox is located to the left (1), the Design surface in the middle (2) and Properties (3) to the right (Figure 1).
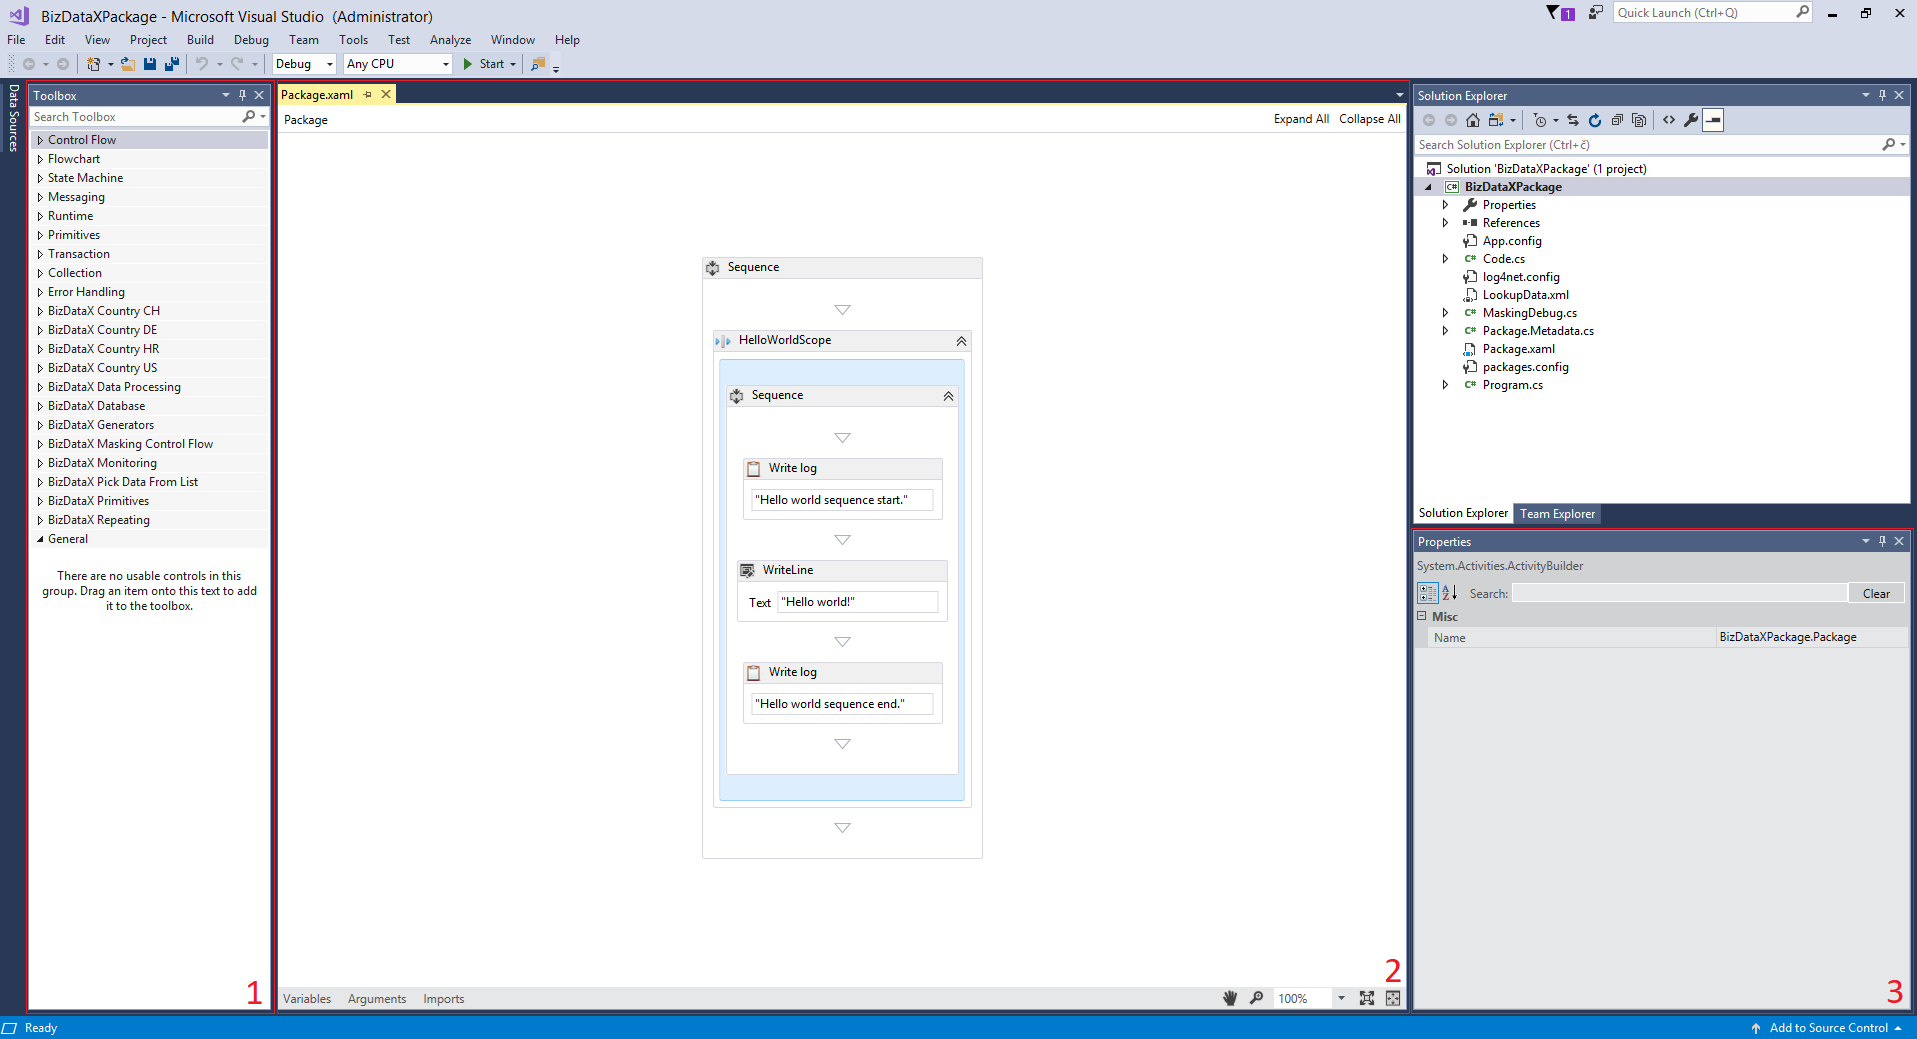 Figure 1: BizDataX/Workflow Designer user interface elements
Toolbox
The Toolbox contains different items grouped into logical groups (Figure 2). For example, the Control Flow group (1) contains items that provide control over the workflow logic flow such as branching and looping. Some groups, such as Control Flow, Primitives and Error Handling, are part of the Windows Workflow Foundation technology. Data masking and other data transformation items can be found in BizDataX [Group Name] groups (2) which are added to the Toolbox during BizDataX Designer installation.
 Figure 2: Toolbox with tools and Toolbox groups
Toolbox groups are configurable. You are free to create new groups and choose which items appear in what groups.
Visit Windows Workflow Foundation for more information about the standard Toolbox groups and items. Use third party documentation to learn about any third party Toolbox items. Information and guides concerning BizDataX activities can be found here.
Design Surface
The Design surface is where workflow logic is defined. In the default window layout, it fills the central part of the user interface. The typical design surface is shown on Figure 3. The top band (1) shows the process structure navigation controls. Workflow logic details for the selected hierarchy level are shown in the central part of the design surface (2). Items can be dragged from the Toolbox and dropped into the design surface. This part of the design surface can be used to configure individual item options. Options can be edited in-line or with pop-up dialogs. The bottom band (3) enables defining variables and arguments, as well as referencing artifacts from different namespaces. The design surface also includes standard productivity tools, such as controls to easily change the level of details to show (4) or zoom level (5).
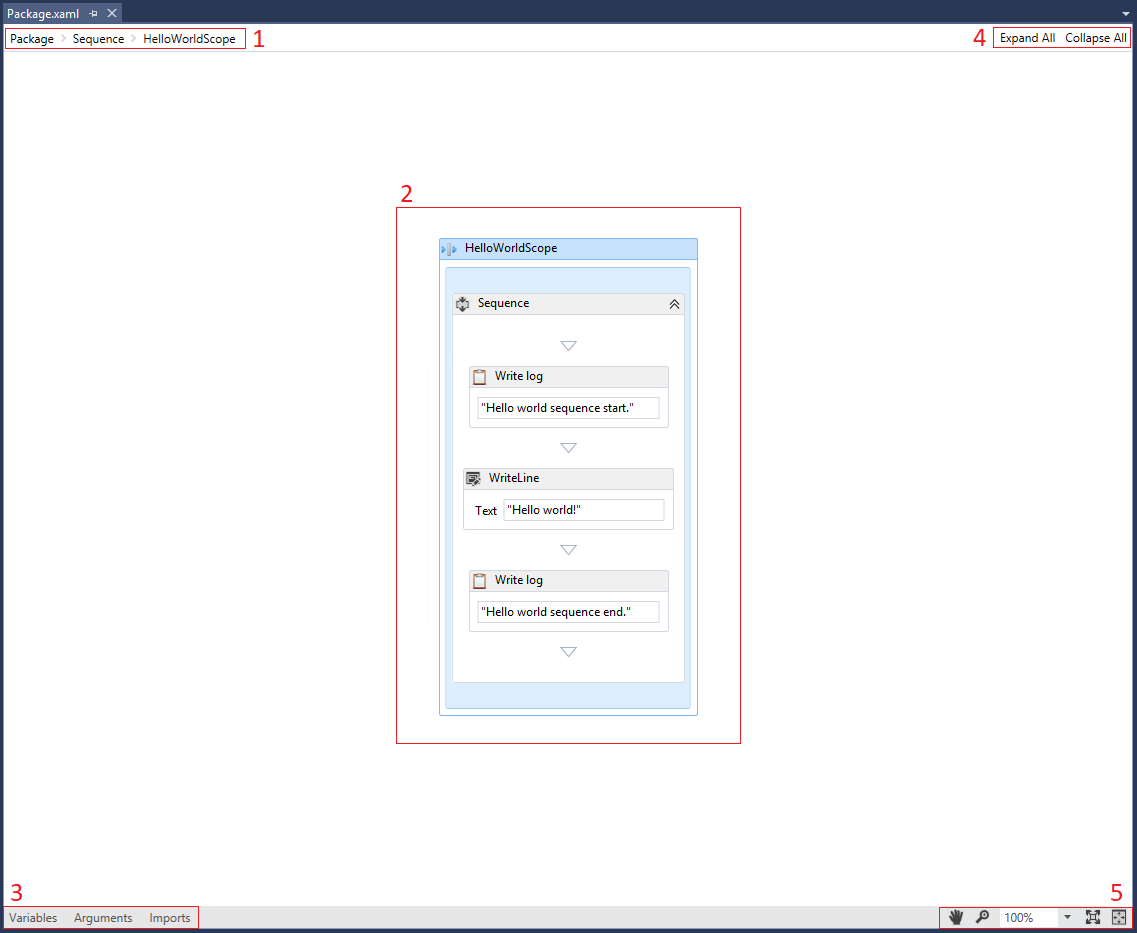 Figure 3: Workflow design surface
Use the bottom band buttons Variables, Arguments and Imports to show or hide details about variables, arguments or namespace references. Figure 4 shows how the design surface looks when the Arguments editor is turned on. This editor enables defining new or editing existing masking logic parameters. The Variables editor enables defining new or editing existing variables. The Imports editor can be used to manage namespace references.
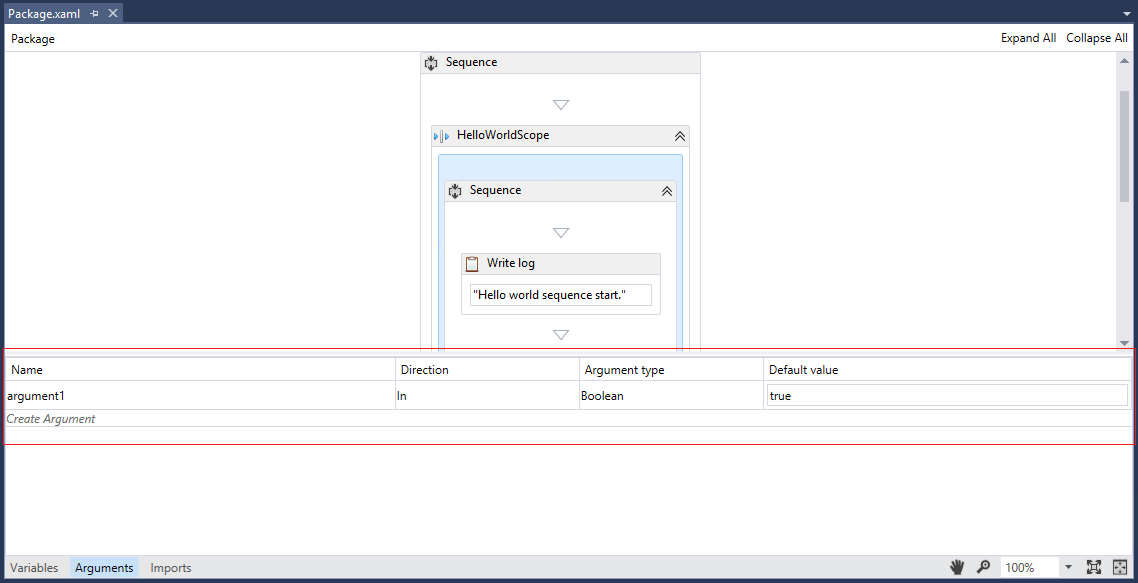 Figure 4: Design surface with Arguments editor expanded
Properties
Properties can be used to define item behavior in more detail and choose configuration options for individual items. Properties are context-sensitive, i.e. they only show details of the item that is selected in the design surface. Additionally, a list of properties shown is different depending on the properties available for the selected item.
Figure 5 shows what happens when the Pick first name from list activity is selected in the design surface (1). Properties show information and configuration options about the activity (2). Note that the name of the property can be changed in the design surface.
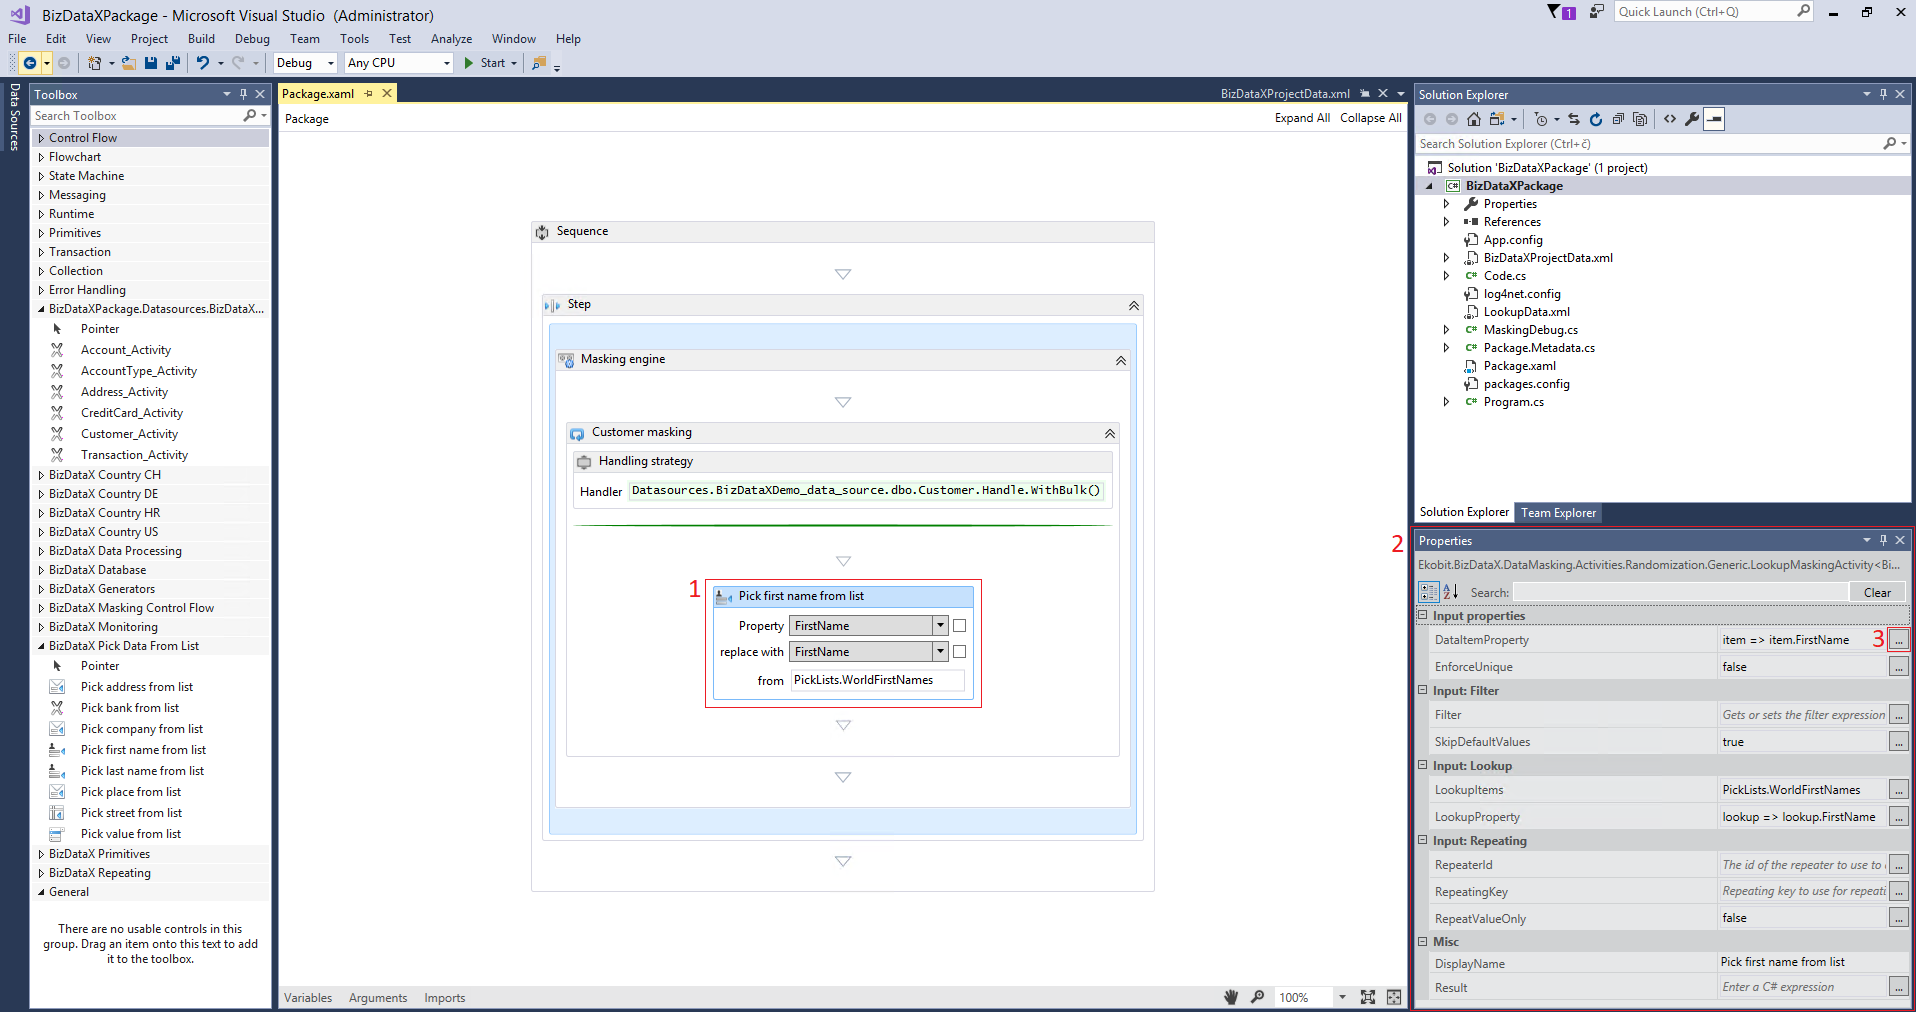 Figure 5: Context sensitivity of Properties window
Activity options can be primitive values, such as strings or numbers, expressions that reference variables or code artifacts, etc.. You can edit values in-line, or use pop-up dialogs to set option values. For example, if you click on ... button (3) next to Filter property, a dialog pops up enabling you to enter the filter predicate (Figure 6).
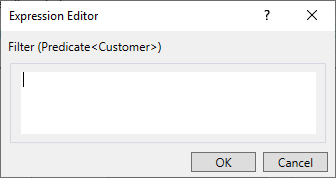 Figure 6: Filter predicate pop-up editor
Use Visual Studio and Windows Workflow Foundation to learn more about editors for primitives and tools shipping with the Windows Workflow Foundation. Check Designer activities for more information about BizDataX specifics.