Creating a simple masking on Portal
This example will demonstrate how to mask First name, Last name and Email in Customer and CreditCard tables from the Microsoft SQL Server demo database with the same values using the User information generator and Repeaters.
| Table of contents |
|---|
| Creating a simple masking flow on Portal |
| Picture steps |
| Video steps |
Creating a simple masking flow on Portal
Prerequisites for this masking flow are:
- Created Data source
- Imported Environment
Picture steps
- Navigate to Plans page and click on the + button to Create a data masking plan.
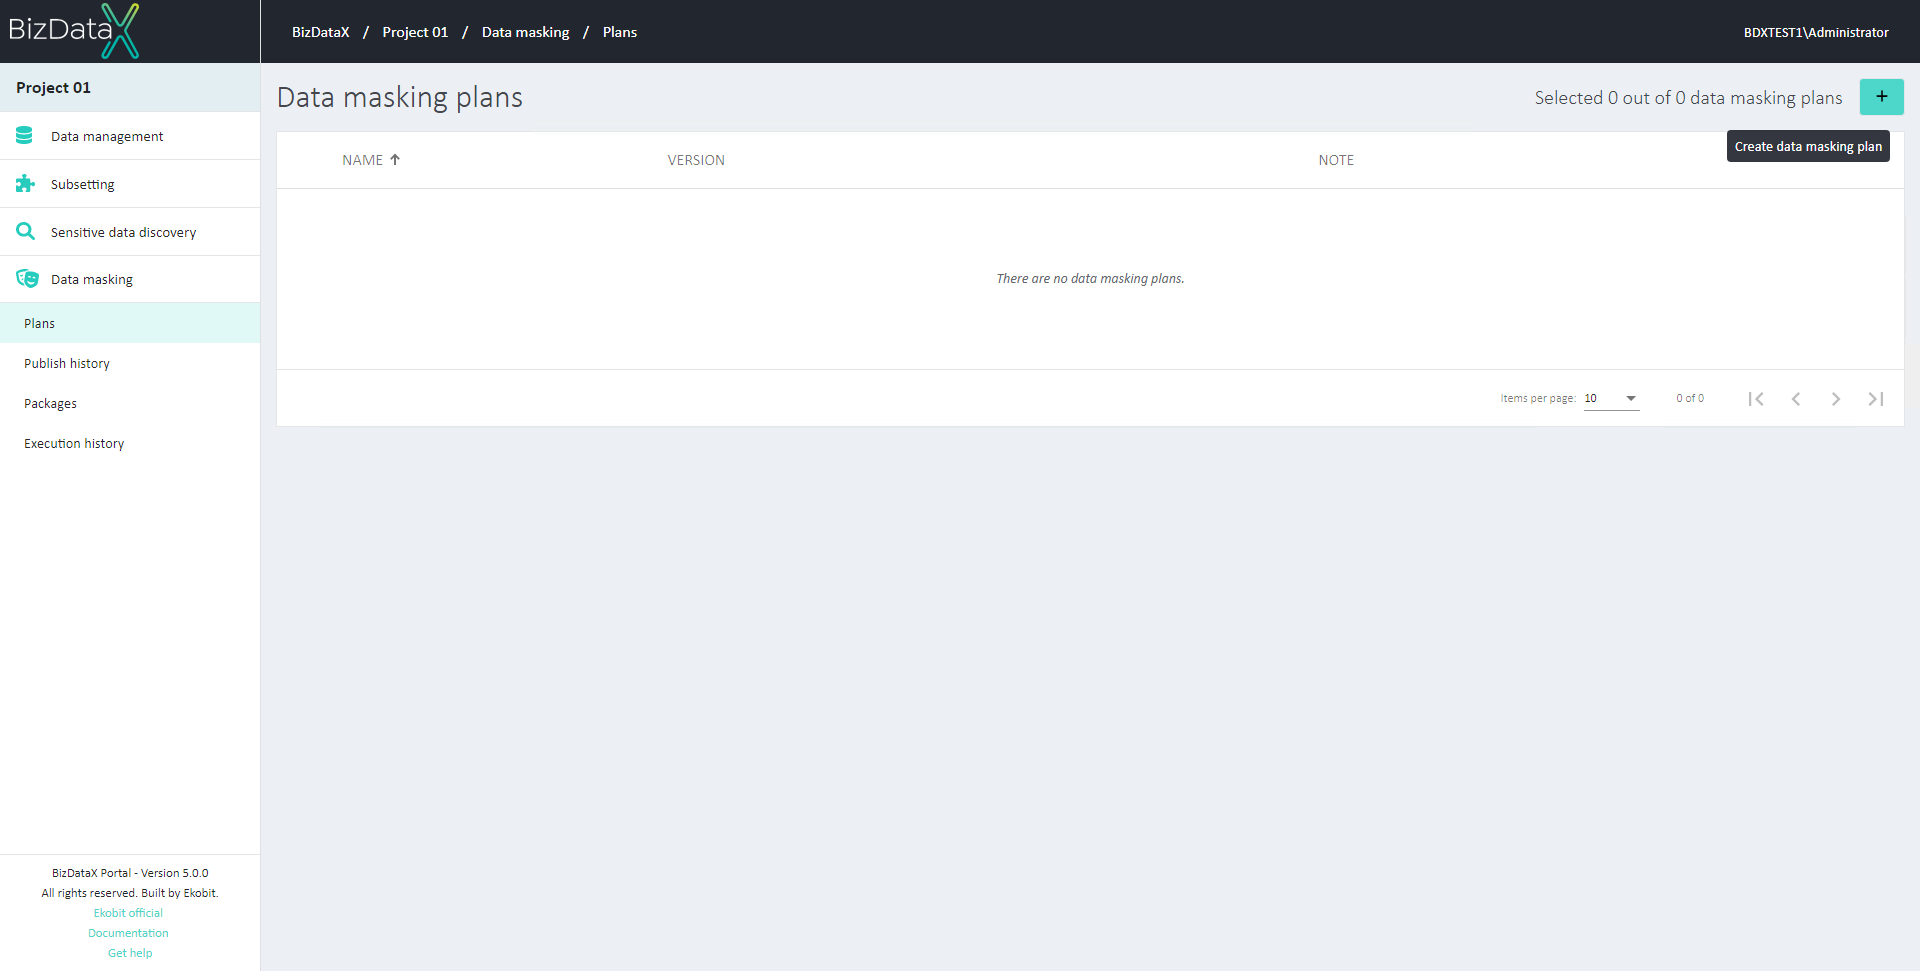
Figure 1: Plans page
- Enter the Name and Note of the plan. Click on the 'Confirm' (✓) button with 'Proceed with wizard' toggle set to On.
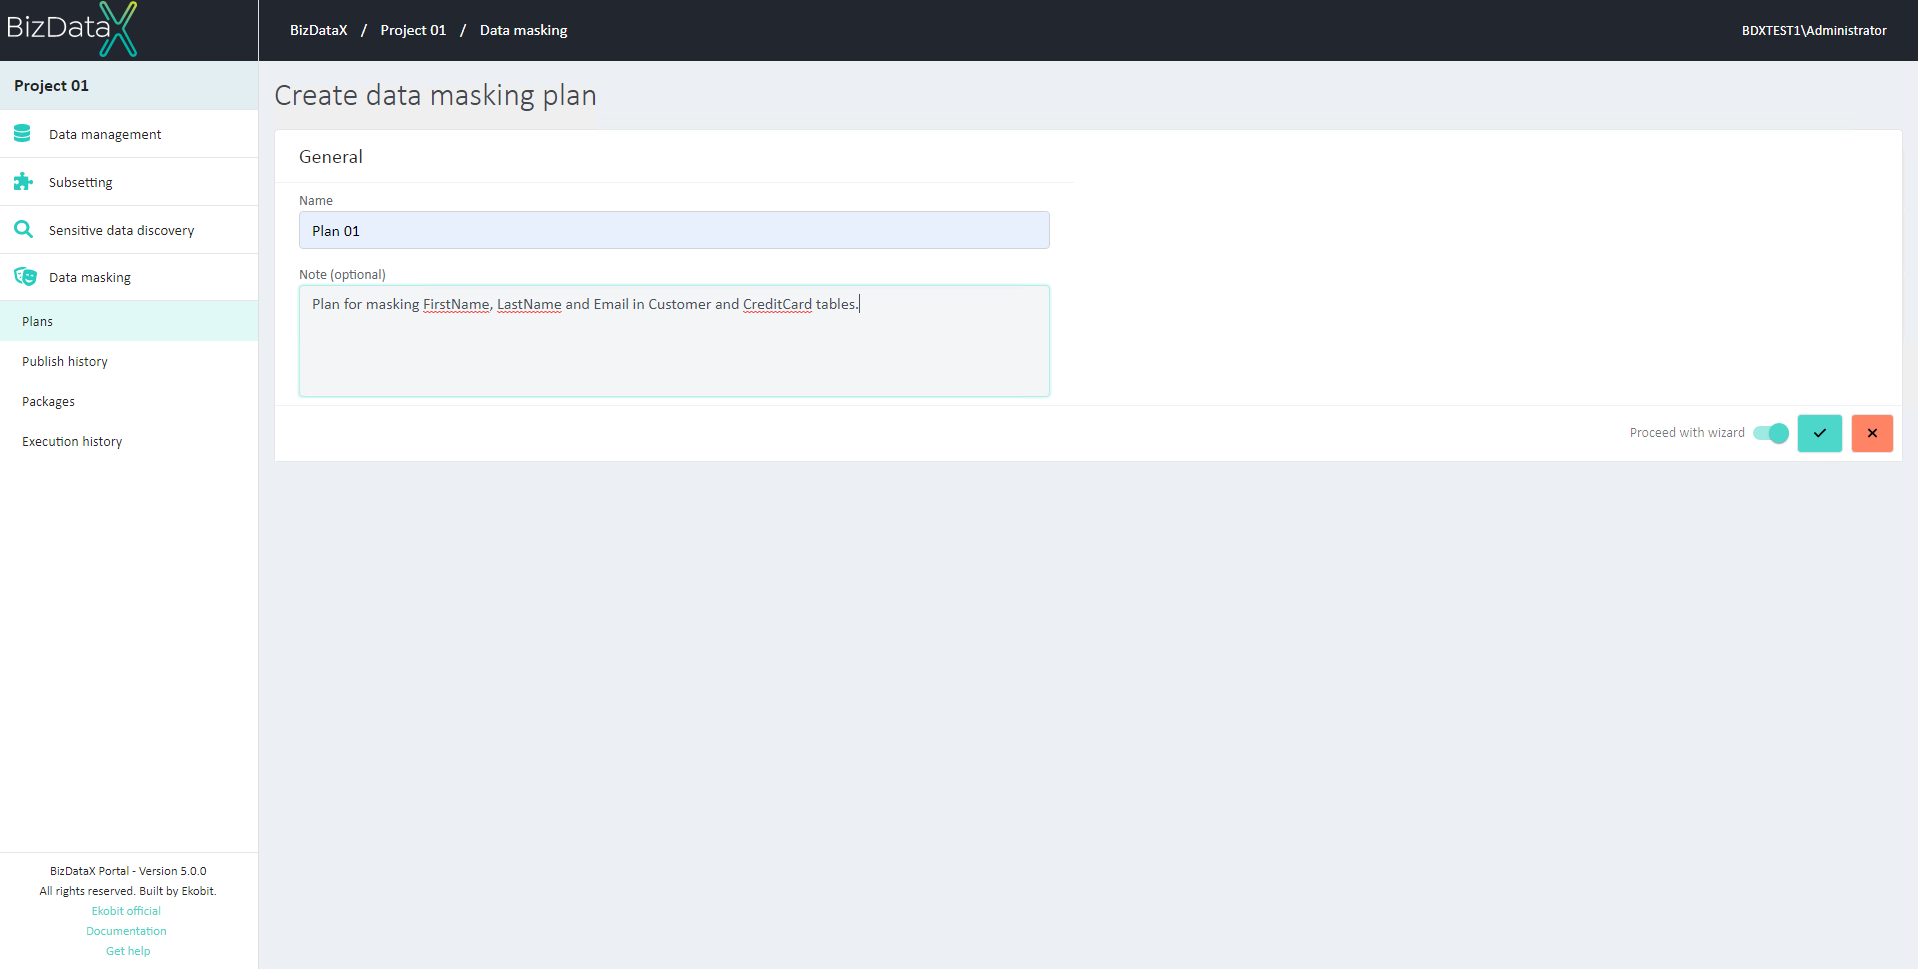
Figure 2: Create Data masking plan
- Wizard step 1 is displayed. In this step, the user can select columns to mask from all previously imported Data sources in Data management.
Display columns of the Customer table by clicking the ˃ buttons. Select all columns you want to mask in this table (in this case, the Email, First name and Last name columns) by clicking on the checkbox buttons.
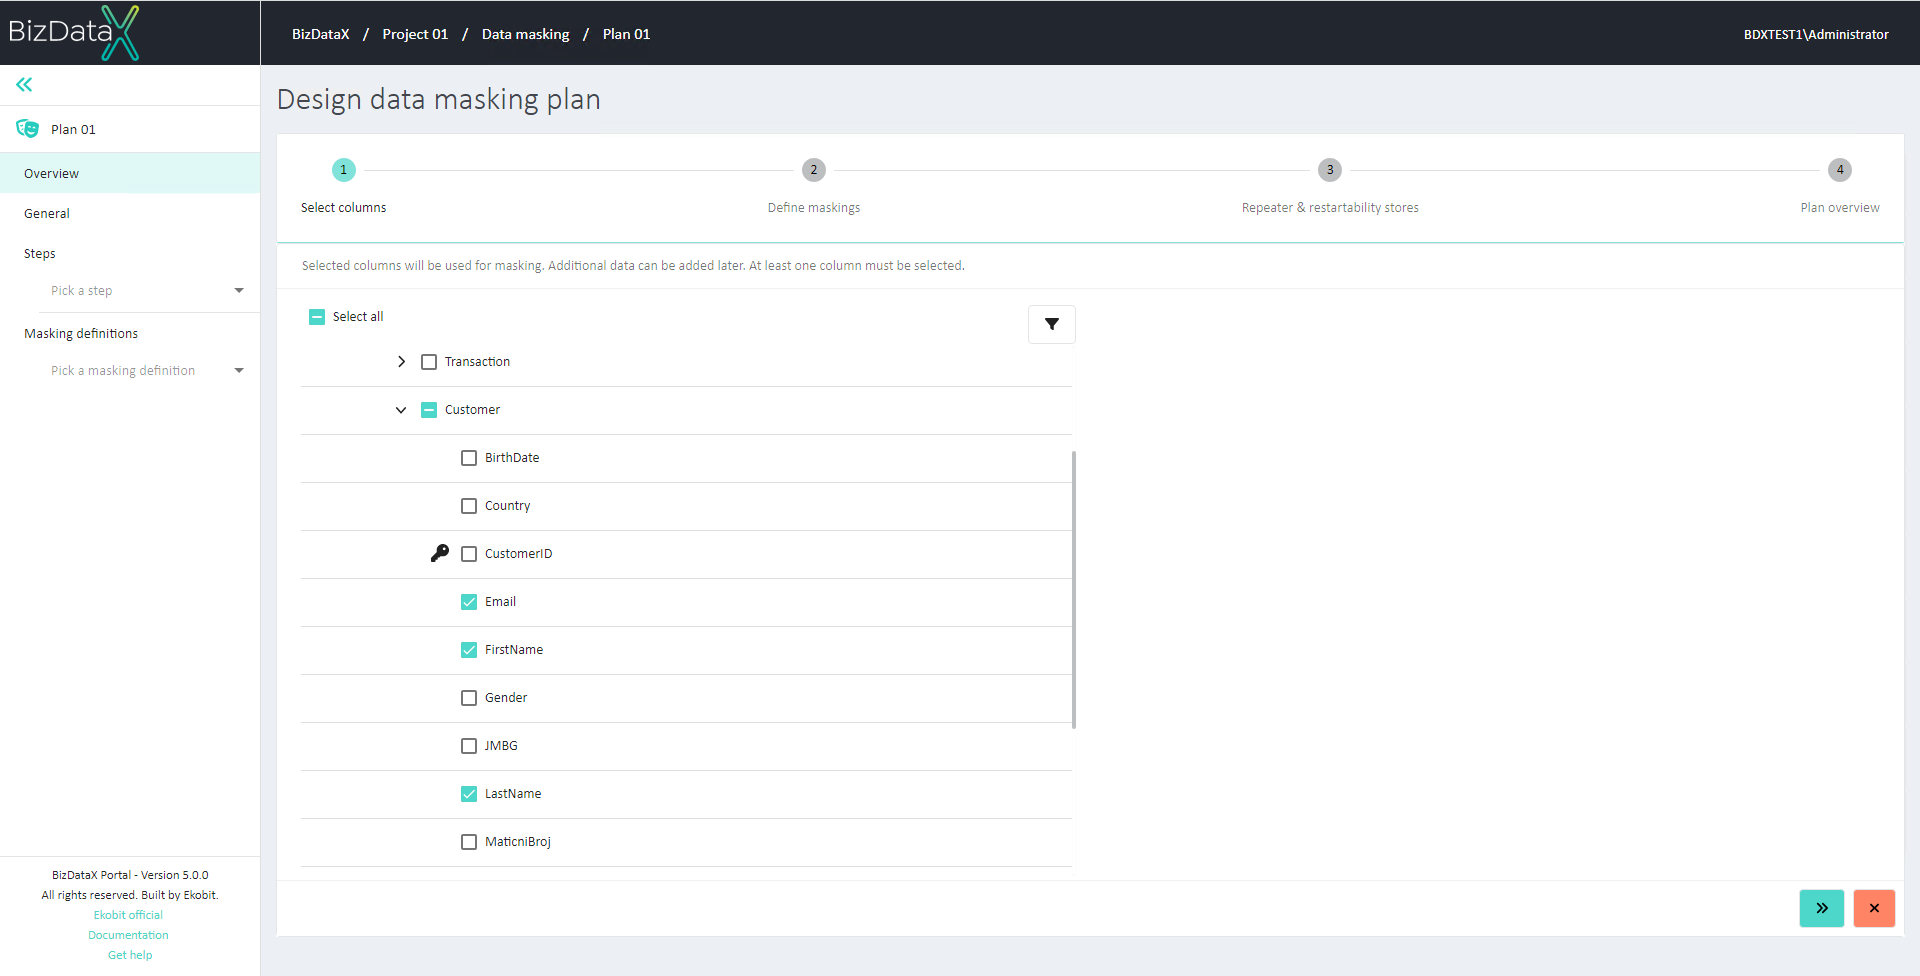
Figure 3: Wizard step 1 - Customer table
- Display columns of the CreditCard table by clicking the ˃ buttons. Select all columns you want to mask in this table (in this case, the First name and Last name columns) by clicking on the checkbox buttons.
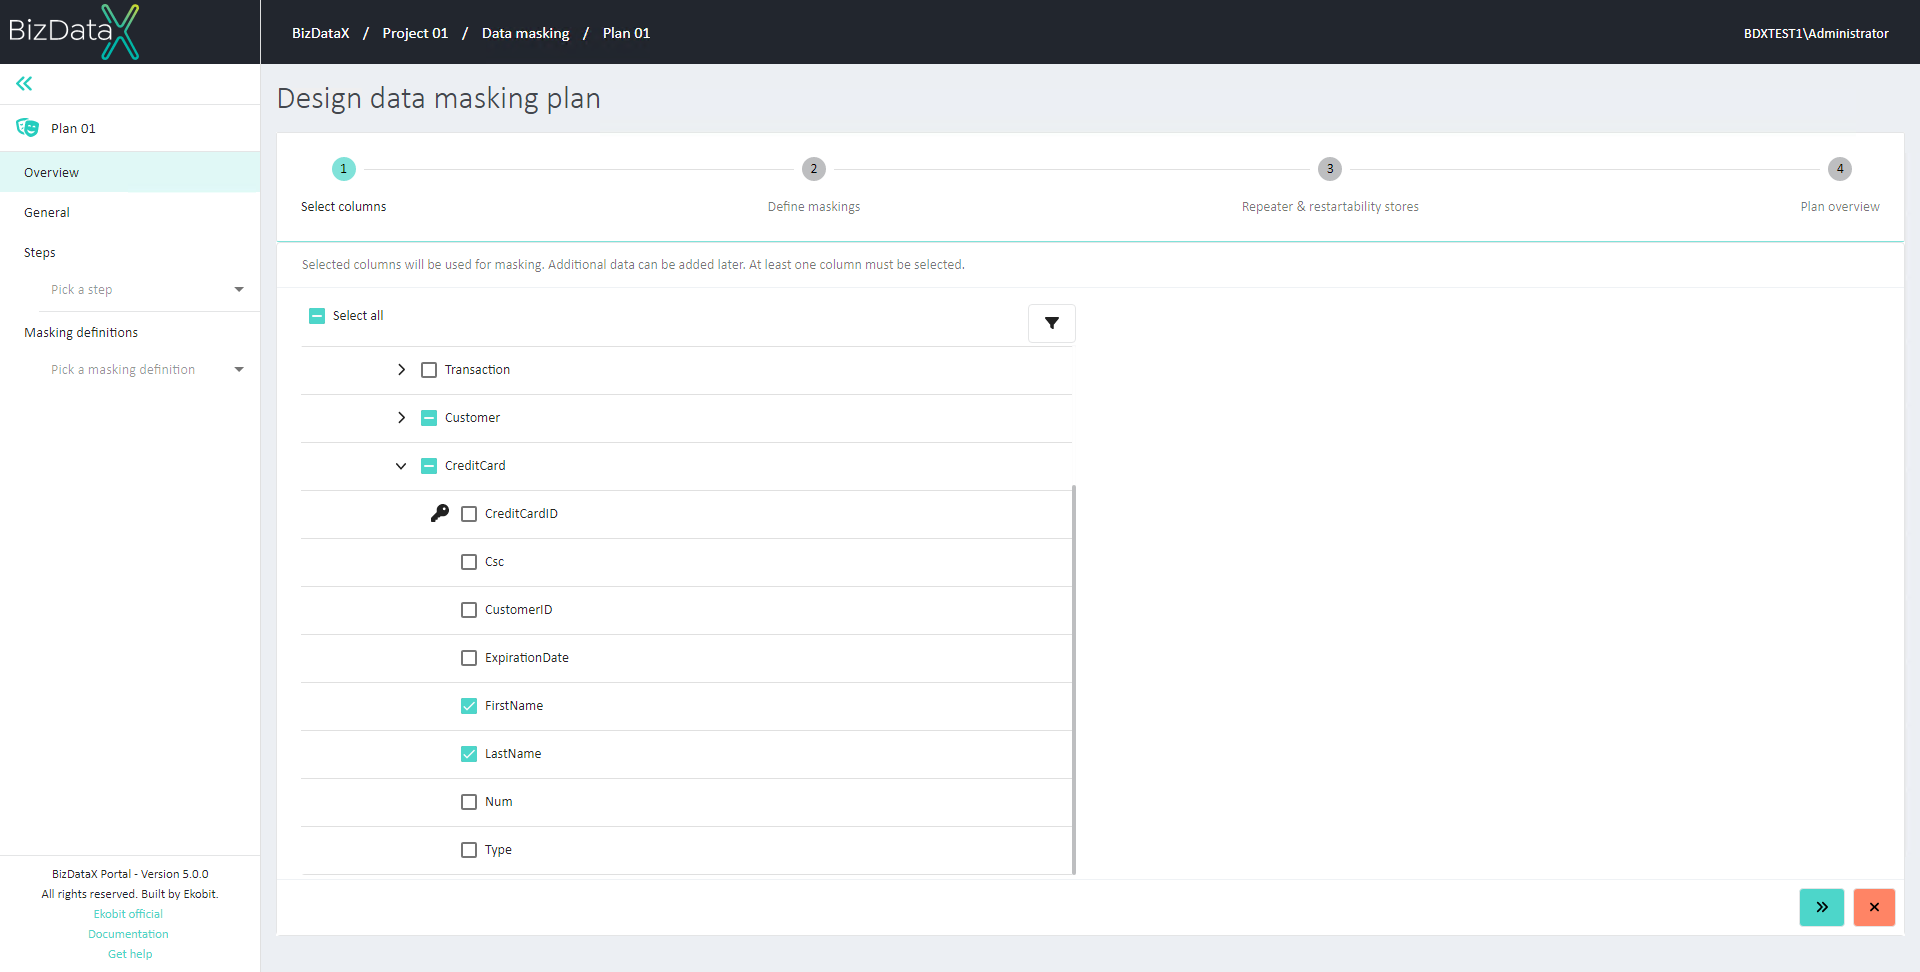
Figure 4: Wizard step 1 - CreditCard table
Click on the 'Next' button. Wizard step 2 is displayed. The second step of designing a Data masking plan is assigning values to columns selected in Step 1, which will define how masking will be done.
Select the 'Masking category' dropdown for the table column 'Email'. Select 'Generator outputs - basic'. This choice allows choosing between various Generators which can be used to generate new data.
Select the 'Masking value' dropdown for the table column 'Email'. Select 'Email' from the 'User information generator' category. This ensures that 'Email' value that is generated using 'User information generator' will be assigned to the 'Email' table column when masking data.
Select the 'Masking category' dropdown for the table column 'FirstName'. Select 'Generator outputs - basic'.
Select the 'Masking value' dropdown for the table column 'FirstName'. Select 'First name' from the 'User information generator' category. This ensures that 'First name' value that is generated using 'User information generator' will be assigned to the 'FirstName' table column when masking data.
Select the 'Masking category' dropdown for the table column 'LastName'. Select 'Generator outputs - basic'.
Select the 'Masking value' dropdown for the table column 'LastName'. Select 'Last name' from the 'User information generator' category. This ensures that 'Last name' value that is generated using 'User information generator' will be assigned to the 'LastName' table column when masking data.
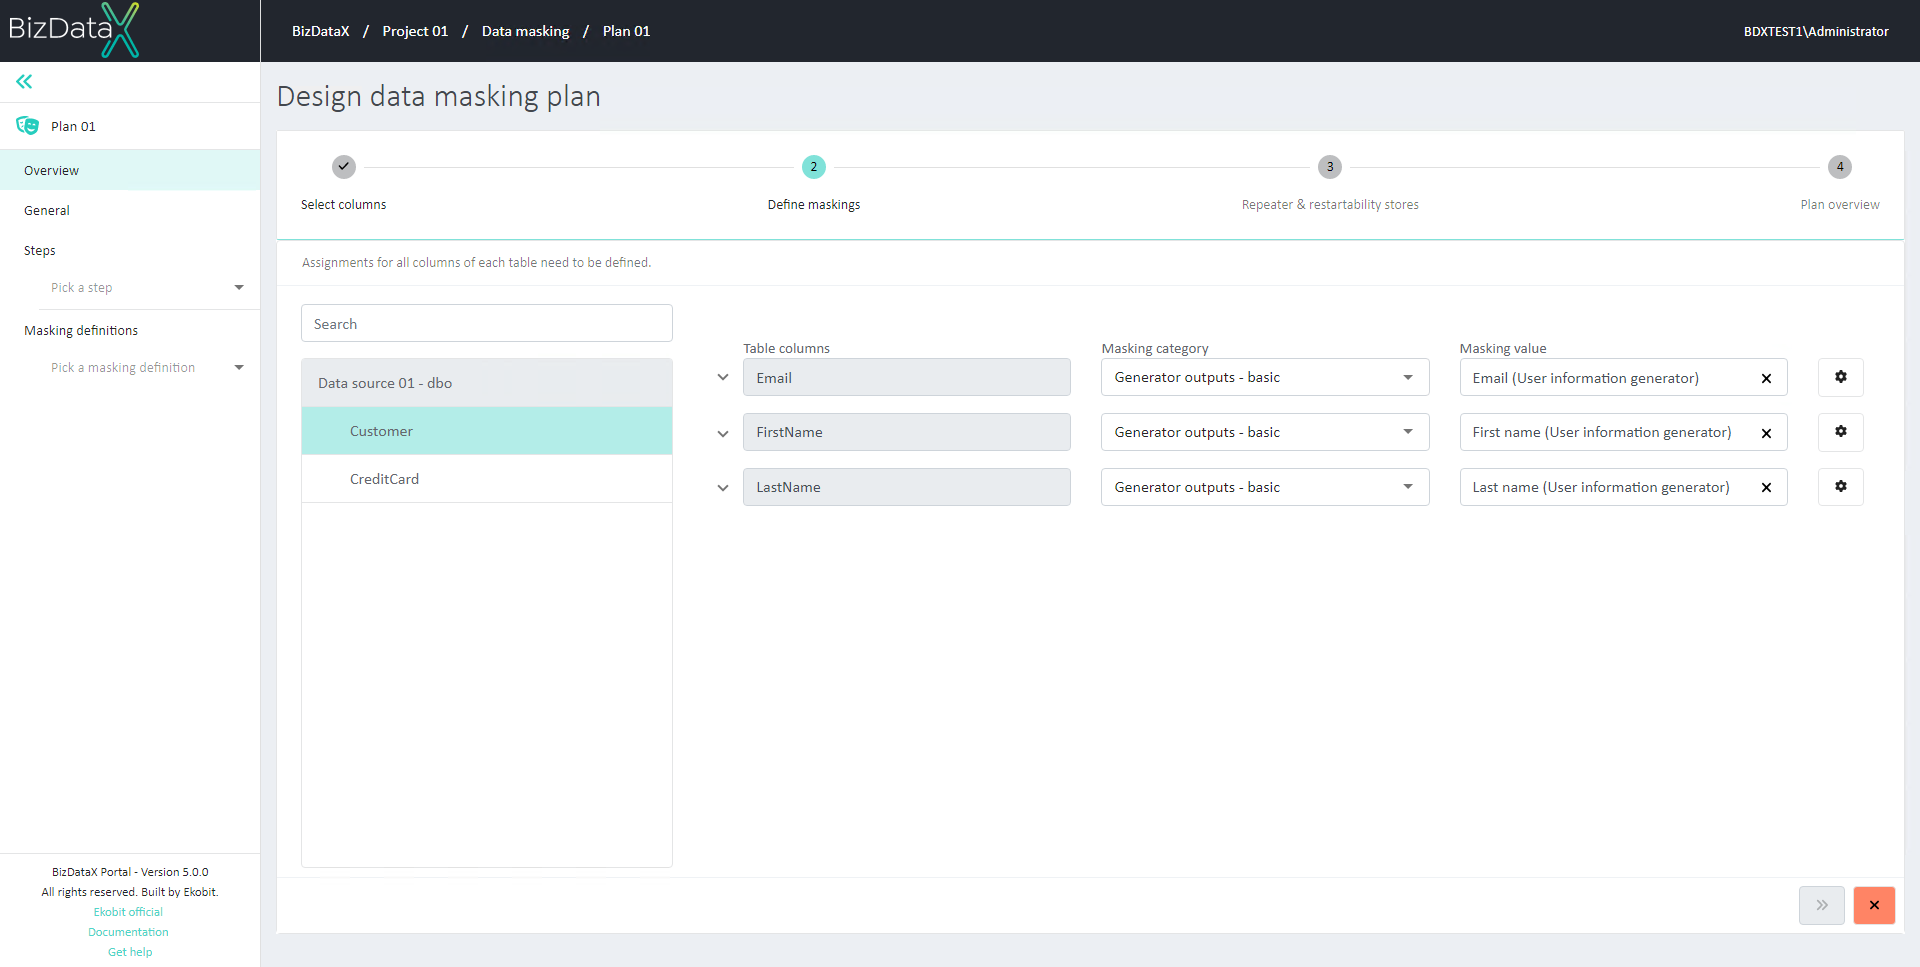
Figure 5: Wizard step 2 - Customer columns
Click on the 'Settings' button of any Table column. 'Generator details' pop-up is displayed. It is used to additionally configure settings of the Generator that will be used in masking (in this case, settings of the 'User information generator' generator).
Select 'Yes' on the 'Is repeatable?' toggle. Data that is generated using this generator (in this case, 'User information generator') will be generated using Repeaters.
Select the 'Input category' dropdown of the 'First Name' Generator input. Select 'Table columns'. This ensures connection between the original data and data that will be created when using Generator.
Select the 'Input value' dropdown of the 'First Name' Generator input. Select 'FirstName'. This connects First name that will be generated using User information generator with the original value in the FirstName column in the table.
Select the 'Input category' dropdown of the 'Last Name' Generator input. Select 'Table columns'.
Select the 'Input value' dropdown of the 'Last Name' Generator input. Select 'LastName'. This connects Last name that will be generated using User information generator with the original value in the LastName column in the table.
Select 'No' on the 'Repeater key' toggle for 'Country' and 'Gender'. By selecting this, only FirstName and LastName will be taken in consideration when generating data using Repeaters. Only First name and Last name will represent the original value ("RepeaterKey") that will always be replaced with the same masked value ("RepeatingValue") - same First name and Last name. Gender and Country will be ignored.
Click on the 'Confirm' button.
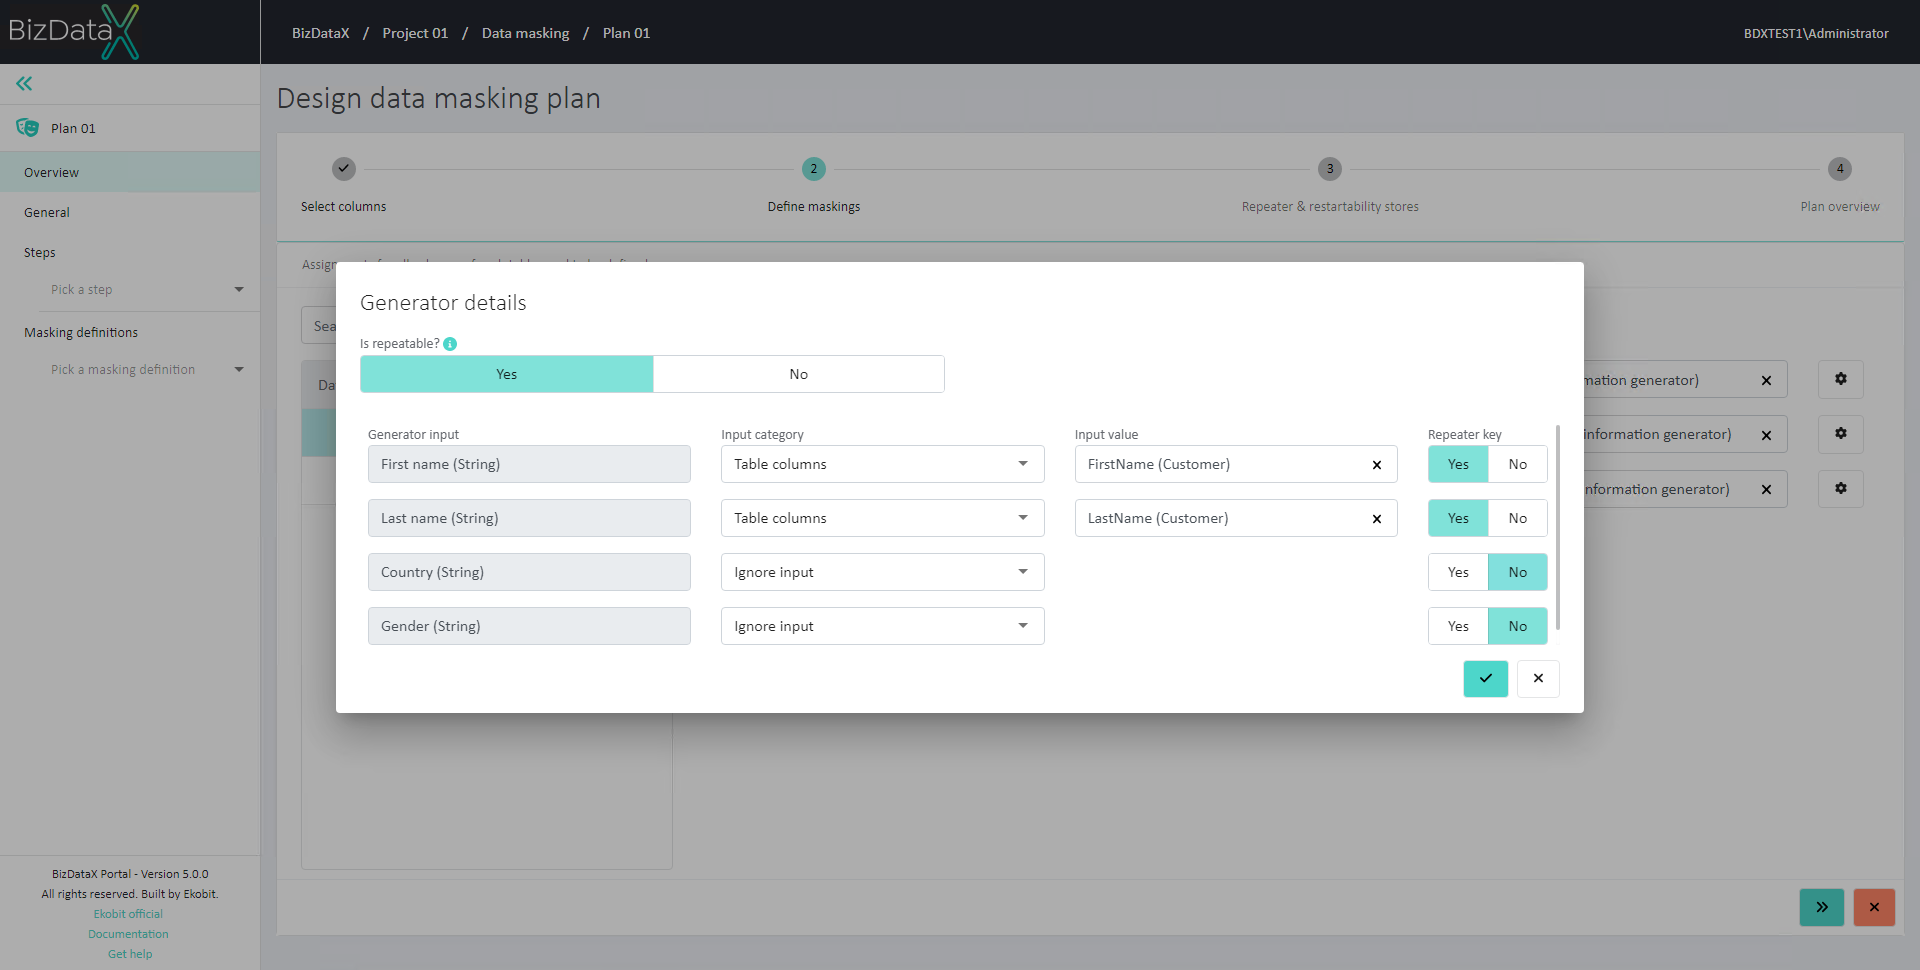
Figure 6: Wizard step 2 - Generator details for Customer columns
Select the 'CreditCard' table in the selection menu. The same process needs to be repeated for all tables that will be masked.
Select the 'Masking category' dropdown for the table column 'FirstName'. Select 'Generator outputs - basic'. This choice allows choosing between various Generators which can be used to generate new data.
Select the 'Masking value' dropdown for the table column 'FirstName'. Select 'First name' from the 'User information generator' category. This ensures that 'First name' value that is generated using 'User information generator' will be assigned to the 'FirstName' table column when masking data.
Select the 'Masking category' dropdown for the table column 'LastName'. Select 'Generator outputs - basic'.
Select the 'Masking value' dropdown for the table column 'LastName'. Select 'Last name' from the 'User information generator' category. This ensures that 'Last name' value that is generated using 'User information generator' will be assigned to the 'LastName' table column when masking data.

Figure 7: Wizard step 2 - CreditCard columns
Click on the 'Settings' button of any Table column. 'Generator details' pop-up is displayed. It is used to additionally configure settings of the Generator that will be used in masking (in this case, settings of the 'User information generator' generator). To use the same generator (same generated values) in multiple tables, Generator details for the same Generator need to be configured in the same way. That's why all settings for this Generator will be the same as previously described for Generator in the Customer table.
Select 'Yes' on the 'Is repeatable?' toggle.
Select the 'Input category' dropdown of the 'First Name' Generator input. Select 'Table columns'.
Select the 'Input value' dropdown of the 'First Name' Generator input. Select 'FirstName'.
Select the 'Input category' dropdown of the 'Last Name' Generator input. Select 'Table columns'.
Select the 'Input value' dropdown of the 'Last Name' Generator input. Select 'LastName'.
Select 'No' on the 'Repeater key' toggle for 'Country' and 'Gender'.
Click on the 'Confirm' button.
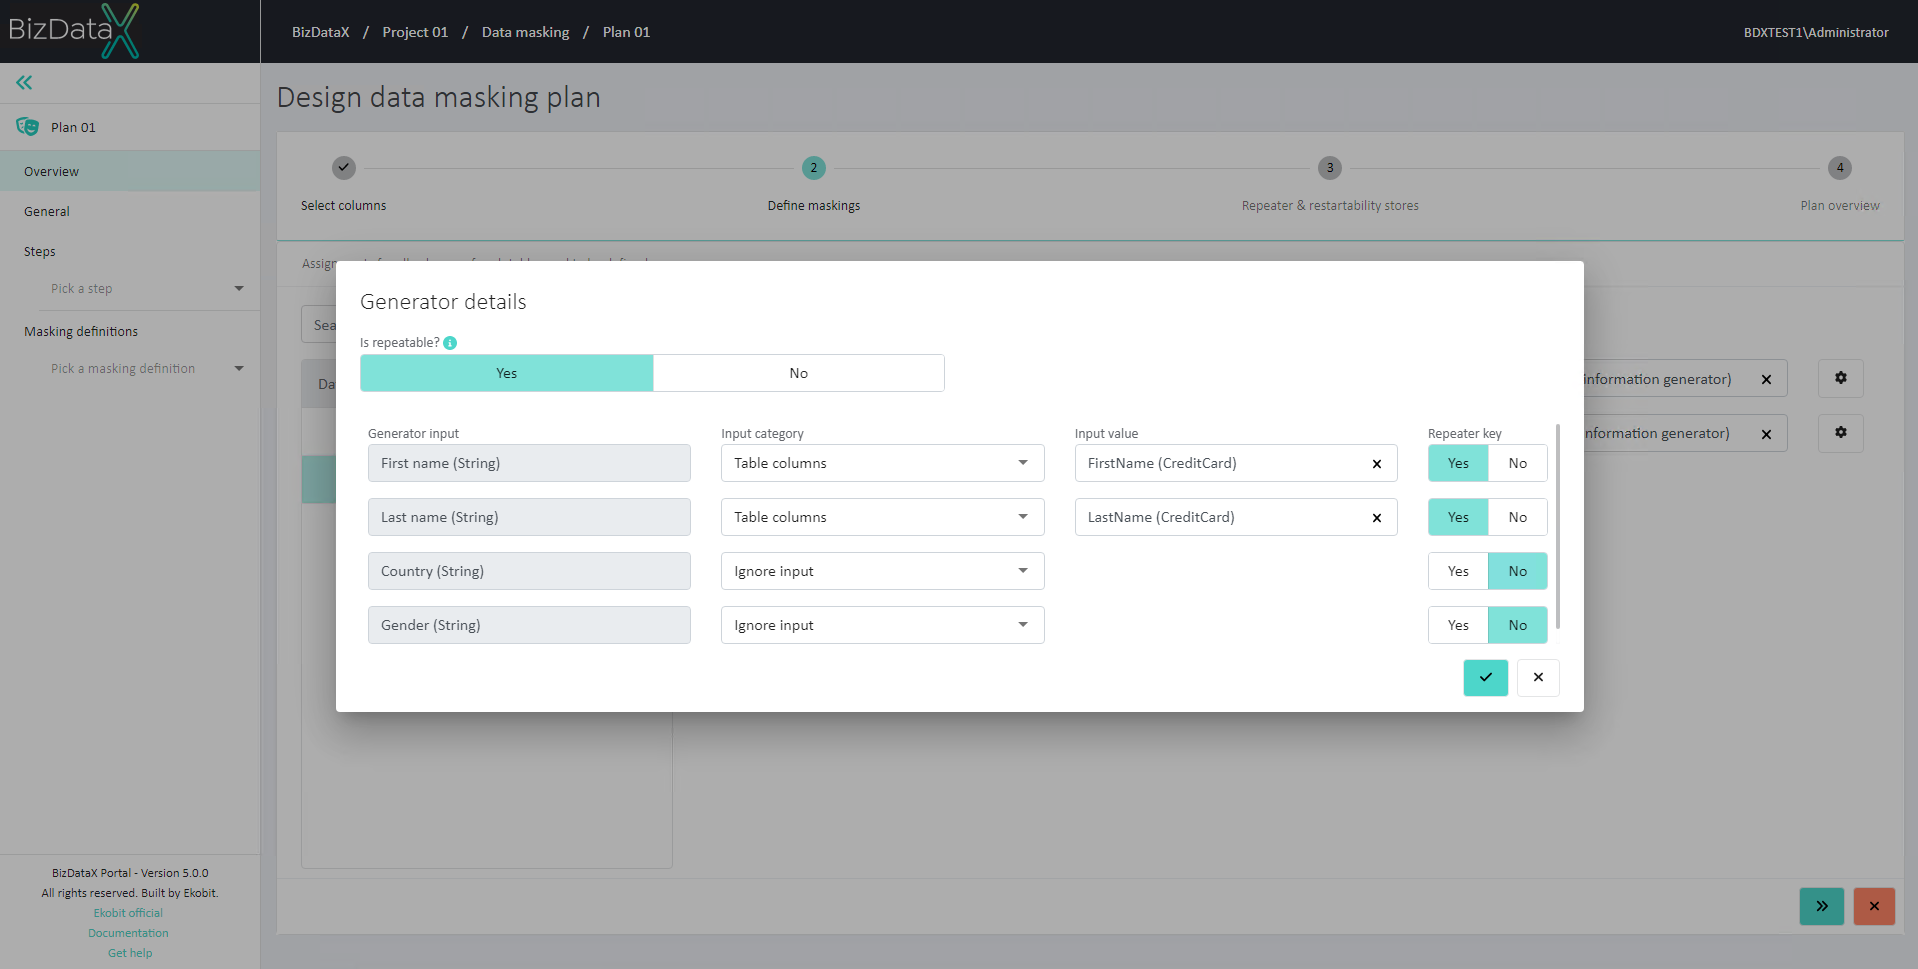
Figure 8: Wizard step 2 - Generator details for CreditCard columns
Click on the 'Next' button. Wizard step 3 is displayed. Persisting repeaters and/or Restartability will not be used in this masking so this step can be skipped.
Click on the 'Next' button again. Wizard step 4 is displayed. All previous steps can be reviewed here in a form of Plan overview.

Figure 9: Wizard step 3 - Repeaters and Restartability store configuration
- Click on the 'Finish' button. The plan overview page is displayed.

Figure 10: Wizard step 4 - Plan overview
- If the Data masking plan is designed according to the goal, Plan needs to be published into Package. To publish Plan, click on the 'Publish data masking plan' button. A pop-up for publishing the plan is displayed. The version of the package can be defined here. Click on the 'Confirm' button.
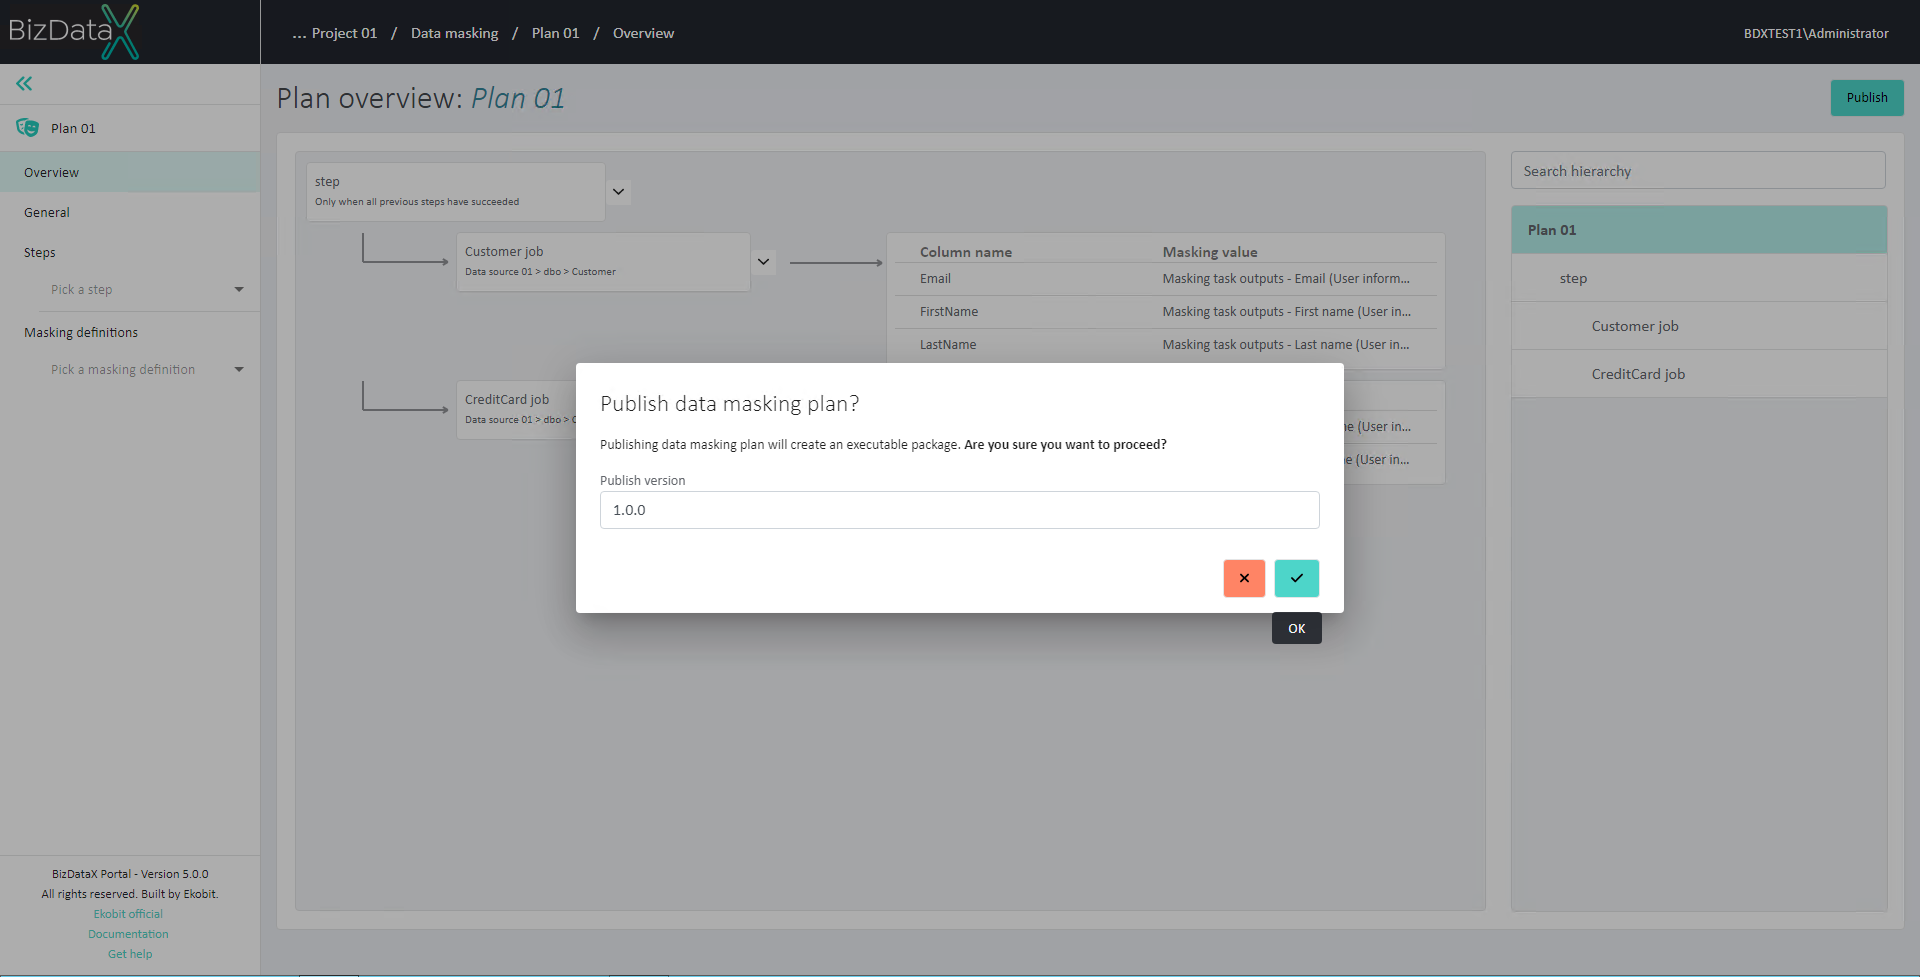
Figure 11: Publish plan
- 'Plan publish details' page with details about the publishing process is displayed. If the publishing process is succesfully completed, click on the 'View package' button. The 'Package details' page is displayed.
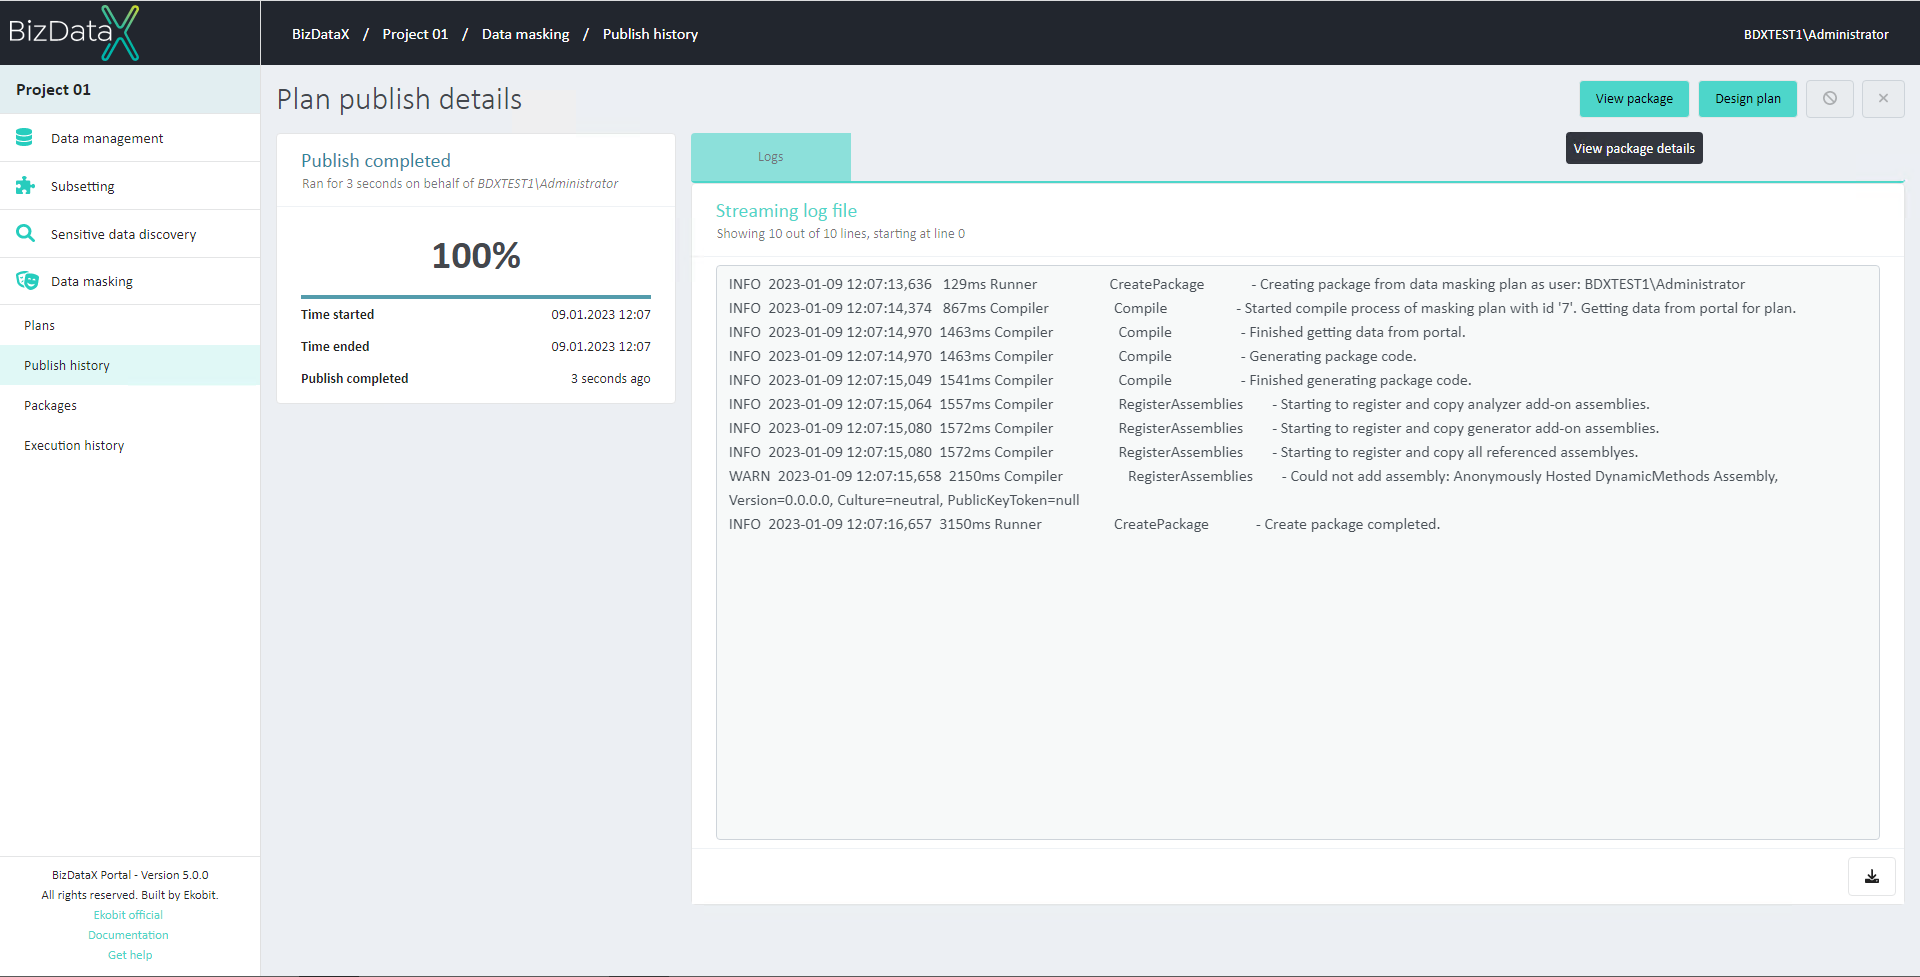
Figure 12: View package
- On the 'Package details' page, details about the created Package can be reviewed. If all information is correct, click on the 'Execute package' button to execute it. A pop-up for executing the package is displayed where Environment and version of the Package (and potential Restartability) can be configured. Click on the 'Confirm' button to start the execution.
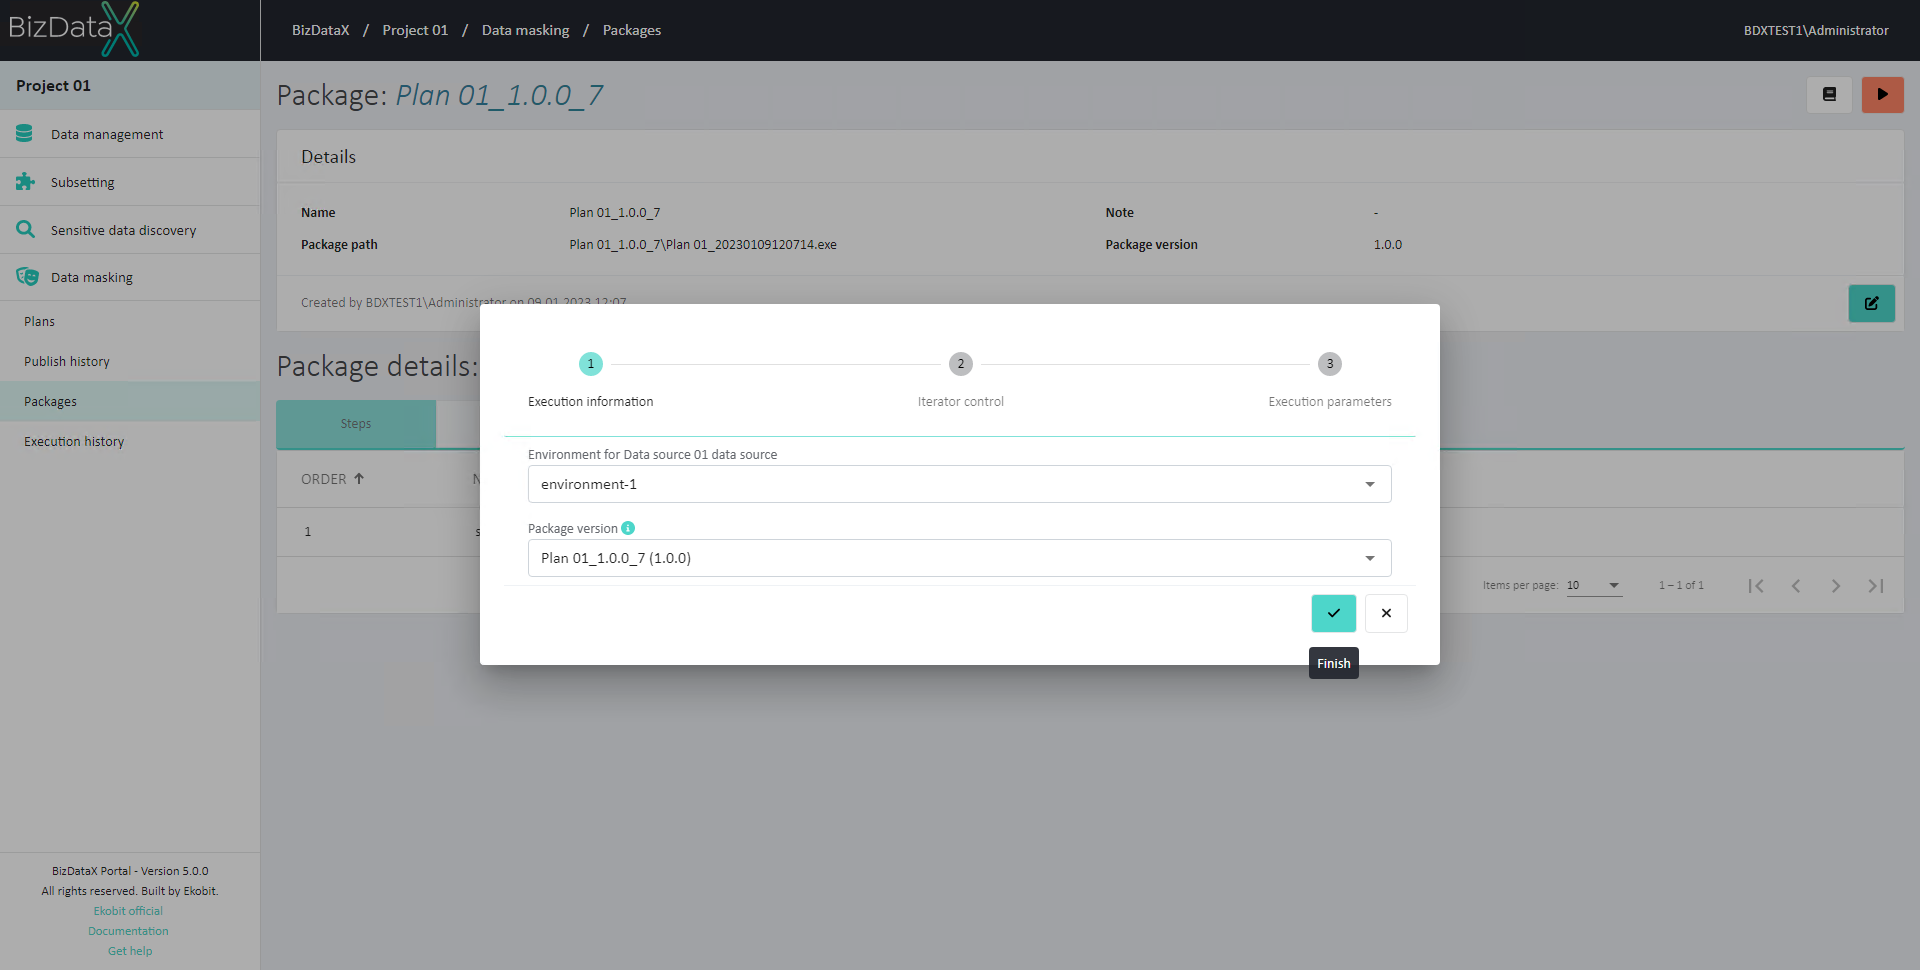
Figure 13: Execute package
- 'Package execution details' page is displayed with all information about the execution. Wait for the execution to complete successfully. Once it's complete, the data in both tables should be masked with the same new First name, Last name and Email.
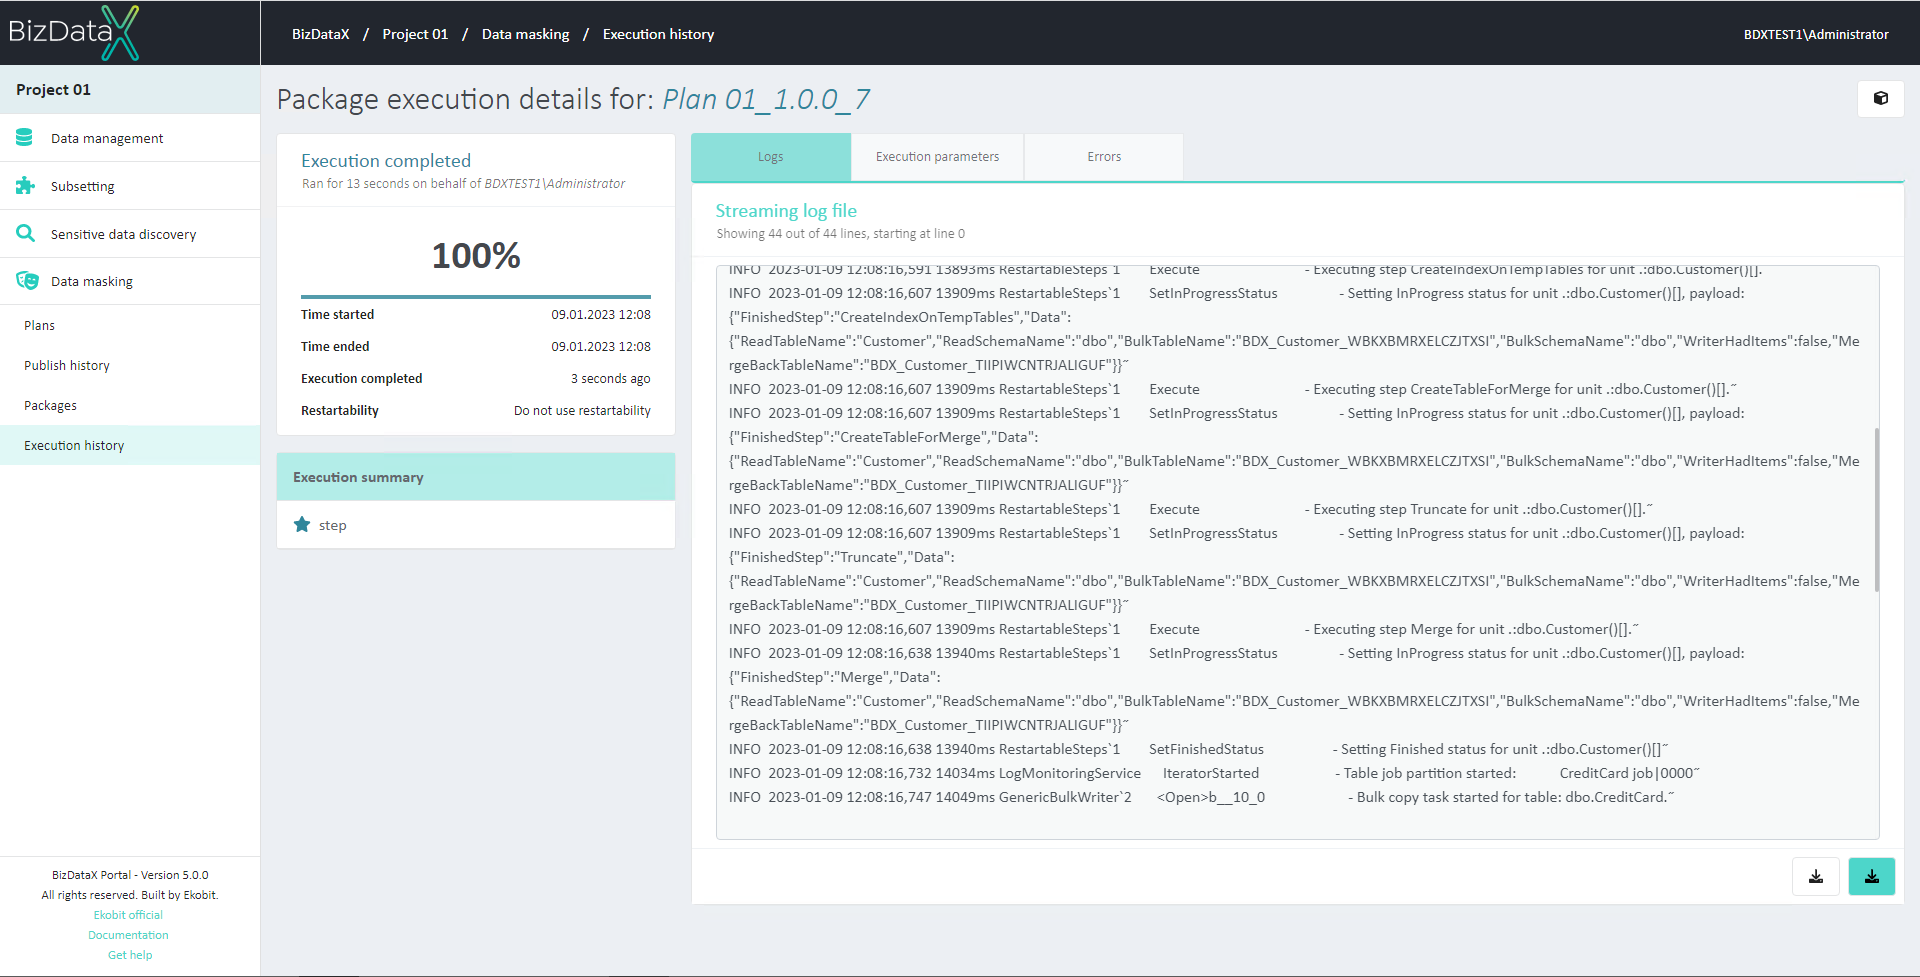
Figure 14: Execution complete