Design subset definition
On the Design subset definitions screen user can create and define subset definitions.
On the left side of the screen, there is a Toolbox, which contains all Tables from the environment with the possibility to search by the table. Each table can contain table filters:
- Global filter - They are used to create rules that exclude/include all data or just a part of the user-defined data (Custom Global Filter). Global filters can be set on the Subset Table Filters screen and rules defined on Subset Table Filters apply to all subset definitions as a priority.
- Local filter - Custom local filter is just a part of the user-defined data which can be set in the Design subset definition page.
On the right side of the screen, there is a Design surface where the user can design subset definitions by dragging and dropping tables in it.
| Table of contents |
|---|
| Design subset definition |
| Subset table details |
| Expand all nodes |
| Copy and Paste as a loop |
| Subset relationship details |
| Execute Subset Definition |
Design subset definition
On the left side of the screen, there is a Toolbox, which contains all Tables from the environment with the possibility to search by the table. If a table contains global or custom filters, it will have an icon showing what type of filter the table has, Global, Custom, or both filters.
Possible filter icons on the tables:
 - "Include all data".
 - "Exclude all data"
 - "Custom Global Filter"
 - "Custom local filter" - it is showing on SubsetTable element for Local custom filter, Global custom filter or both if defined.
- if no filtering is configured, then the toolbox item doesn't have an additional icon
Tables from all Data Sources that have defined filter 'Include all data', through global filters, and all their implicit parents are called PassTrough Tables.
On the right side of the screen, there is a Design surface where the user can define a subset definition by dragging and dropping tables in it.
Root tables are found in the Subset definition at the root level.
When the root table is created, we can drag the next table to it and create a subset definition. In case there is no relationship or if there is more than one relationship in the database between the two selected tables, the pop-up window ‘Subset relationship’ will be opened automatically for entering Subset relationship details.
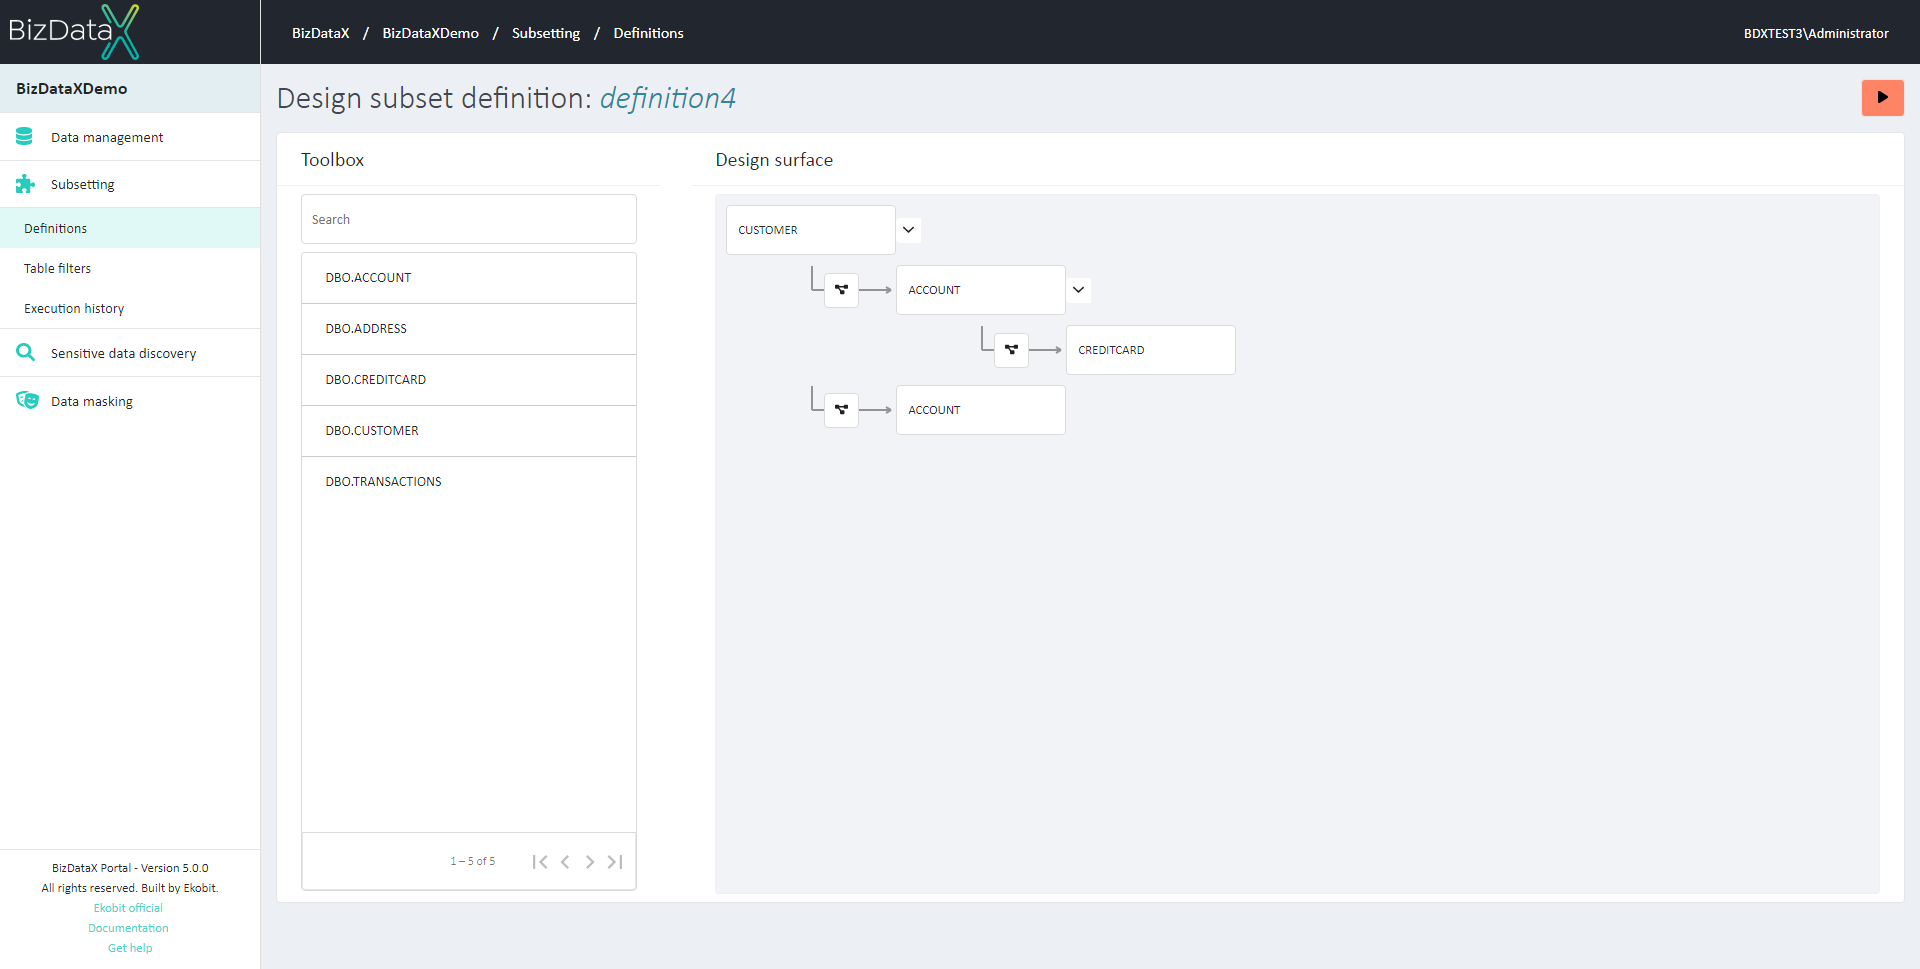 Figure 1: Design Subset Definition
Dragging the existing subset table without a relationship will create a new relationship. When dragging an existing subset table that had a relationship with another table (dragging an existing subset table as a child to another table) - that relationship will be updated with the new data.
When the table is dragged to the Design surface filter icons will be shown on SubsetTables if they exist.
Users can adjust SubsetTable details by right-clicking on the subset table (Figure2). This will open the menu with possibilities to:
- Subset table details – this will open a pop-up window with Subset table details (Figure3)
- Expand all nodes – this will expand all related tables which are under the selected table (Figure4)
- Copy (as a loop) - this will copy selected node (Figure5)
- Paste (as a loop) ‘TABLE_NAME’ – this will paste selected node
Subset table details
By choosing ‘Subset table details’ on the right-click on some table on the Design surface, a pop-up window will open.
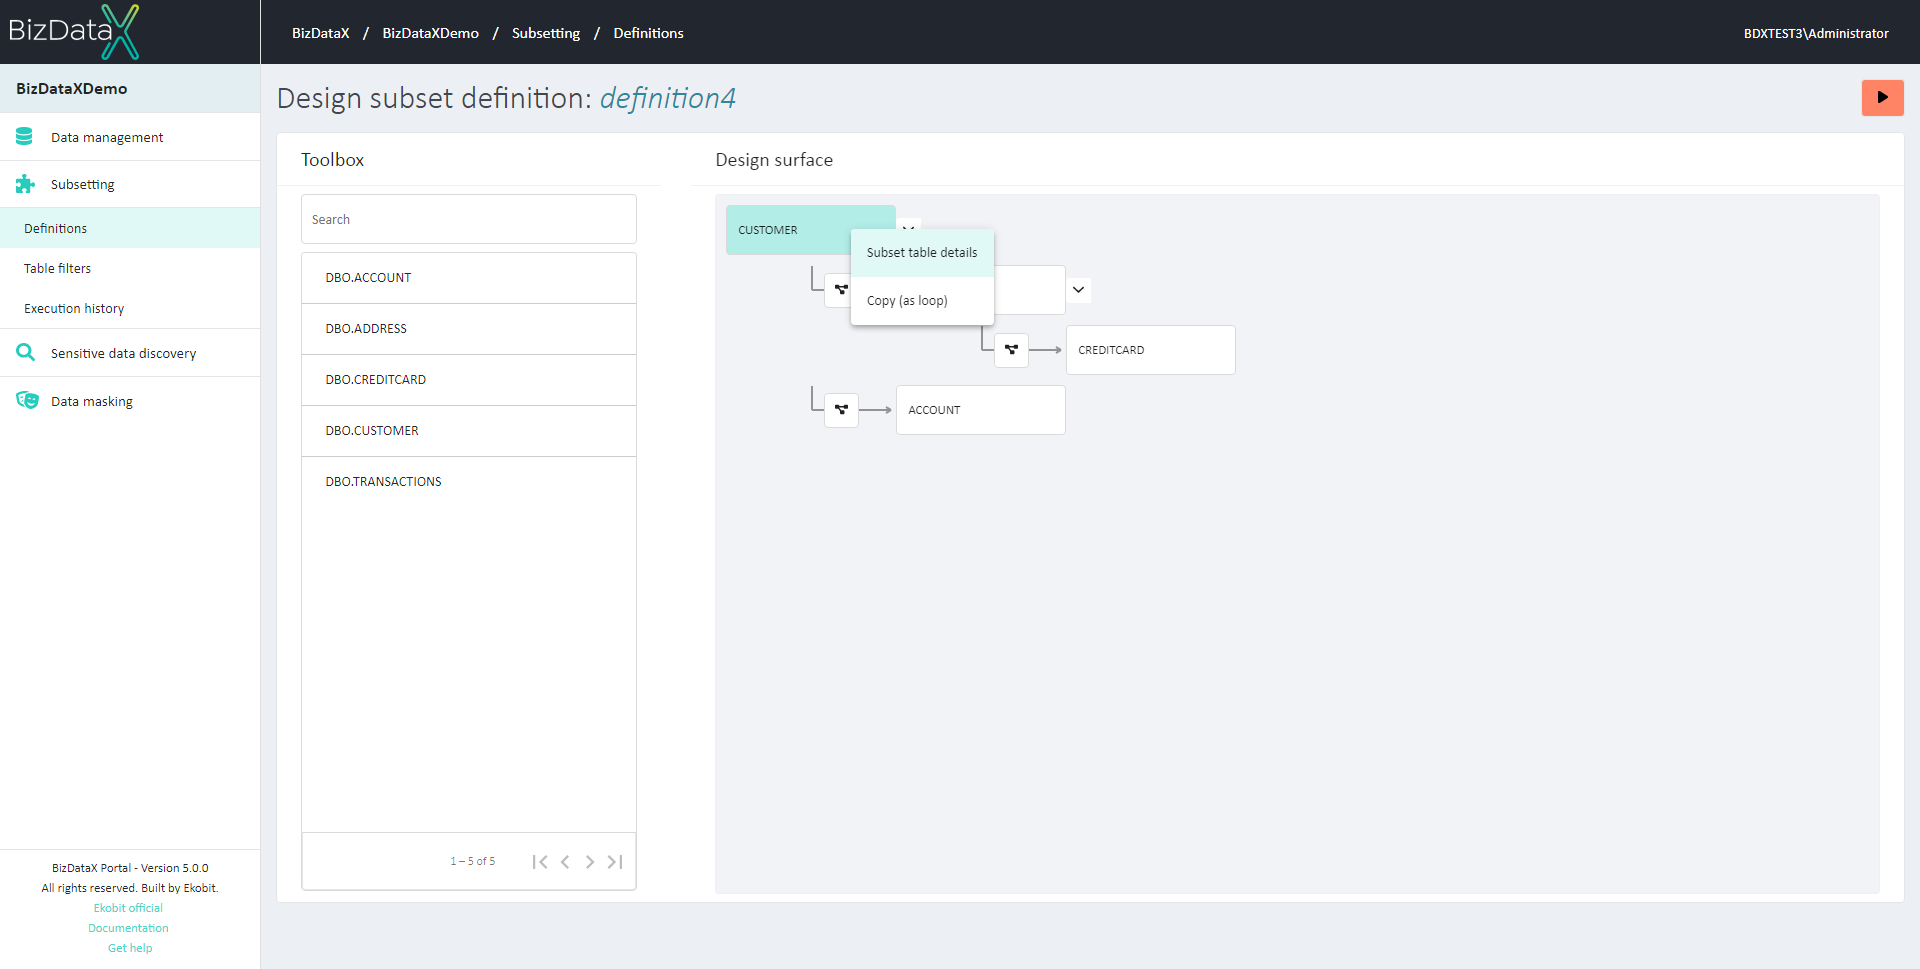 Figure 2: Subset Table Details
The following table details can be entered:
- Local custom filter criteria - In Local custom filter criteria, the user can write some custom criteria for the subset table. If a local custom filter exists Icon for Custom filter criteria will be shown on SubsetTable on the Design surface. E.g. 'COUNTRY_ID=’IT’'
- Global custom filter criteria - This field is protected and it represents global custom criteria if it is defined in ‘Subset table filters’. If the global filter is defined as "Custom" then replacement strategies are mandatory. Default replacement strategy is ‘Report error’.
- Primary key columns - A list of Primary key columns can be chosen from the lookup. When one primary key is chosen, it won’t be displayed in the next lookup. Duplicate primary keys are not supported.
 Figure 3: Subset Table Details
To confirm inserted custom filter criteria press the Confirm button or press the Cancel button to exit without saving changes.
Expand all nodes
By choosing ‘Expand all nodes’ on the right click on some table pop-up window this will expand all related tables which are under the selected table.
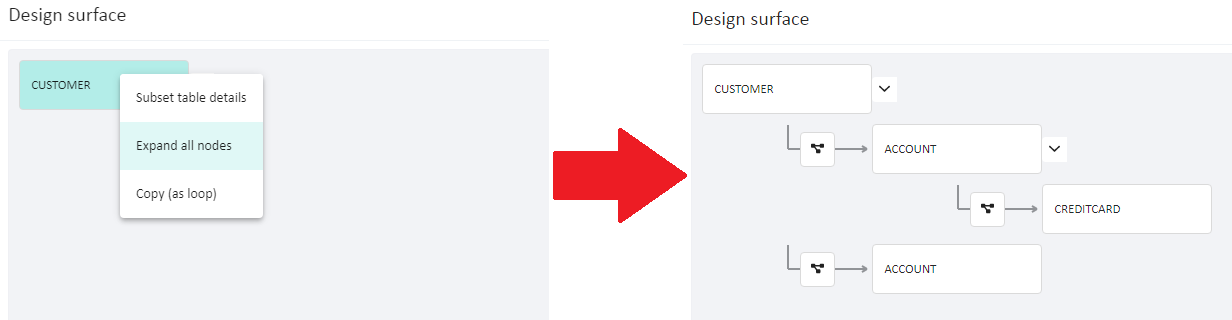 Figure 4: Expand all nodes
To expand all open child nodes, the user can also choose the Expand button:
 .
.
Copy and Paste (as a loop)
"Loop" relation is the relation that points to the existing tree element in the parent hierarchy (arrow pointing to the left and to above). Copy (as a loop) can be used as much as the user needs.
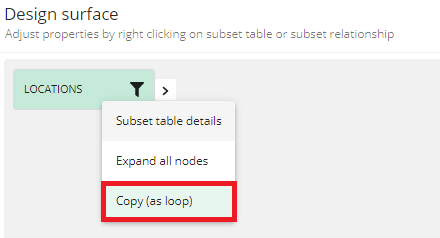 Figure 5: Copy As Loop
- When dragging an existing loop: the only drag which is supported is to delete the relation.
- Copy - Paste operation:
- Copy node is available for all nodes
- Paste node (after copy) is available ONLY on the starting node (copy node) or nodes that are in the parent hierarchy of the starting node (but not on child nodes and not on different tree branches)
- When selecting relationship loop node related tables will be "highlighted" in project color.
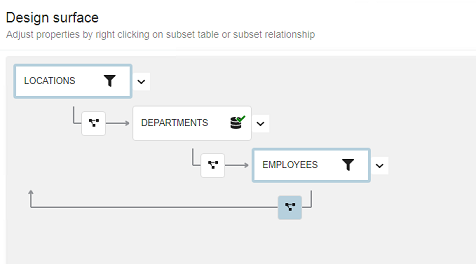 Figure 6: Loop
When a relationship or table is selected and highlighted, with the left key mouse pressing, it can be Deleted in two ways:
- By pressing ‘Delete’ on the keyboard
- By dragging the relationship or table to Toolbox
 Figure 7: Delete subset node
Subset relationship details
When the table is dragged user can adjust the relationship dialog. Relationship dialog between two tables is a line with the relationship button: 
By placing the mouse on the relationship button the relationship between the two tables is shown. On left-click the relationship node is colored as the selected node. Both the source and target table will be "highlighted" in the project color.
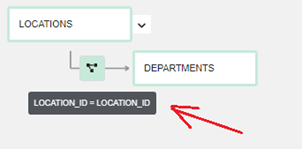 Figure 8: Subset Relationship between the two tables
Right-click on the relationship button, and a menu with one option opens: 'Subset relationship details' where the user can enter more details about the subset relationship.
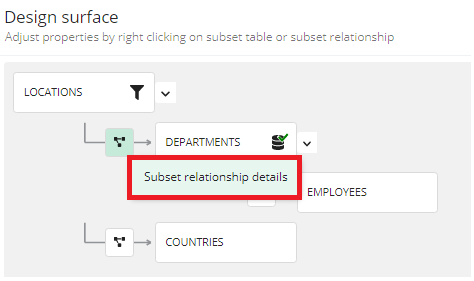 Figure 9: Subset Relationship
By selecting 'Subset relationship details', the pop-up window for viewing or defining Subset relationship details will be open.
The following relationship details can be entered:
RELATIONSHIP
Relationship - Possible relationship:
- Custom relationship
- possible relationship depends on chosen Subset relationship tables
Parent columns - If Parent columns exist they will be automatically entered. Users can also add Parent columns for the parent relationship table.
Child columns - If Child columns exist they will be automatically entered. Users can add Child columns for the child relationship table.
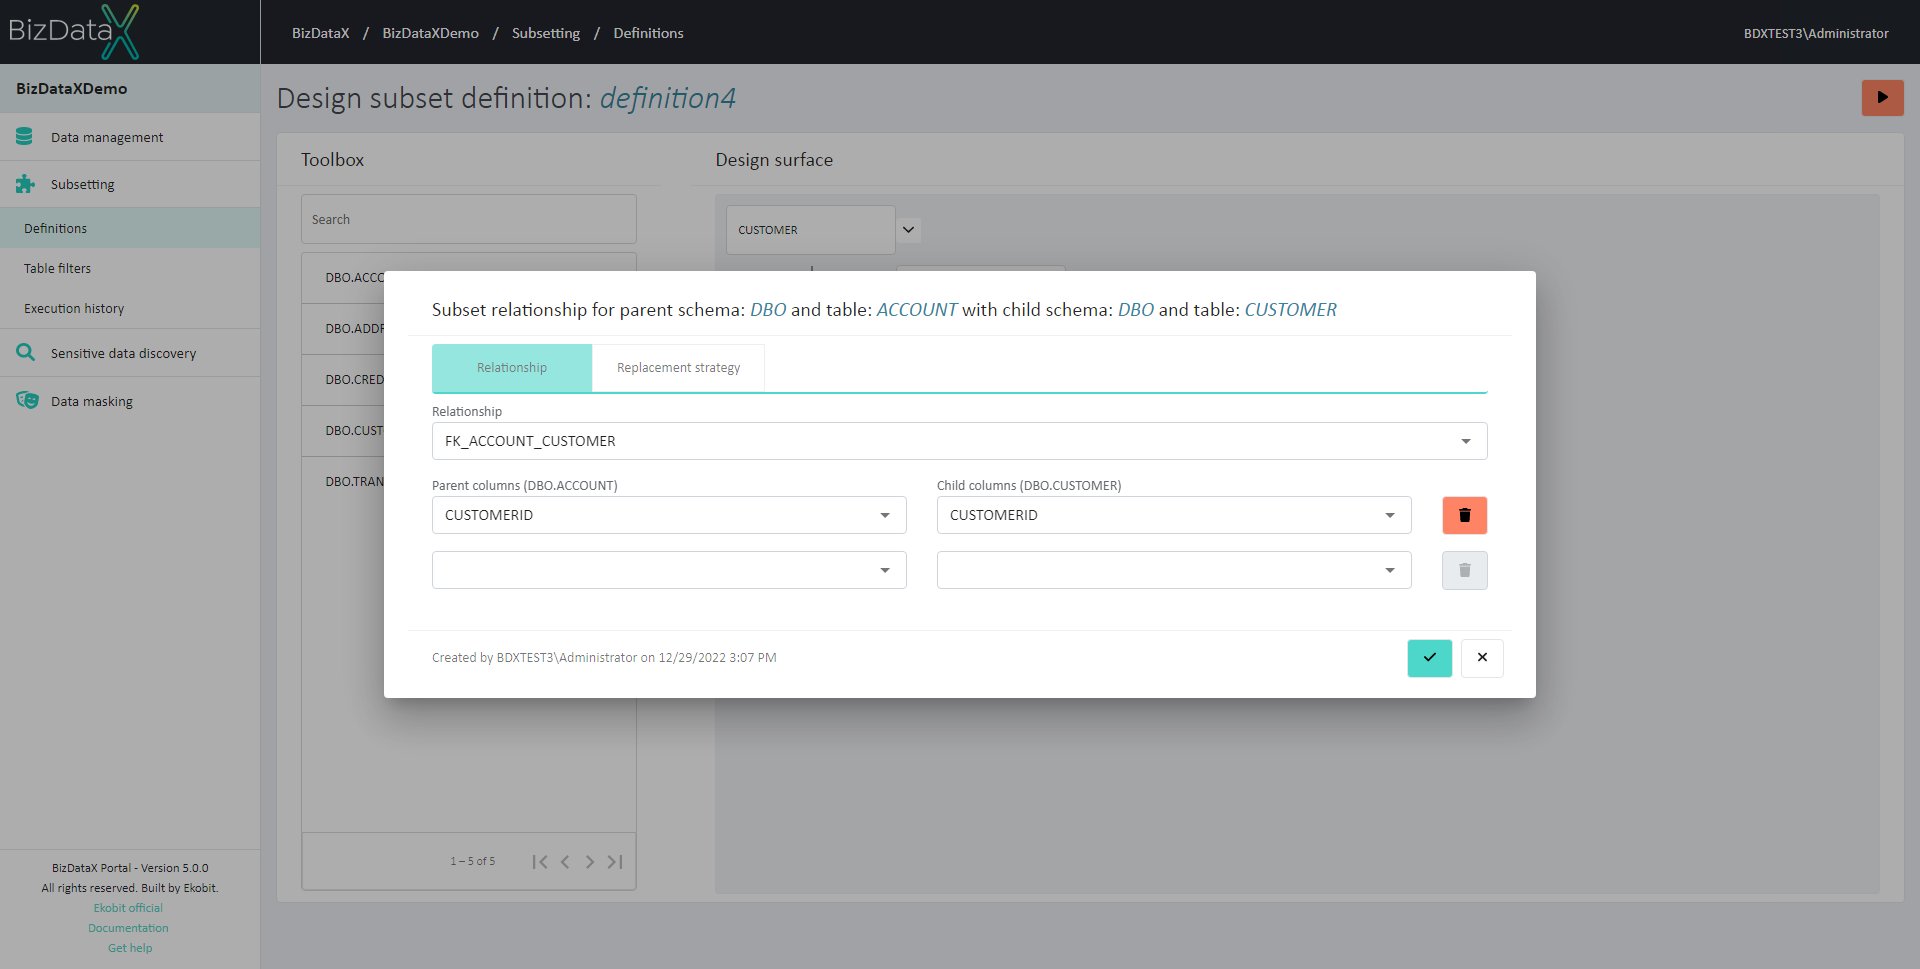 Figure 10: Subset Relationship
When selecting a new Parent-Child column relationship from the drop-down list, the system opens a new key entry row. If there are no more input options, all keys from the drop-down list are used, and a new relationship can no longer be added.
REPLACEMENT STRATEGY
Replacement strategy -The user can choose the following strategies:
- Report error - is the default value. Missing values will not be replaced, and errors will be reported. So, when ‘Execute subset’ is started, the system checks if there is any data that needs to be replaced (that references to records that are not in the subset). If there is any data that needs to be replaced execution will fail with an error on the 'VerifyExecution' step.
- Random value - Missing values will be replaced with the random value from the child table
- Constant value - Missing values will be replaced with a constant predefined value
- Value from list - - Missing values will be replaced with one of the predefined values from the list
- Values are entered in pairs depending on the list of parent-child columns in the Relationship tab
- column pairs from the "Relationship" tab are listed as headers (dynamic number of columns)
- values are listed as table rows: the user can edit the values entered in the text boxes
- In case the user wants to put a NULL value this can be done using ‘ALT + 0’
- The entered values are not validated and in case the user enters a value that does not exist in the child table, then there will be an error when executing the subset
Replacement values - If the Replacement strategy is ‘Report error’ or ‘Random value’, the Replacement value is protected and it is not mandatory. If the Replacement strategy is ‘Values from list’, Replacement values fields are open and the user must enter some constant value. In this case, the field is mandatory.
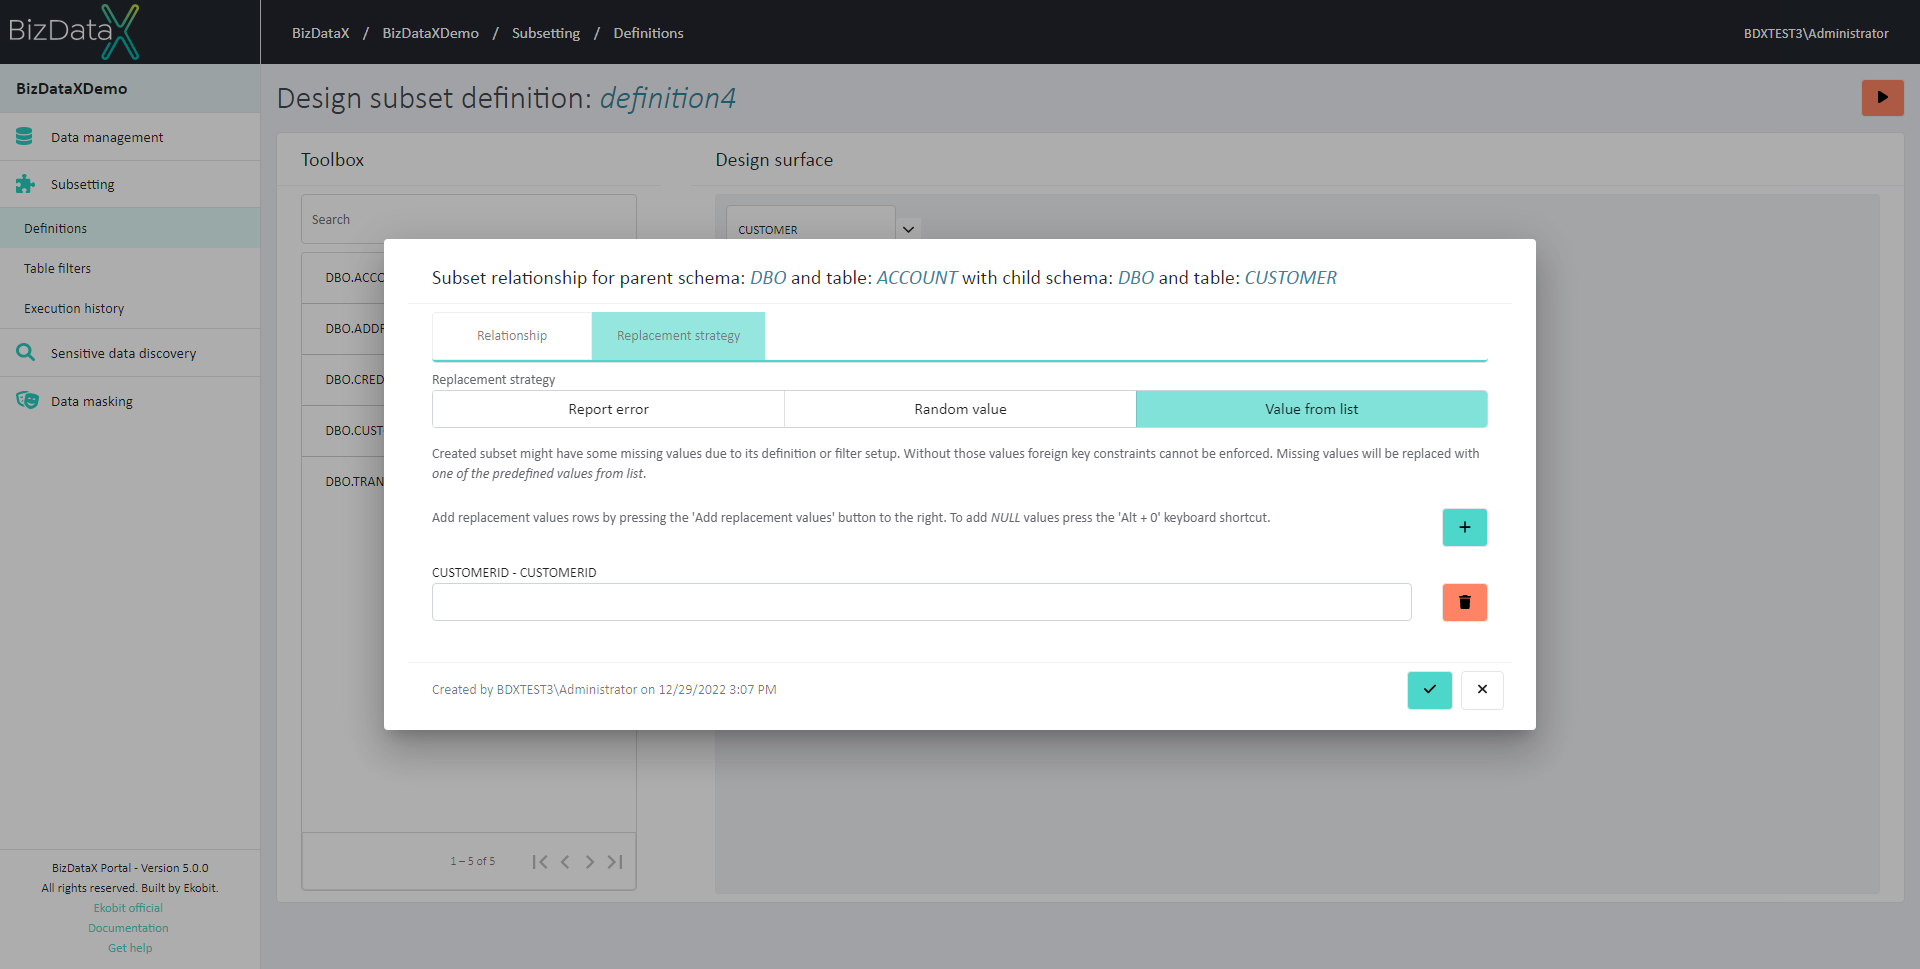 Figure 11: Replacement strategy
To delete entered values press the Delete button.
To confirm inserted relationship details press the Confirm button or press the Cancel button to exit without saving changes.
If no replacement value is added and the Execution subset definition is started this message will be shown: ‘Replacement strategy for the relationship ‘Parent-Child column names’ requires values.’
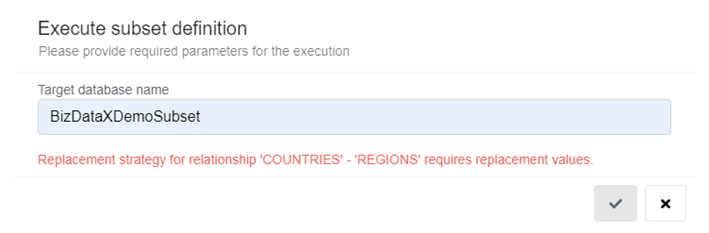 Figure 12: No Replacement strategy
Execute Subset Definition
When the Define Subset Definition is ready, the user can execute it by pressing the Execute button. This will open the Subset Execution Parameters pop-up window. (Figure8) where the user must enter the Target database name.
- To start execution press Confirm button.
- To cancel execution press Cancel button
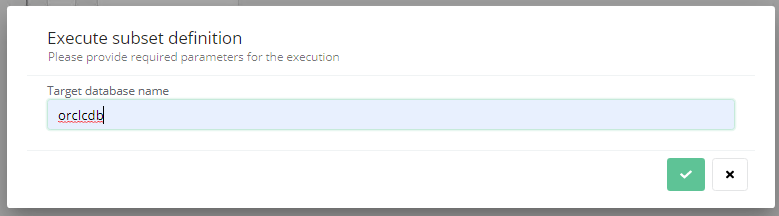 Figure 13: Execute Subset Definition