- BizDataX
- Installation guide
- Requirements
- BizDataX Designer installation
- BizDataX Designer version upgrade
- BizDataX Designer advanced settings
- BizDataX Portal installation
- BizDataX Portal version upgrade
- BizDataX Portal advanced settings
- NuGet packages installation
- Start guide
- Creating a data model (BizDataX Portal)
- Finding sensitive data
- Creating a new Visual Studio BizDataX project
- Creating a data model (BizDataX Designer)
- Creating a simple masking flow
- Creating a simple masking on Portal
- Publishing package to BizDataX Portal
- Executing package
- BizDataX Portal
- User manual
- Home
- Project Dashboard
- Data management
- Subsetting
- Sensitive data Discovery
- Data masking
- Design Data Masking Plan
- Functions
- BizDataX Designer
- Workflow
- Creating a new Visual Studio BizDataX project
- User interface elements
- Creating a data model
- Toolbox items
- Masking activities
- BizDataX Masking Control Flow
- BizDataX Country BE
- BizDataX Country CH
- Generate AHV (Sozialversicherungsnummer)
- Generate CH IBAN
- Pick CH address from list
- Pick CH bank from list
- Pick CH company from list
- Pick CH first name from list
- Pick CH last name from list
- Pick CH place from list
- Pick CH street from list
- BizDataX Country DE
- Generate DE IBAN
- Pick DE address from list
- Pick DE bank from list
- Pick DE company from list
- Pick DE first name from list
- Pick DE last name from list
- Pick DE place from list
- Pick DE street from list
- BizDataX Country HR
- Generate HR bank account
- Generate HR BBAN
- Generate HR IBAN
- Generate JMBG
- Generate maticni broj
- Generate OIB
- Generate porezni broj
- Pick HR address from list
- Pick HR bank from list
- Pick HR company from list
- Pick HR first name from list
- Pick HR last name from list
- Pick HR place from list
- Pick HR street from list
- BizDataX Country US
- Generate US SSN
- Pick US address from list
- Pick US company from list
- Pick US first name from list
- Pick US last name from list
- Pick US place from list
- Pick US street from list
- BizDataX Data Processing
- BizDataX Database
- BizDataX Generators
- Generate and convert
- Generate and convert to number
- Generate and convert to text
- Generate business name
- Generate credit card number
- Generate date
- Generate date in range
- Generate decimal number in range
- Generate double number in range
- Generate Email
- Generate fixed digit number
- Generate IBAN
- Generate items
- Generate items in random order
- Generate number in range
- Generate number sequence
- Generate numbered string
- Generate PAN
- Generate phone number
- Generate text
- Generate value
- BizDataX Monitoring
- BizDataX Pick Data From List
- Pick address from list
- Pick bank from list
- Pick company from list
- Pick first name from list
- Pick last name from list
- Pick place from list
- Pick street from list
- Pick value from list
- BizDataX Primitives
- API masking
- Assign date
- Assign number
- Assign text
- Assign value
- Clear value
- Evaluate date function
- Evaluate function
- Evaluate numeric function
- Evaluate text function
- Format properties
- BizDataX Repeating
- Assign repeating value
- Clear repeater
- Load repeaters
- Load single repeater
- Repeating of any value condition branch
- Repeating of boolean condition branch
- Repeating of date condition branch
- Repeating of number condition branch
- Repeating of text condition branch
- Save repeaters
- Save single repeater
- Set any repeating value
- Set boolean repeating value
- Set date repeating value
- Set number repeating value
- Set text repeating value
- Fluent Handler API
- Package steps
- Package parameters
- Publishing package to BizDataX Portal
- Package execution
- Masking-examples
- Logging
- Functions
- Custom code
- Picklists
- Addresses
- Banks
- Business suffixes
- Companies
- Domain names
- First names
- Last names
- Phone codes
- Places
- Streets
- Data generators
- Lambda expressions
- Synthetic data generation
- Repeaters
- Restartability
- Masking conditioned by data from related entities
- File masking
- Advanced
- Supported data sets
- Oracle
- Oracle database analyzer
- Oracle database handler
- Repeaters persistence
- Restartability store configuration
- Oracle database subsetting
- Microsoft SQL Server
- SQL Server database analyzer
- SQL Server database handler
- Repeaters persistence
- Restartability store configuration
- DB2
- Informix
- Sybase
- PostgreSQL
- Glossary
- Release notes
Step 2 - Define maskings
The second step of designing a Data masking plan is assigning values to columns selected in Step 1, which will define how masking will be done.
| Table of contents |
|---|
| Selecting a Table to mask |
| Column details |
| Assigning values |
| Generator outputs (basic) |
| Constants |
| Function |
| Continuing to the next step |
Selecting a Table to mask
A list of loaded Tables for each Data source is located on the left. The Search field, above the list of tables, can be used to search for a specific table.
The right side of the screen displays a list of loaded Columns when a certain Table is selected.
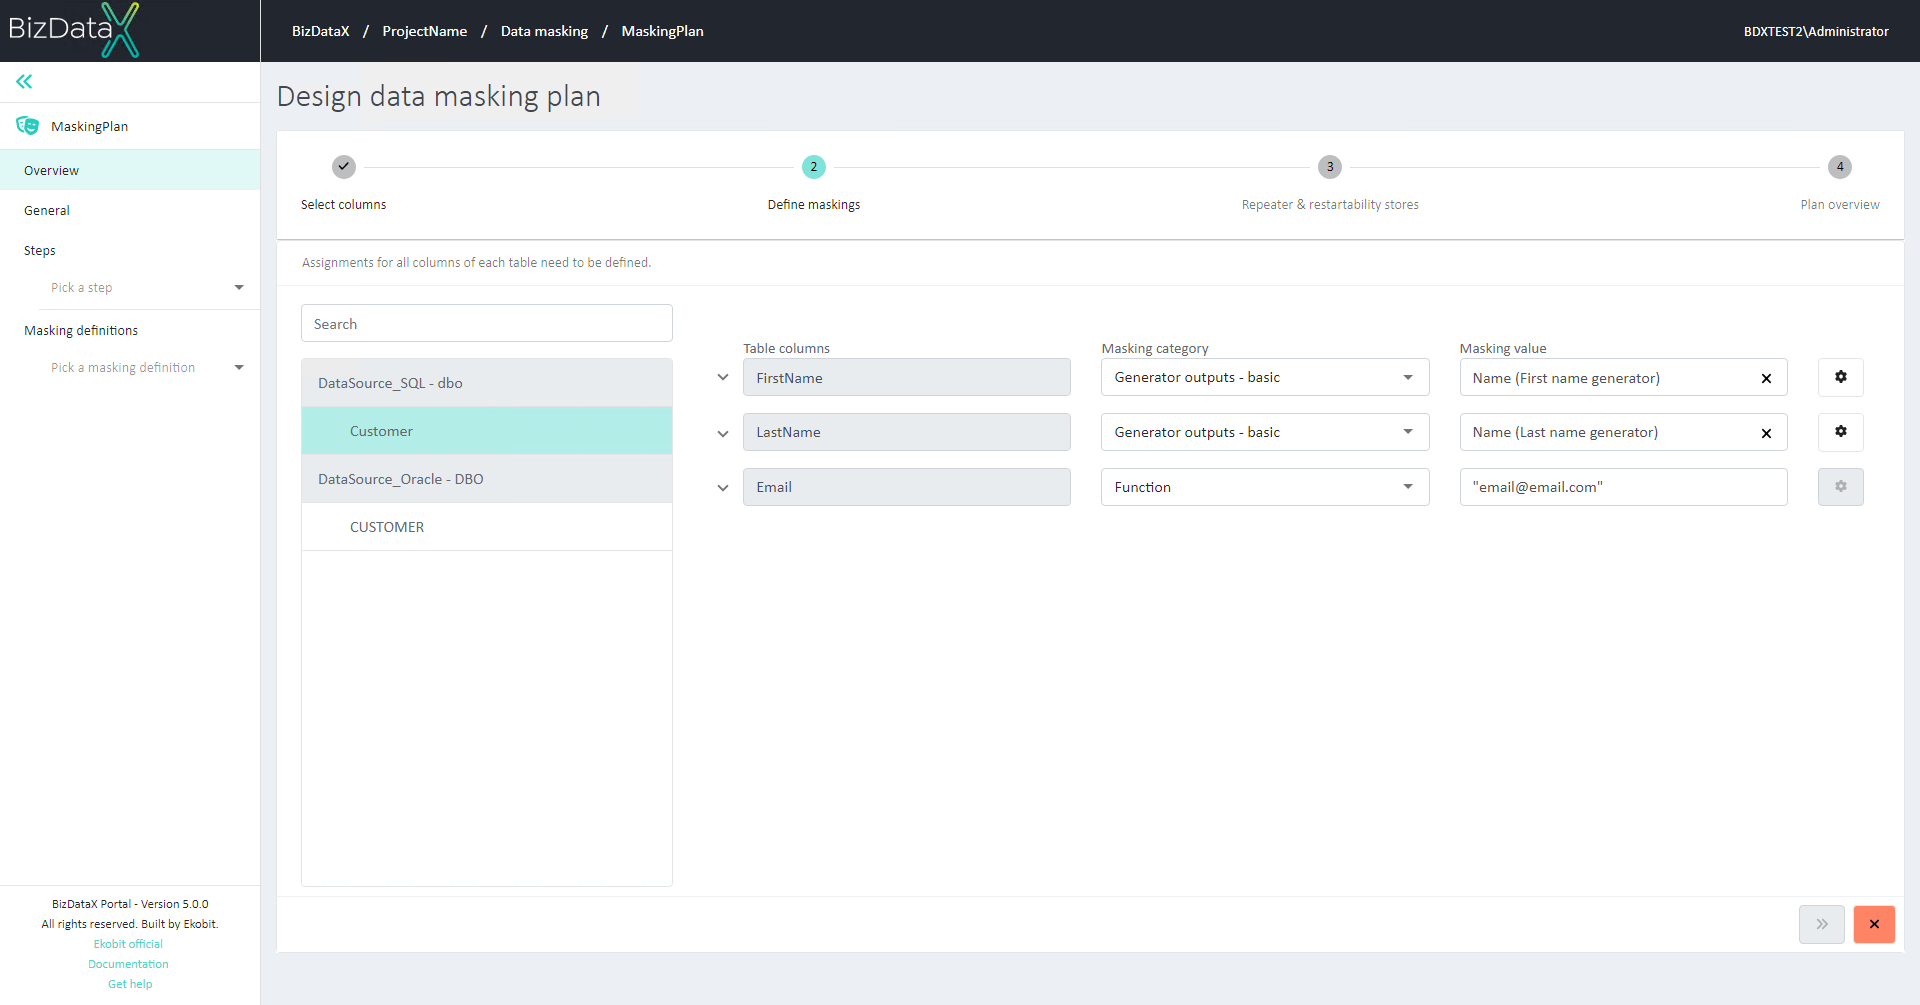 Figure 1: Step 2 - Selecting a table to mask
Column details
Column details can be opened by selecting the arrow buttons next to the column name. It will show:
- Primary key - indicates whether the selected Column is a Primary key.
- Is nullable - indicates whether the selected Column is nullable.
- Database type - indicates to which type of database the selected Column belongs to.
- CLR type - indicates to which Common Language Runtime type is Column type mapped to.
 Figure 2: Step 2 - Column details
Assigning values
A Masking category and a Masking value must be defined for each of the loaded Columns.
Possible Masking categories are:
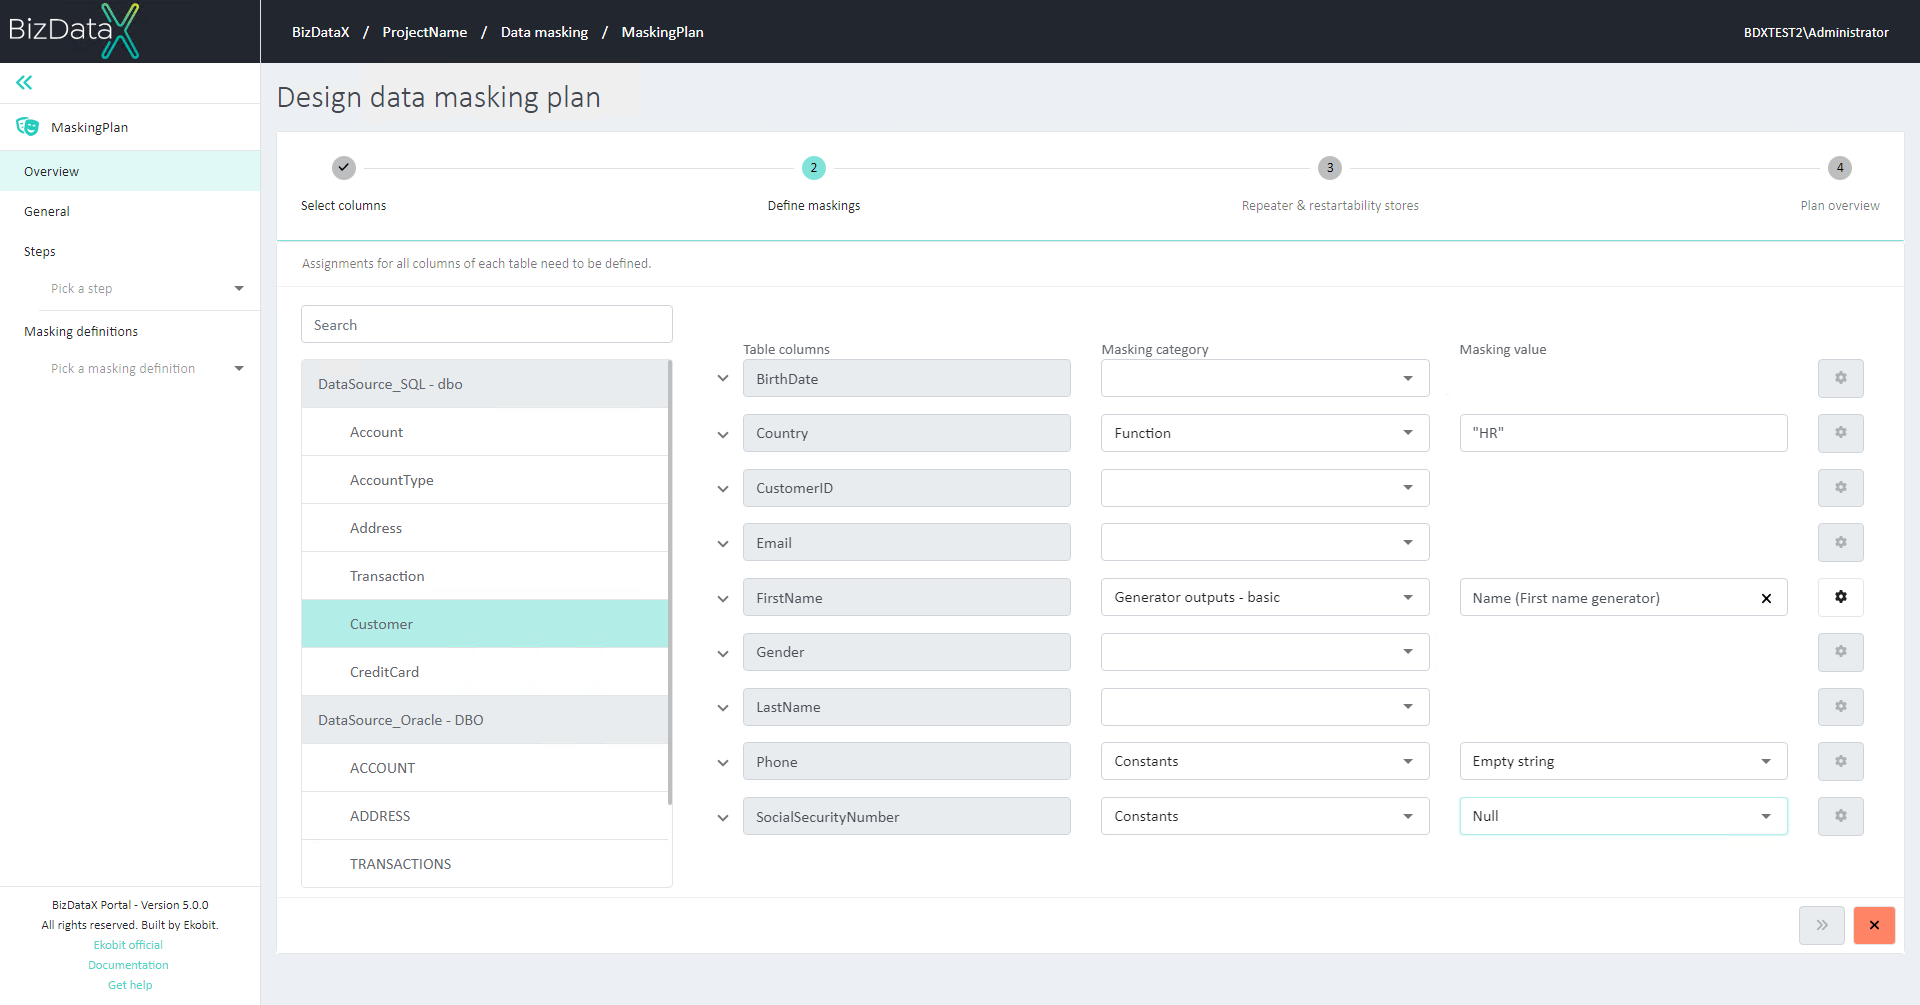 Figure 3: Assigning values
Generator outputs (basic)
Generator outputs are values that are generated using Add-on generators.
If "Generator outputs - basic" is selected as Masking category, "Generator details" button is enabled for that row. By clicking on it, a pop-up window for configuring Generator details is displayed. The user can define:
Is repeatable - if repeater will be used for that Generator. Options:
- Yes - Repeaters will be used. Additional fields for defining Repeater keys are displayed next to each Generator input. The user defines what inputs will be used as Repeater keys by clicking on 'YES' next to the input they want to use as Repeater key.
- No - Repeaters will not be used.
Details about the Generator - the user can additionally configure what values will be used as input values for Generator.
Generator input - automatically displays name and type of Generator input. Read-only.
Input category - possible options are:
- Ignore input - Generator will not use any specific input while generating data
- Constants - Generator input will be set to predefined value that cannot be changed during execution.
- Function - Generator input will be calculated using this function.
- Table columns - Table column value will be forwarded to Generator as input.
Input value - specifies value that will be used as input value when generating data:
- if Constants was chosen - available options are Null and Empty string
- if Function was chosen - the user can provide custom code into the input field. If simple string constant is provided it should be enclosed inside double quotes (" "). Numbers or dates don't have to be enclosed.
- if Table columns was chosen - available options are all columns of the currently selected Table. Generator will use values from that Column as input when generating data.
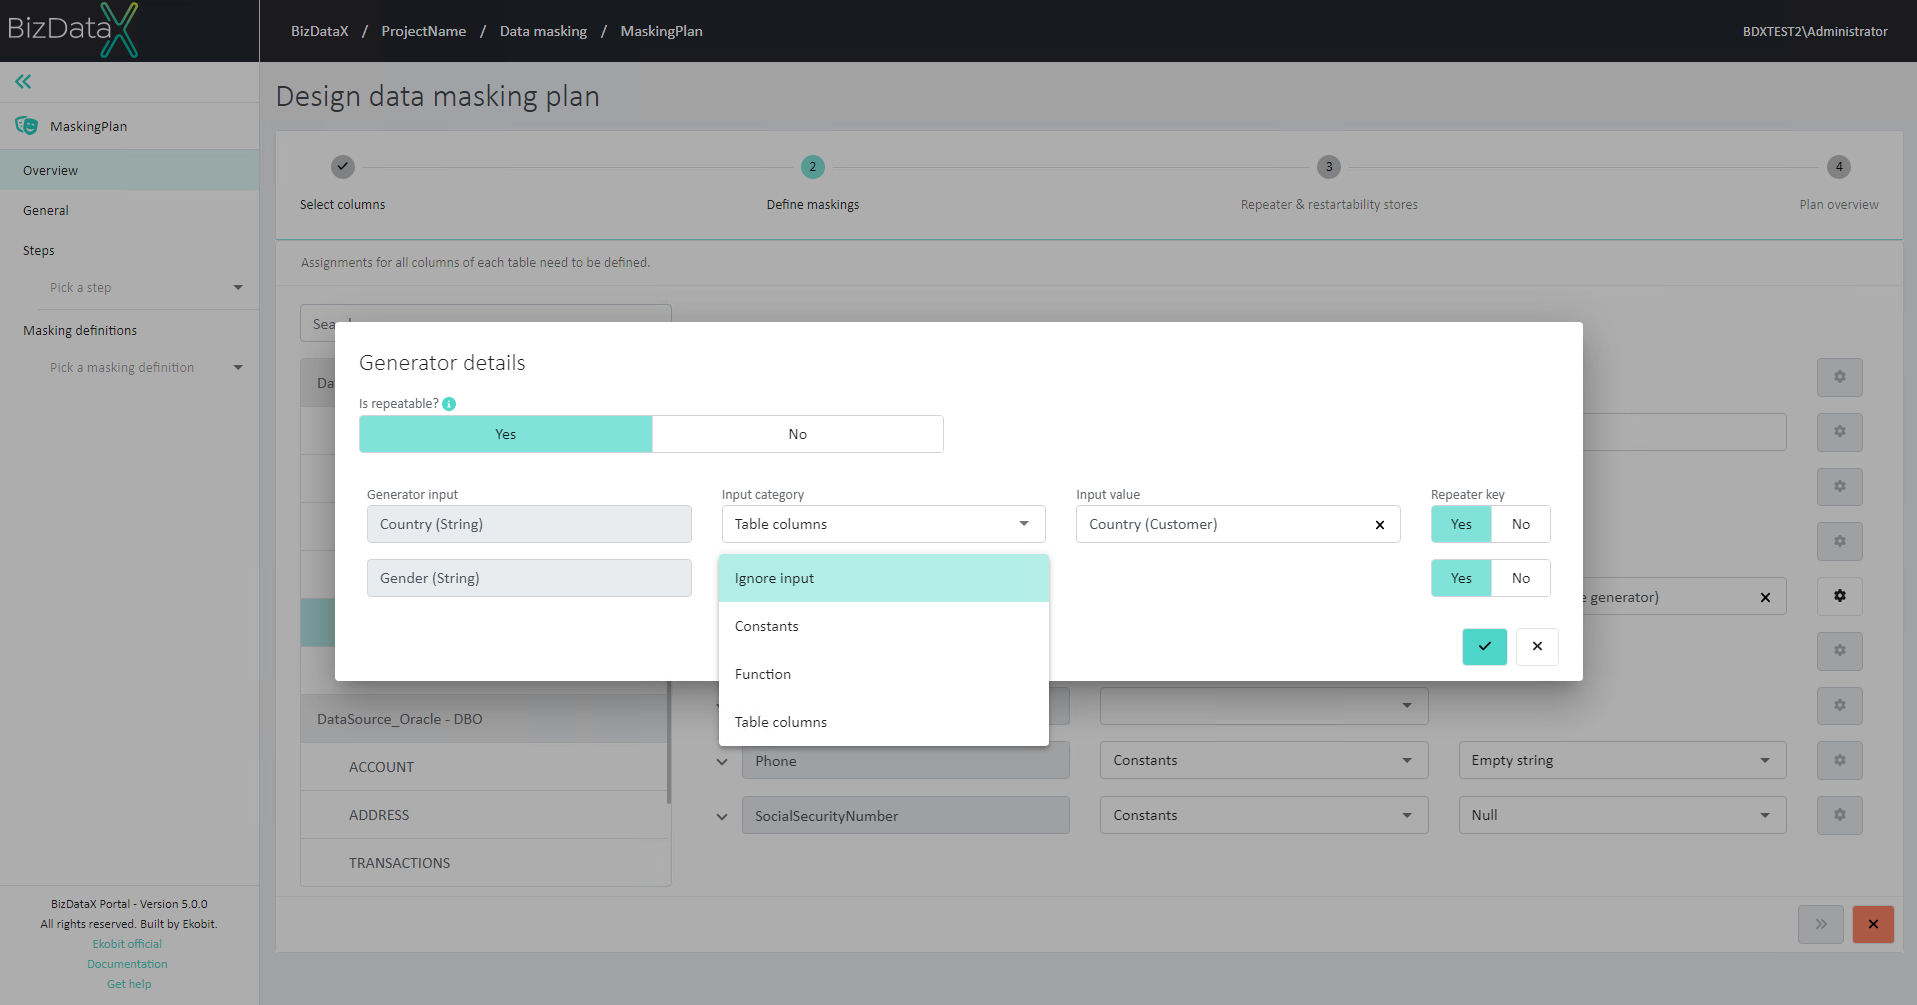 Figure 4: Generator details
Constants
Constants can be used as Masking category.
Possible Masking values for that Masking category are:
Null
Empty string.
Function
If no predefined Masking values or categories fulfill wanted behaviour, the user can choose 'Function' Masking category which allows them to provide custom C# code, or custom values (string).
If simple string constant is provided it should be enclosed inside double quotes (" "). Numbers or dates don't have to be enclosed.
Examples:
    GeneratorOutputs [FirstNameGenerator][Name]
    "John Doe" (string input)
    20 (number input)
    01.01.2000 (date input)
Continuing to the next step
Assignments for all columns of each table need to be defined for user to be able to continue to the next step of the Wizard (Step 3 - Repeater and Restartability stores). The 'Next step' button will be disabled until all Columns have assigned Masking value.
To cancel the process of designing a data masking plan, the user can click on the 'Cancel' button at any time.
BizDataX Documentation © Built by Ekobit. All rights reserved.
https://www.ekobit.com/ https://bizdatax.com/ https://bizdatax.com/support/