- BizDataX
- Installation guide
- Requirements
- BizDataX Designer installation
- BizDataX Designer version upgrade
- BizDataX Designer advanced settings
- BizDataX Portal installation
- BizDataX Portal version upgrade
- BizDataX Portal advanced settings
- NuGet packages installation
- Start guide
- Creating a data model (BizDataX Portal)
- Finding sensitive data
- Creating a new Visual Studio BizDataX project
- Creating a data model (BizDataX Designer)
- Creating a simple masking flow
- Creating a simple masking on Portal
- Publishing package to BizDataX Portal
- Executing package
- BizDataX Portal
- User manual
- Home
- Project Dashboard
- Data management
- Subsetting
- Sensitive data Discovery
- Data masking
- Design Data Masking Plan
- Functions
- BizDataX Designer
- Workflow
- Creating a new Visual Studio BizDataX project
- User interface elements
- Creating a data model
- Toolbox items
- Masking activities
- BizDataX Masking Control Flow
- BizDataX Country BE
- BizDataX Country CH
- Generate AHV (Sozialversicherungsnummer)
- Generate CH IBAN
- Pick CH address from list
- Pick CH bank from list
- Pick CH company from list
- Pick CH first name from list
- Pick CH last name from list
- Pick CH place from list
- Pick CH street from list
- BizDataX Country DE
- Generate DE IBAN
- Pick DE address from list
- Pick DE bank from list
- Pick DE company from list
- Pick DE first name from list
- Pick DE last name from list
- Pick DE place from list
- Pick DE street from list
- BizDataX Country HR
- Generate HR bank account
- Generate HR BBAN
- Generate HR IBAN
- Generate JMBG
- Generate maticni broj
- Generate OIB
- Generate porezni broj
- Pick HR address from list
- Pick HR bank from list
- Pick HR company from list
- Pick HR first name from list
- Pick HR last name from list
- Pick HR place from list
- Pick HR street from list
- BizDataX Country US
- Generate US SSN
- Pick US address from list
- Pick US company from list
- Pick US first name from list
- Pick US last name from list
- Pick US place from list
- Pick US street from list
- BizDataX Data Processing
- BizDataX Database
- BizDataX Generators
- Generate and convert
- Generate and convert to number
- Generate and convert to text
- Generate business name
- Generate credit card number
- Generate date
- Generate date in range
- Generate decimal number in range
- Generate double number in range
- Generate Email
- Generate fixed digit number
- Generate IBAN
- Generate items
- Generate items in random order
- Generate number in range
- Generate number sequence
- Generate numbered string
- Generate PAN
- Generate phone number
- Generate text
- Generate value
- BizDataX Monitoring
- BizDataX Pick Data From List
- Pick address from list
- Pick bank from list
- Pick company from list
- Pick first name from list
- Pick last name from list
- Pick place from list
- Pick street from list
- Pick value from list
- BizDataX Primitives
- API masking
- Assign date
- Assign number
- Assign text
- Assign value
- Clear value
- Evaluate date function
- Evaluate function
- Evaluate numeric function
- Evaluate text function
- Format properties
- BizDataX Repeating
- Assign repeating value
- Clear repeater
- Load repeaters
- Load single repeater
- Repeating of any value condition branch
- Repeating of boolean condition branch
- Repeating of date condition branch
- Repeating of number condition branch
- Repeating of text condition branch
- Save repeaters
- Save single repeater
- Set any repeating value
- Set boolean repeating value
- Set date repeating value
- Set number repeating value
- Set text repeating value
- Fluent Handler API
- Package steps
- Package parameters
- Publishing package to BizDataX Portal
- Package execution
- Masking-examples
- Logging
- Functions
- Custom code
- Picklists
- Addresses
- Banks
- Business suffixes
- Companies
- Domain names
- First names
- Last names
- Phone codes
- Places
- Streets
- Data generators
- Lambda expressions
- Synthetic data generation
- Repeaters
- Restartability
- Masking conditioned by data from related entities
- File masking
- Advanced
- Supported data sets
- Oracle
- Oracle database analyzer
- Oracle database handler
- Repeaters persistence
- Restartability store configuration
- Oracle database subsetting
- Microsoft SQL Server
- SQL Server database analyzer
- SQL Server database handler
- Repeaters persistence
- Restartability store configuration
- DB2
- Informix
- Sybase
- PostgreSQL
- Glossary
- Release notes
Step 1 - Select columns
The first step of designing a Data masking plan is to Select columns. On this page, the user can select columns to mask from all previously imported Data sources in Data management.
| Table of contents |
|---|
| Selecting columns |
| Advanced options |
| Continuing to the next step |
Selecting columns
The user selects Columns they want to mask by using checkboxes. At least one Column must be selected for the user to be able to continue to the next step.
Upon starting the Wizard, the hierarchy tree is displayed. It shows all created Data sources and corresponding Schemas, Tables and Columns. Different levels can be displayed by using the arrows for expanding and collapsing the level.
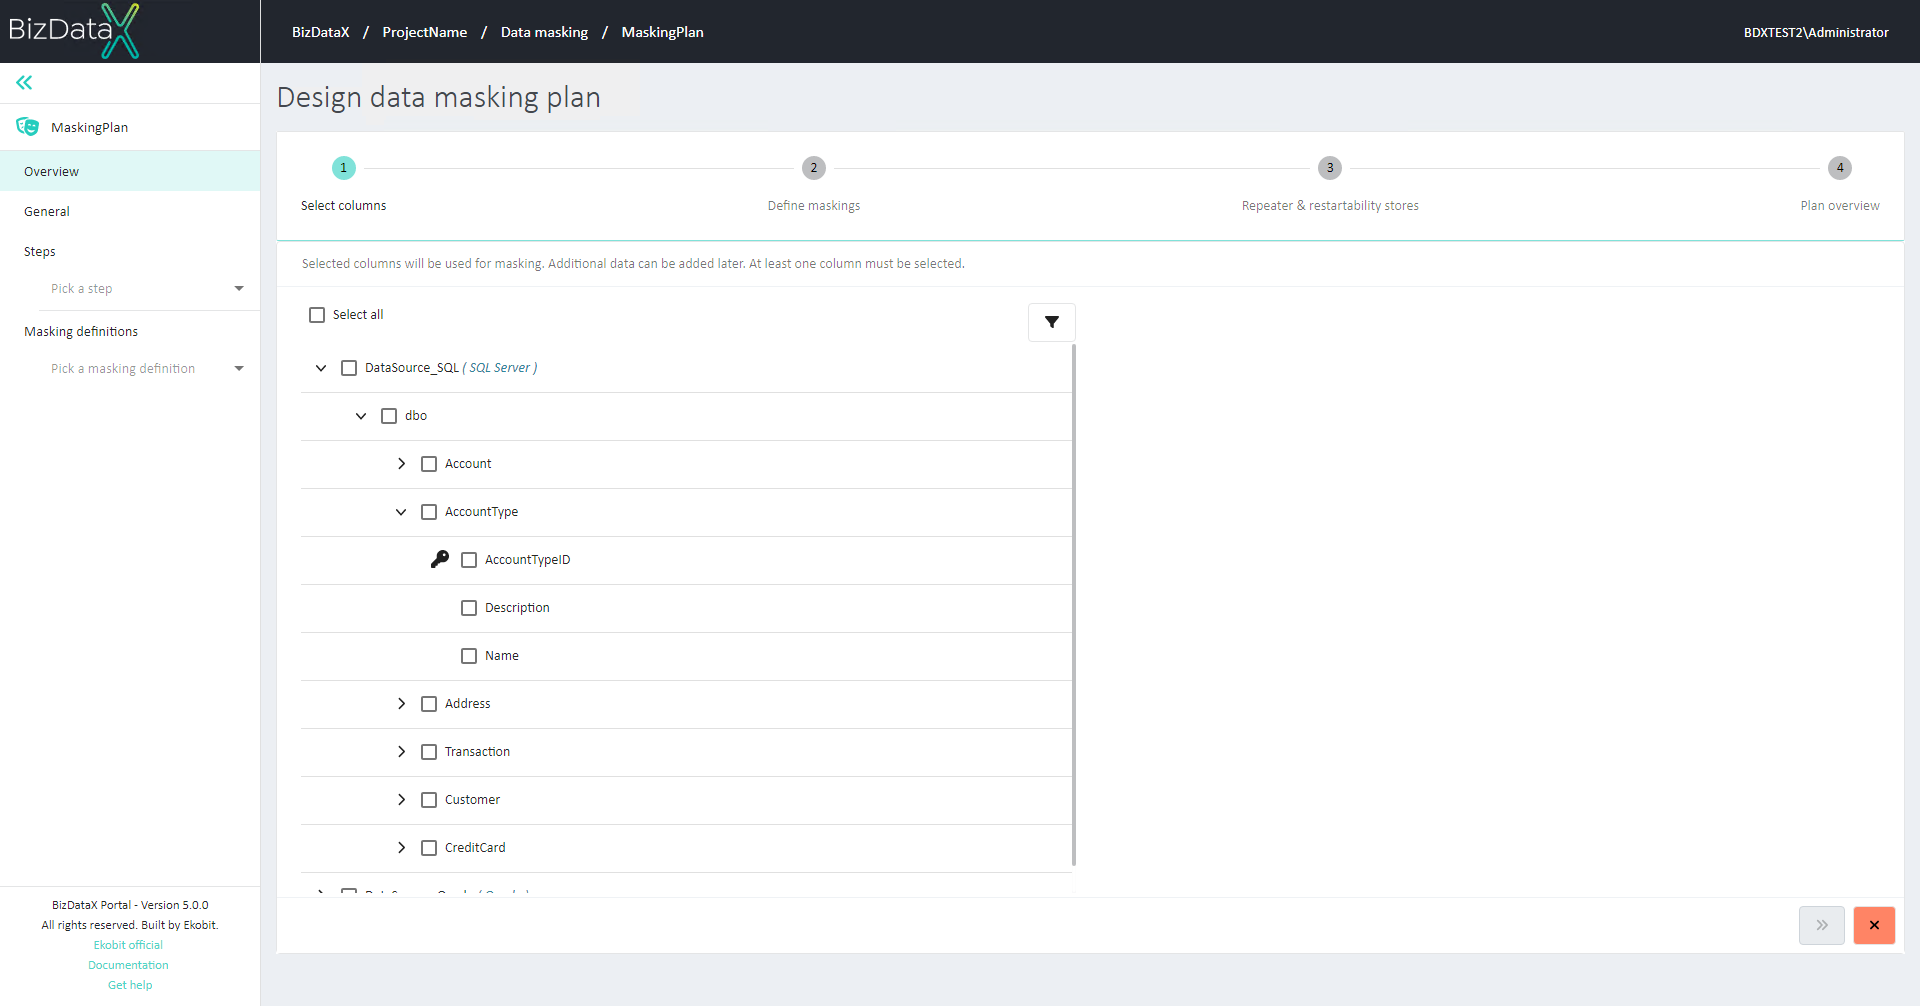 Figure 1: Step 1 - Select columns
All columns from all imported Data sources can be selected at once by clicking the 'Select all' button above the hierarchy tree.
All columns of the specific Table, Schema or Data source can be selected at once by selecting the checkbox next to the name of the Table, Schema or Data source.
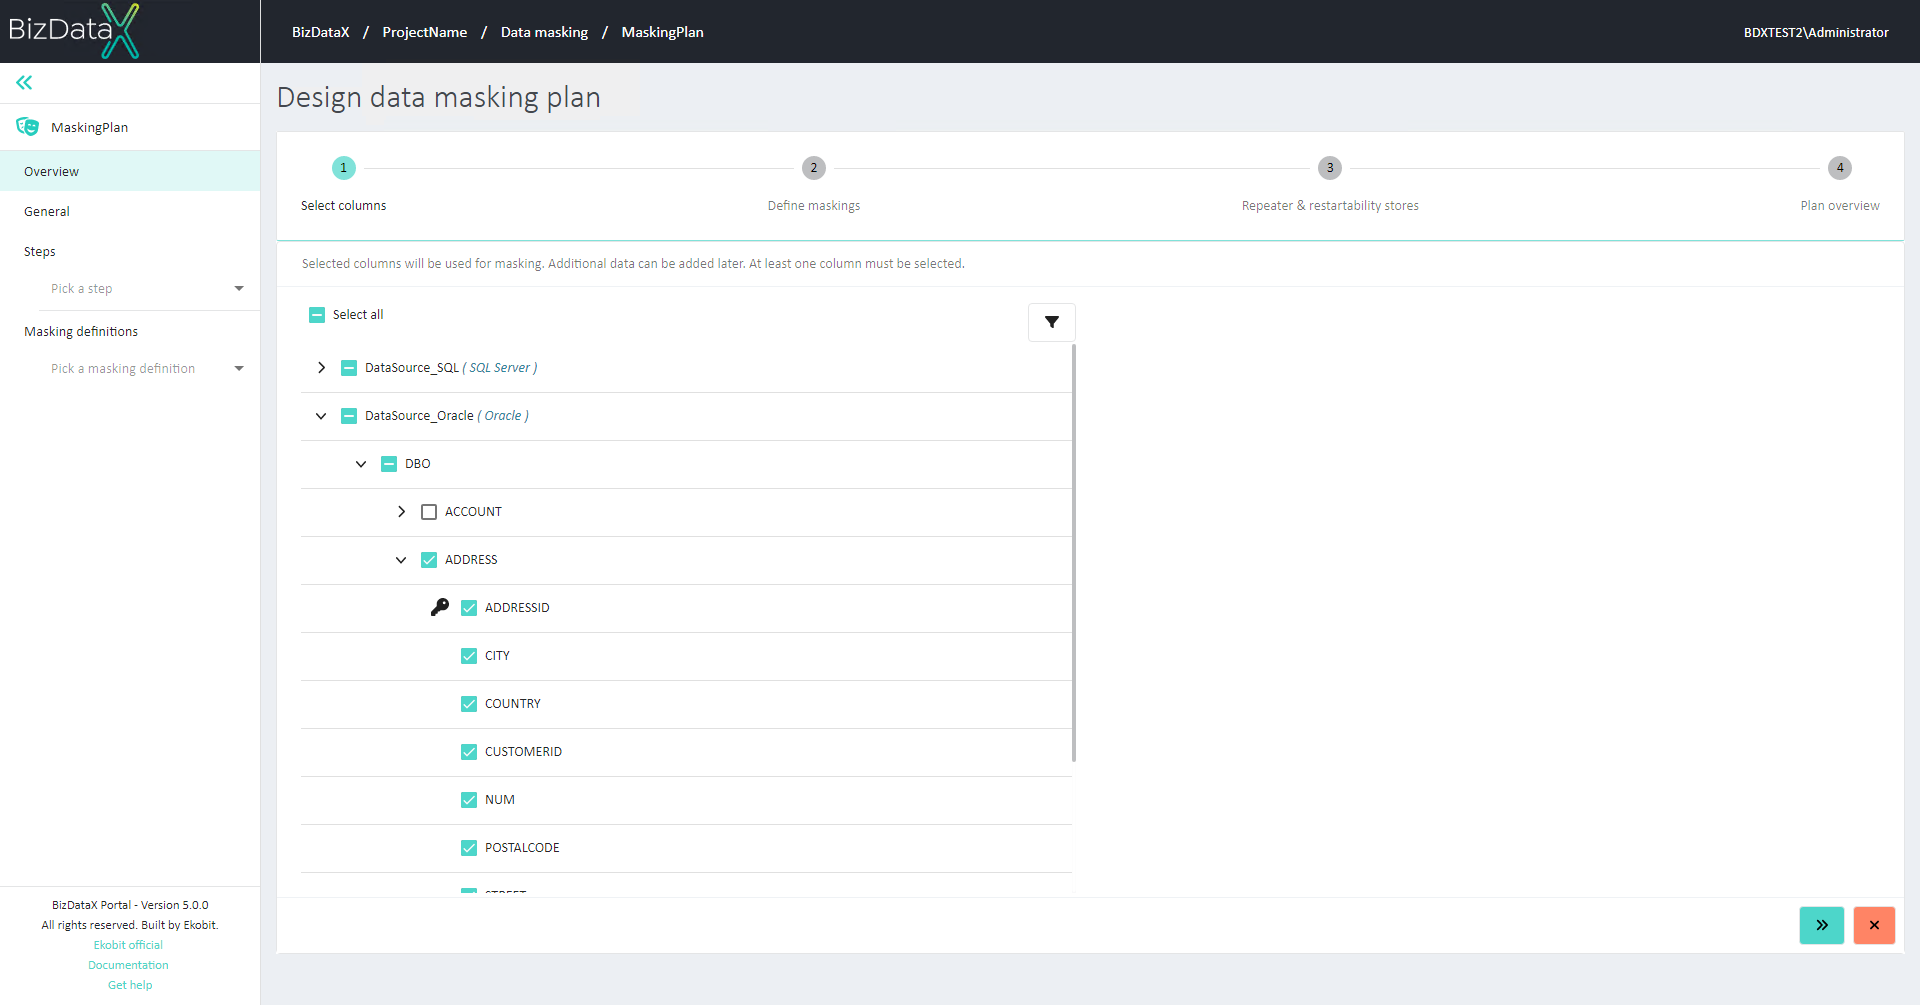 Figure 2: Selected all Columns of one Table
A black key icon appears to the left of the column name if the column is a primary key.
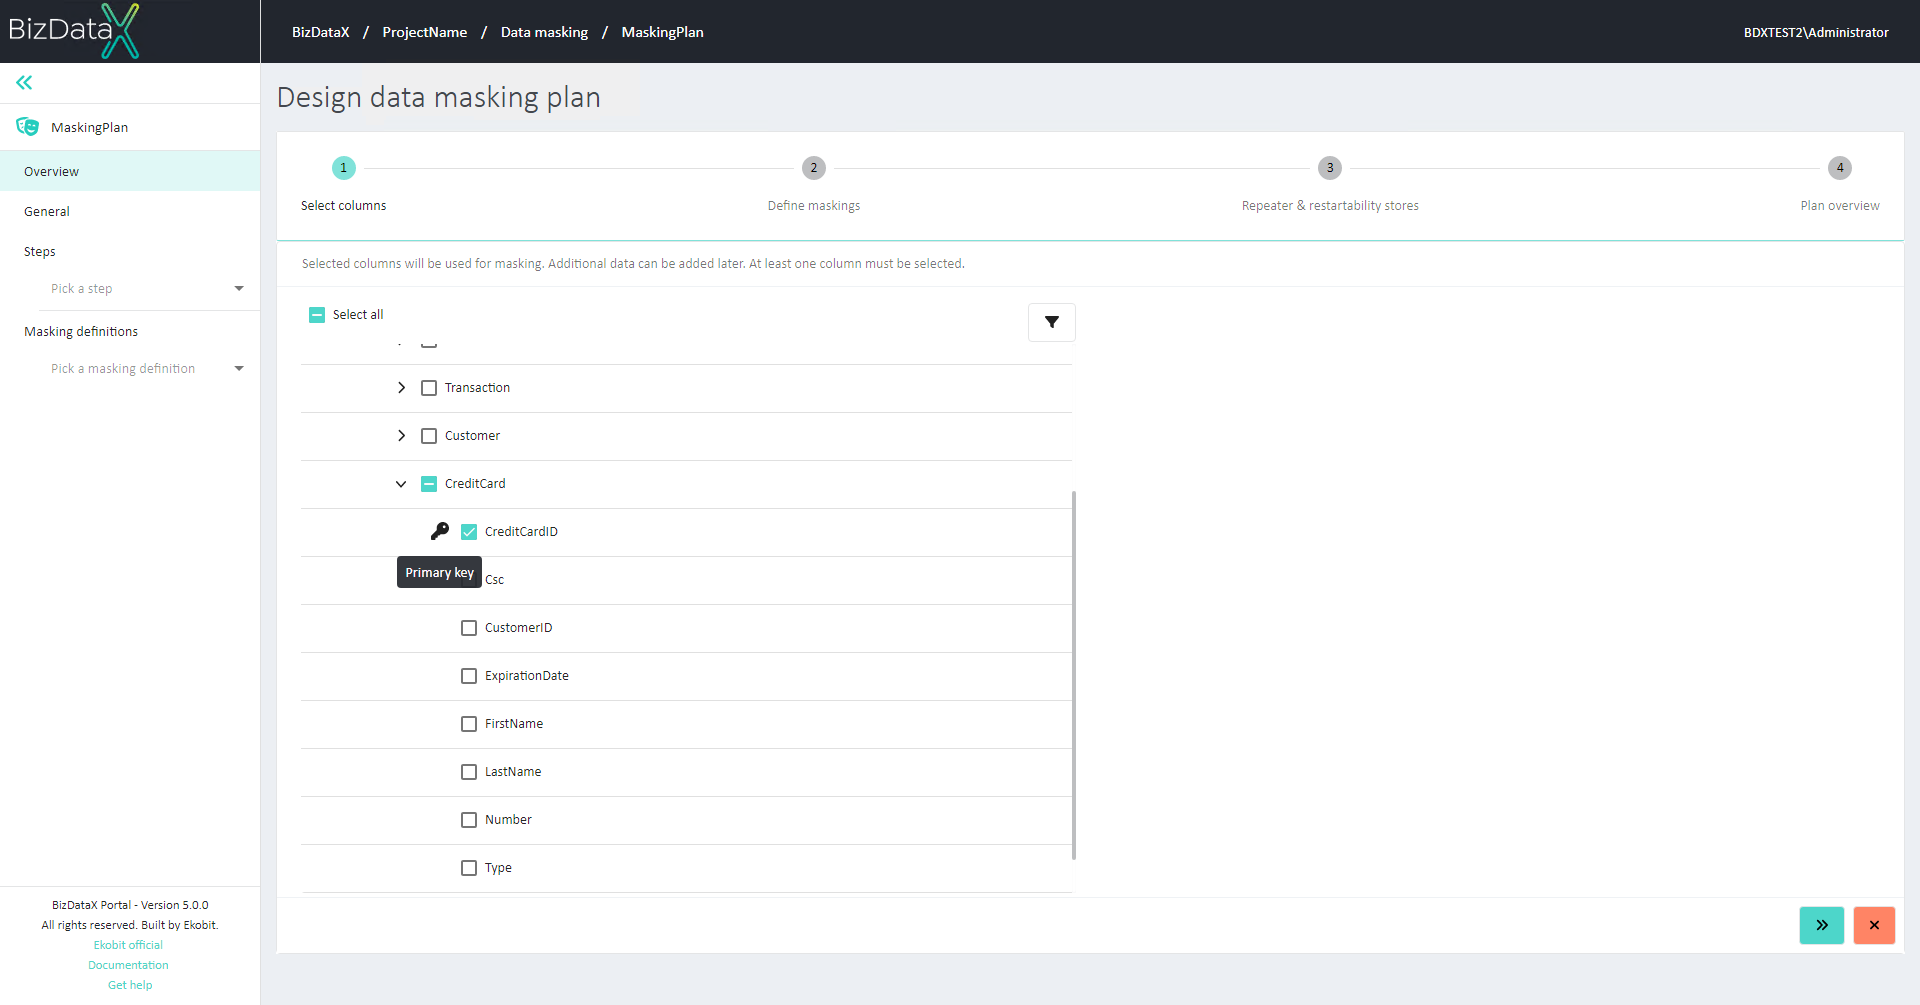 Figure 3: Example of Primary key column
Advanced options
Clicking the ‘Advanced options’ button opens a pop-up window with filtering options for easier selection of wanted Columns.
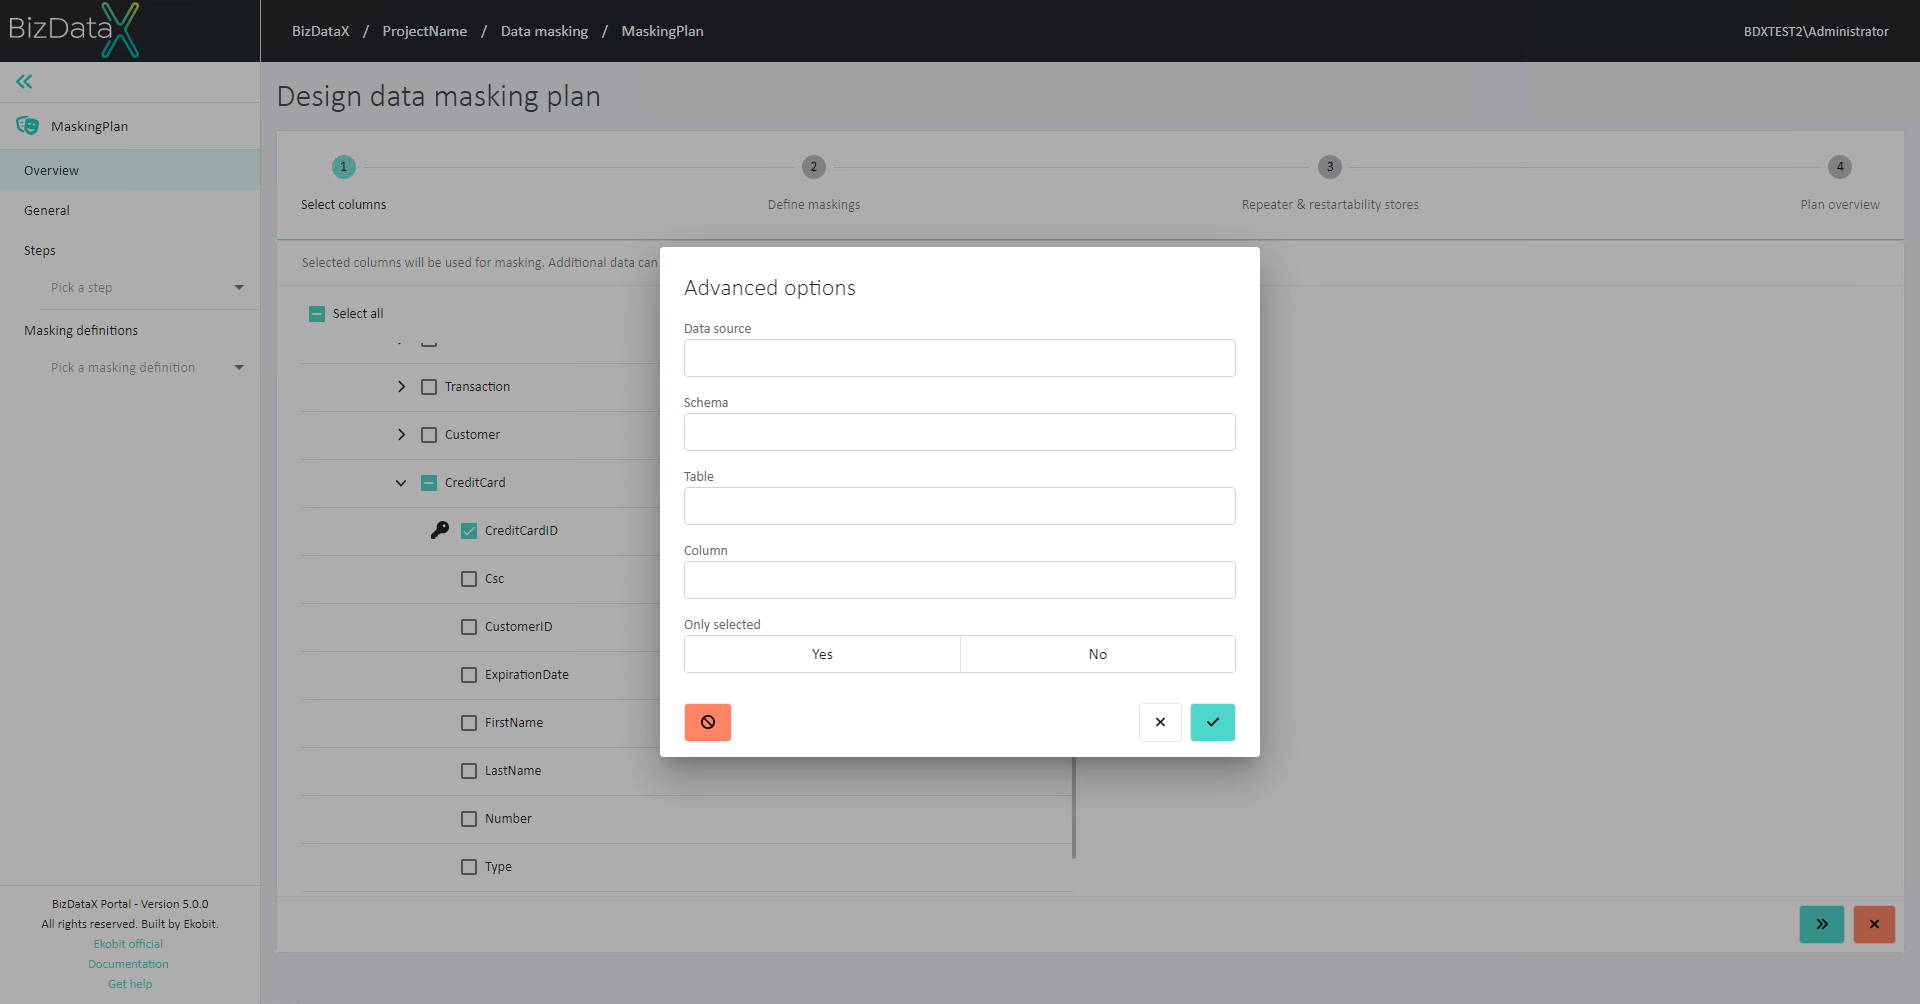 Figure 4: Advanced options
The hierarchy tree can be filtered by:
Data source name - filters Data sources by inputted name
Schema name - filters Schemas by inputted name
Table name - filters Tables by inputted name
Column name - filters Columns by inputted name
Only selected - displays only selected/not selected options.
Continuing to the next step
At least one Column must be selected for the user to be able to continue to the next step. The 'Next step' button will be disabled until one column is selected.
To cancel the process of designing data masking plan, the user can click on the 'Cancel' button at any time.
BizDataX Documentation © Built by Ekobit. All rights reserved.
https://www.ekobit.com/ https://bizdatax.com/ https://bizdatax.com/support/