Environment details
The list of created data models - environments (in the process of metadata import) can be seen in the details of each data source.
| Table of contents |
|---|
| View Environment details |
| Compare environments |
| Set status to Active or Inactive |
| Edit Environment |
| Reimport metadata |
| Delete Environment |
| Reporting |
View Environment details
The environment details page is divided into two parts, where the top part contains basic information about the environment and the bottom part contains the environment metadata.
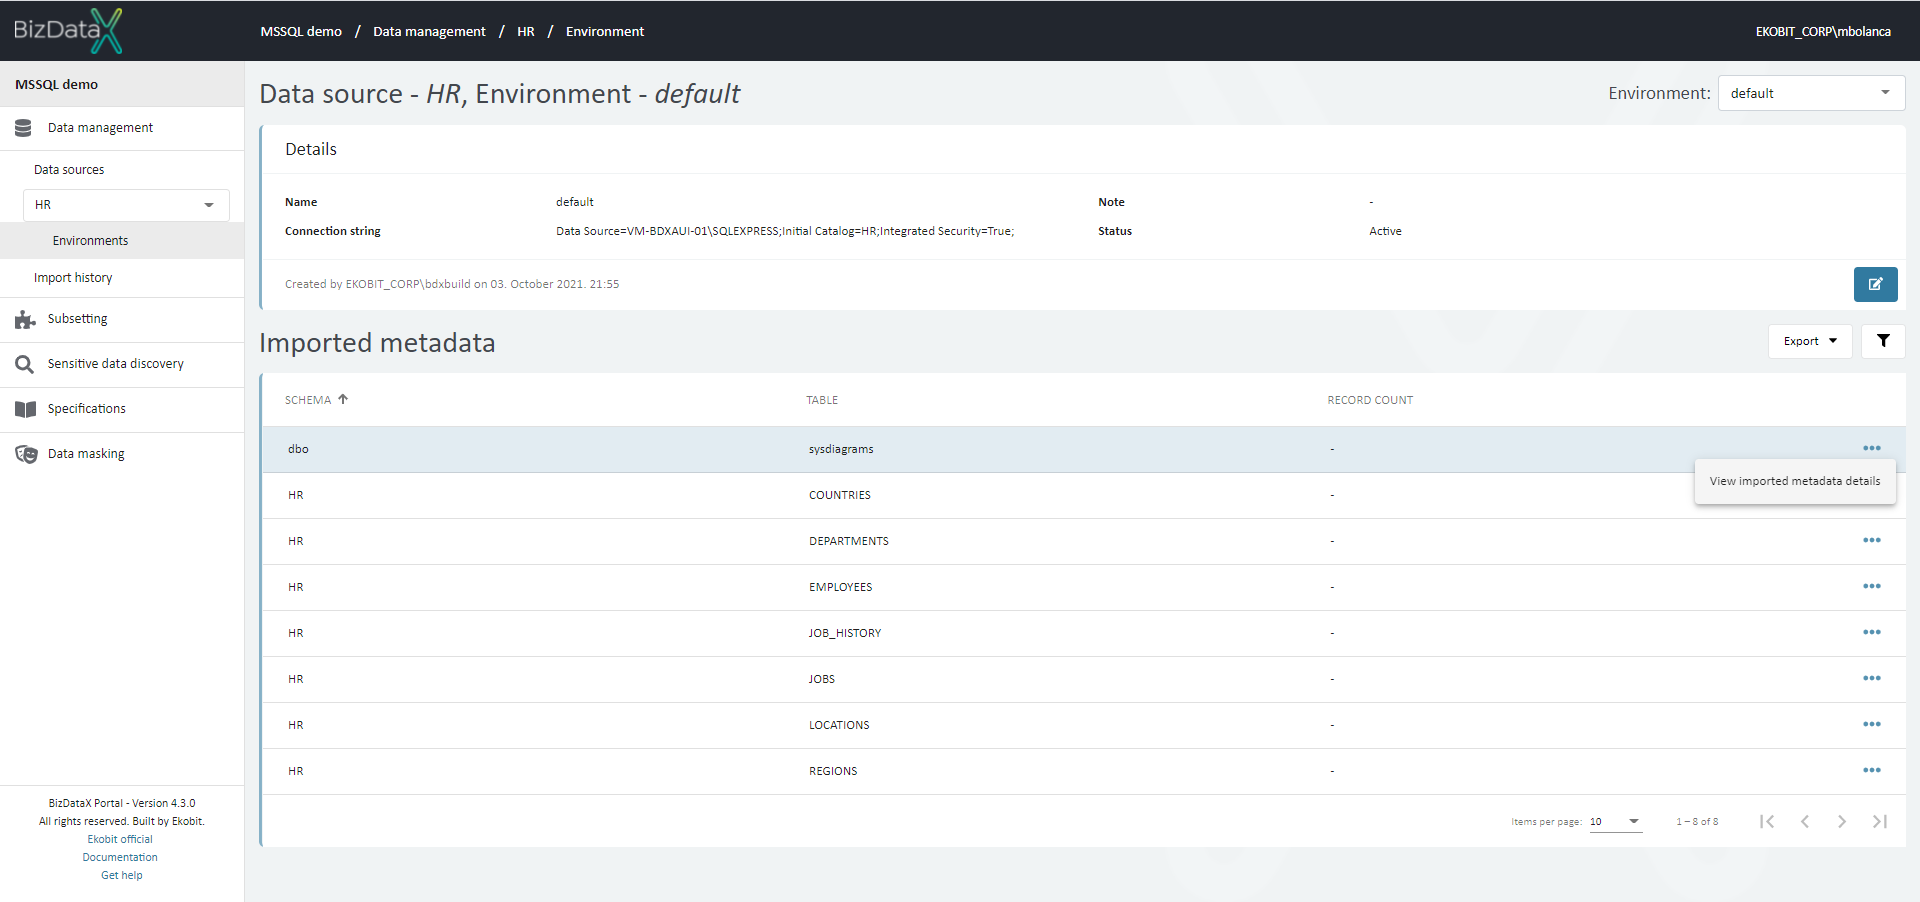 Figure 1: Environment details
Environment metadata is represented through a table that contains information about schemas, tables, and columns in the data model. The columns are not immediately visible. They can be seen for each table by using the View imported metadata details option on the right.
Every column row has information about the type of the column, whether it is a part of the primary key if it is nullable or read-only.
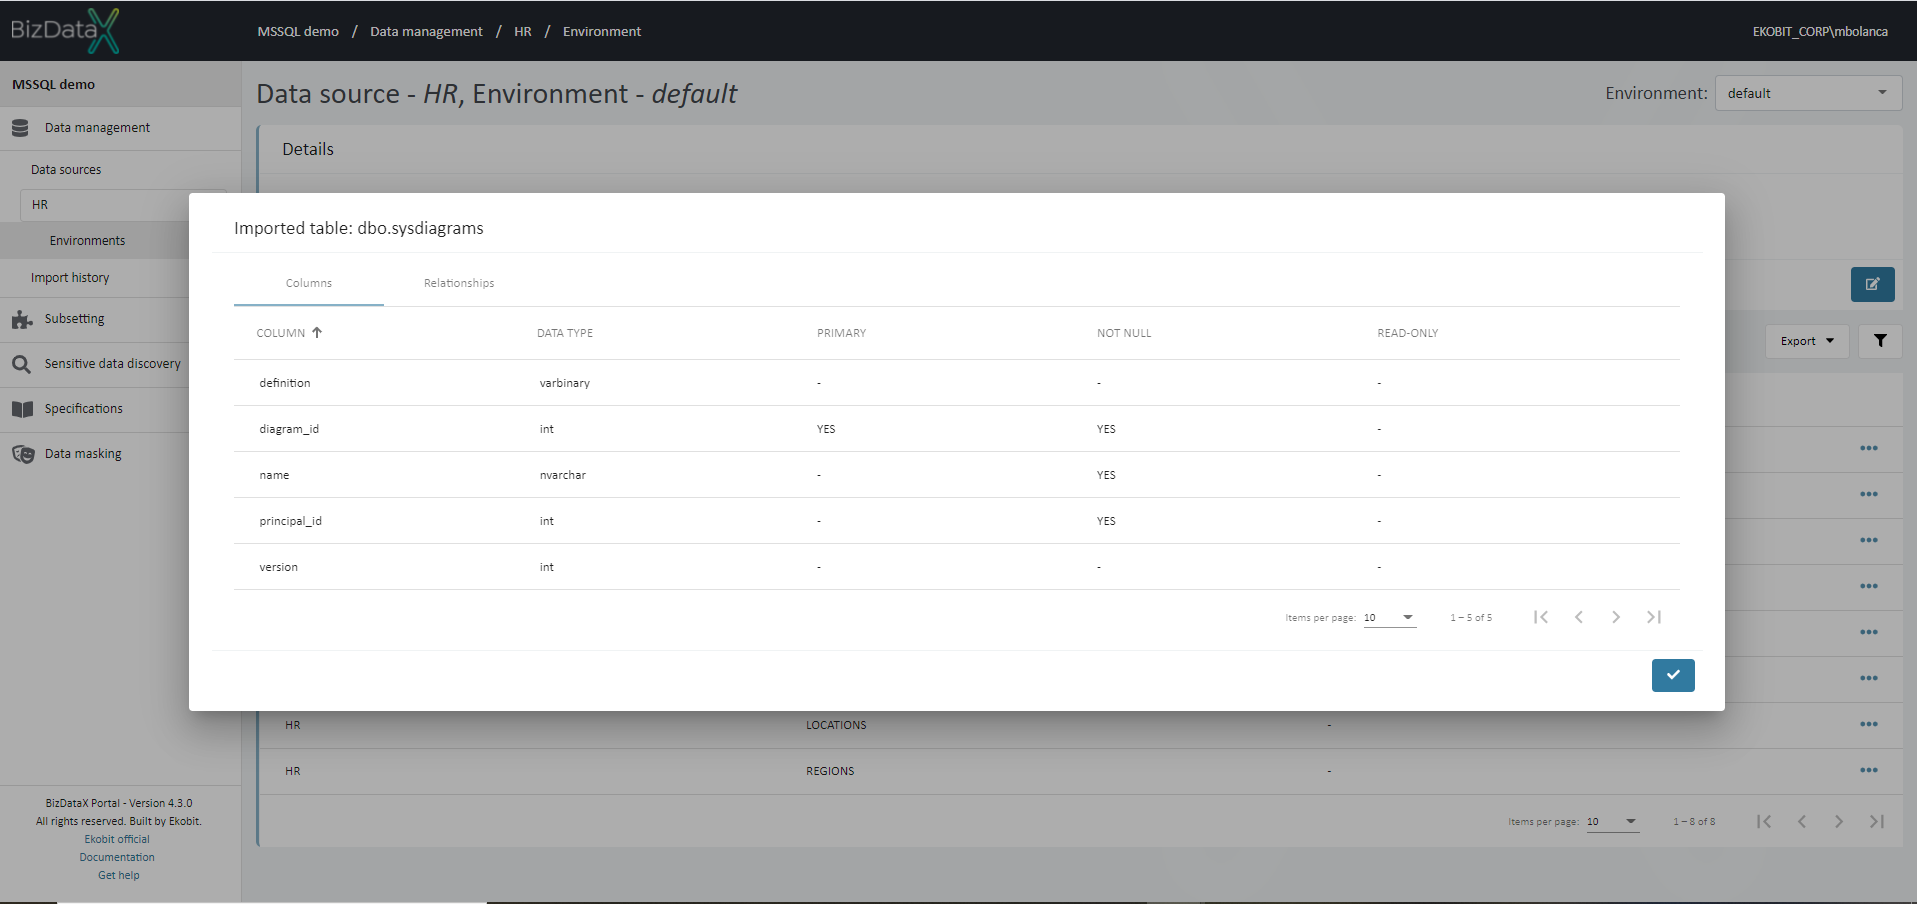 Figure 2: Environment metadata
Compare environments
If there are several different environments in one data source, a comparison can be made. The "Compare environment" option should be offered for both active and inactive environments.
On the data source details screen, select the Compare environments option for the environment you want to compare with another one. ‘Compare environments’ is offered as option in the menu only when exactly two environments are selected.
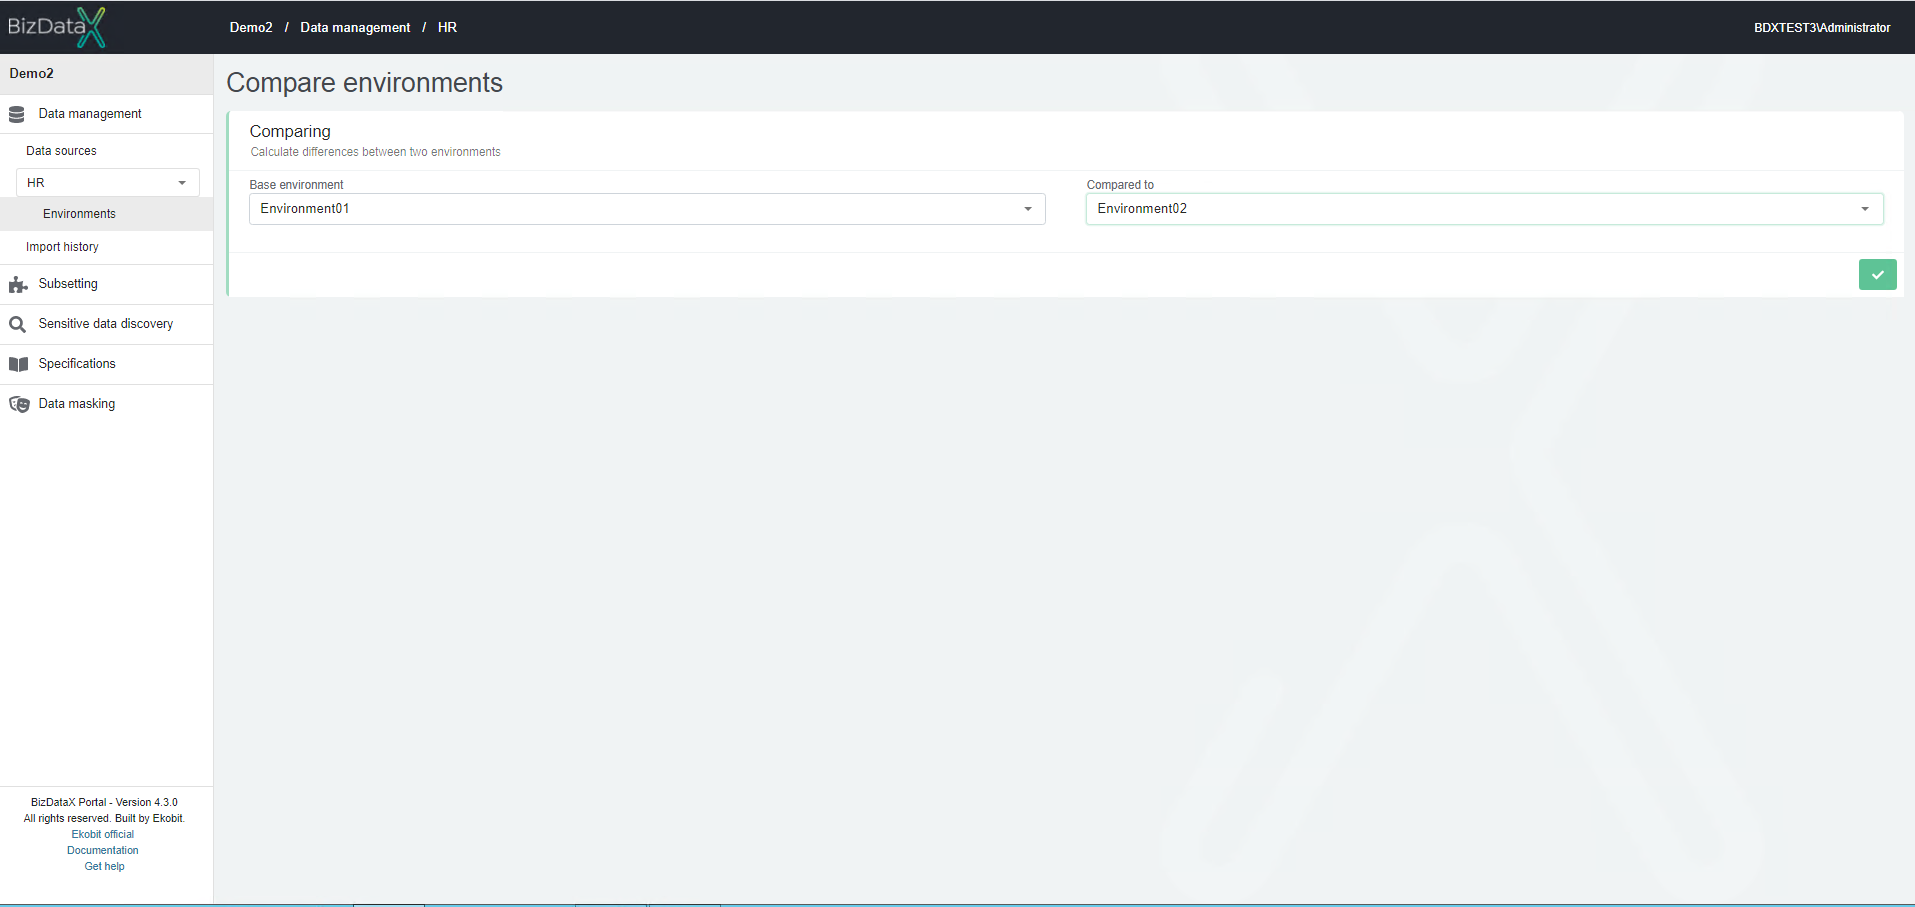 Figure 3: Compare environments
The comparison found that there are differences in the metadata related to the RegularTable table, which exists on both environments being compared, while the other tables exist only on the Default environment.
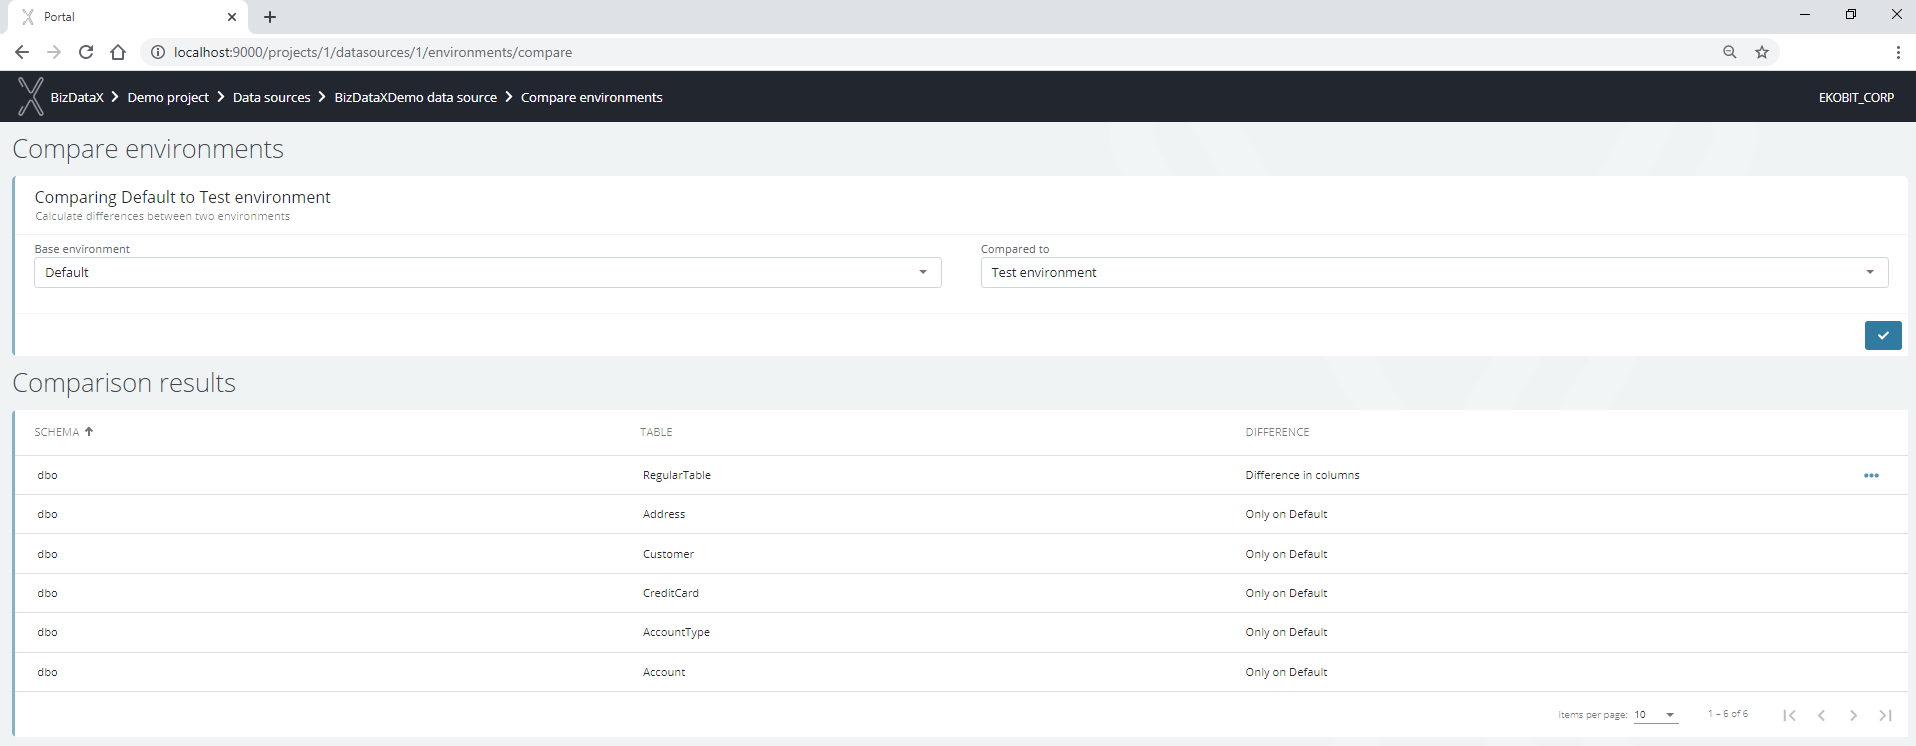 Figure 4: Differences
A closer look at the differences found shows that the LastName column exists only on the Test environment, while the Grade column exists on both environments being compared, but that there is a difference in the metadata. In order to determine exactly which difference is in question, this needs to be done in the database directly.
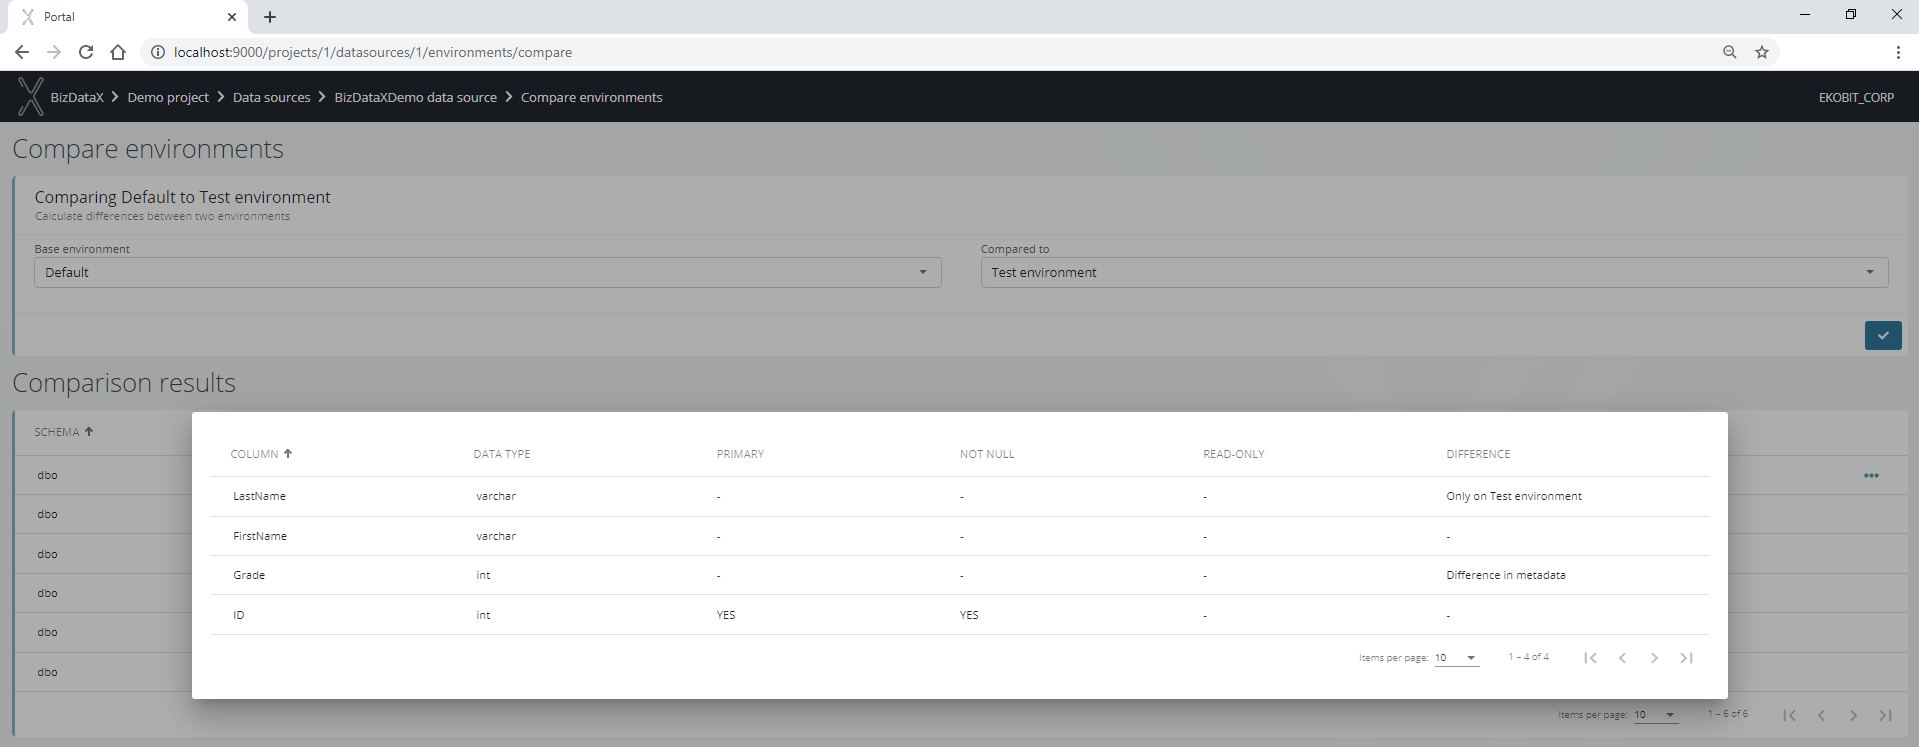 Figure 5: Differences in more detail
Set status to Active or Inactive
Environmet status can be changed. If Environment status is Active by choosing option from table menu 'set status to Inactive' it will become Inactive. If Environment status is Inctive by choosing option from table menu 'set status to Active' it will become Active. Status can be also changed by choosing option from table menu 'Edit Environment'.
Edit Environment
Once Environment is created it can still be edit. By choosing option from table menu 'Edit Environment', Edit Environment screen will be open. In Edit context field ‘Connection string’ is not editable. All other fields are editable. There is also ability to change Environment status to Active or Inactive.
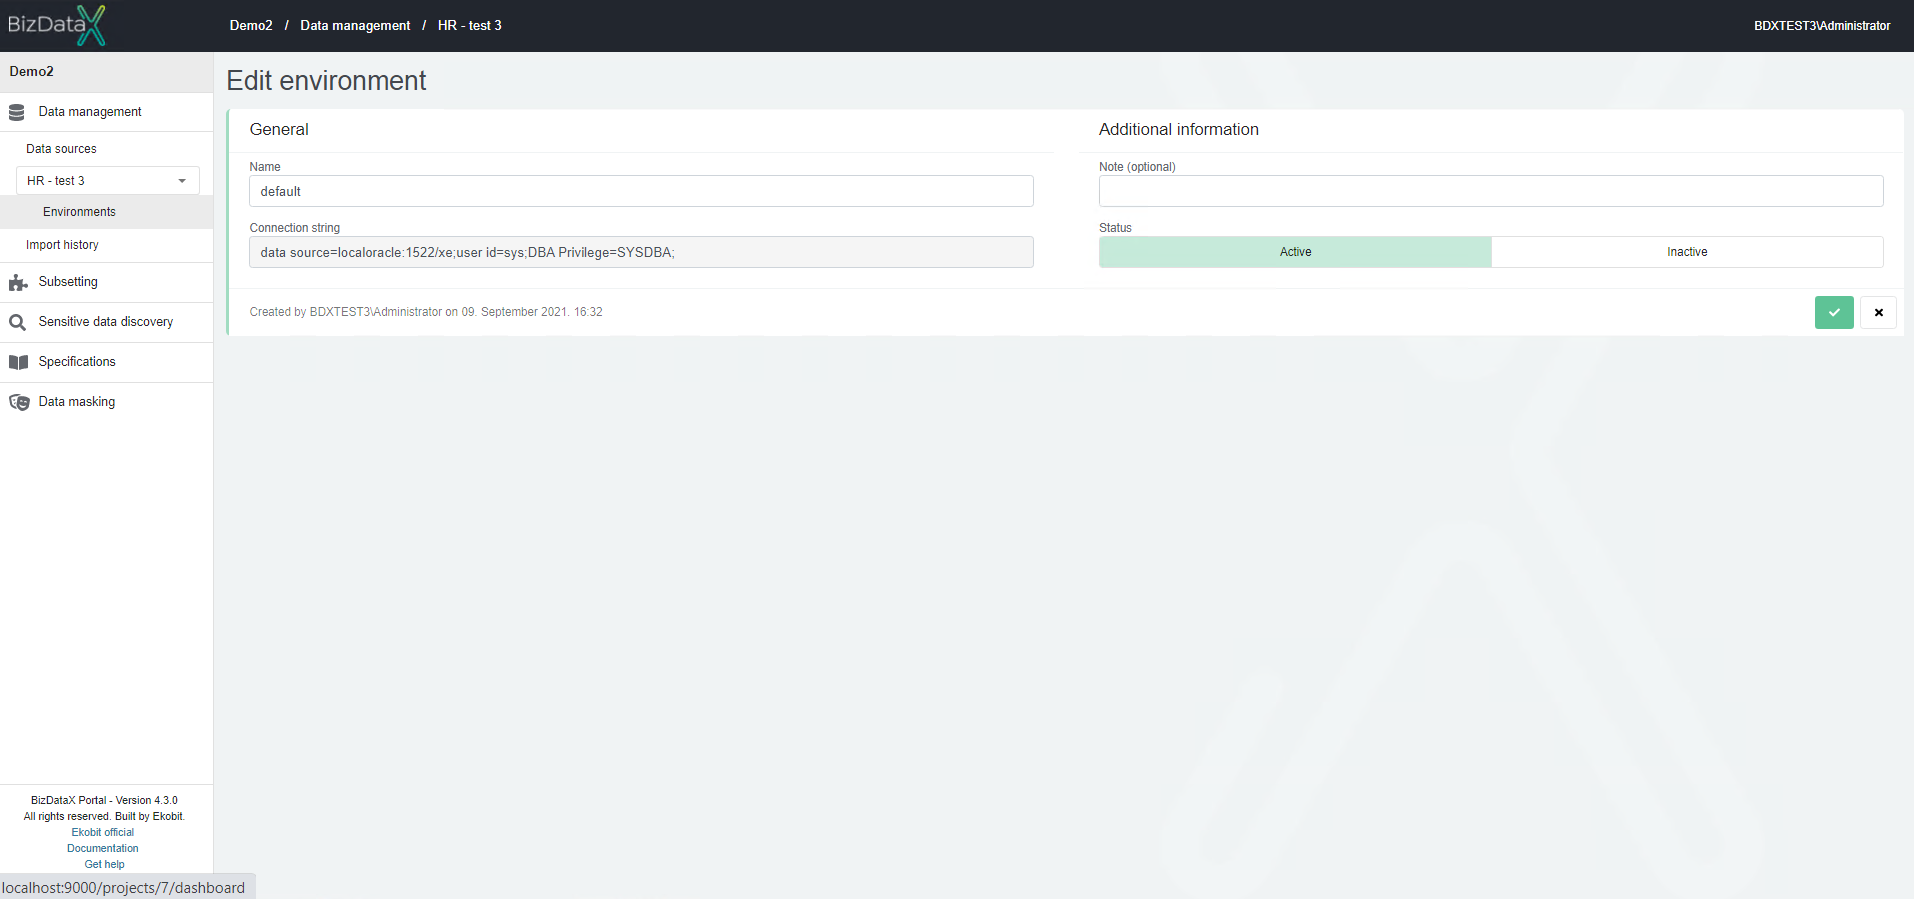 Figure 6: Edit Environment
Edit Environment screen can be also open from View Environment details screen by choosing Edit Environment button.
Reimport metadata
Editing an environment will trigger the import metadata process, where the user can edit environment properties and continue with the import of metadata.
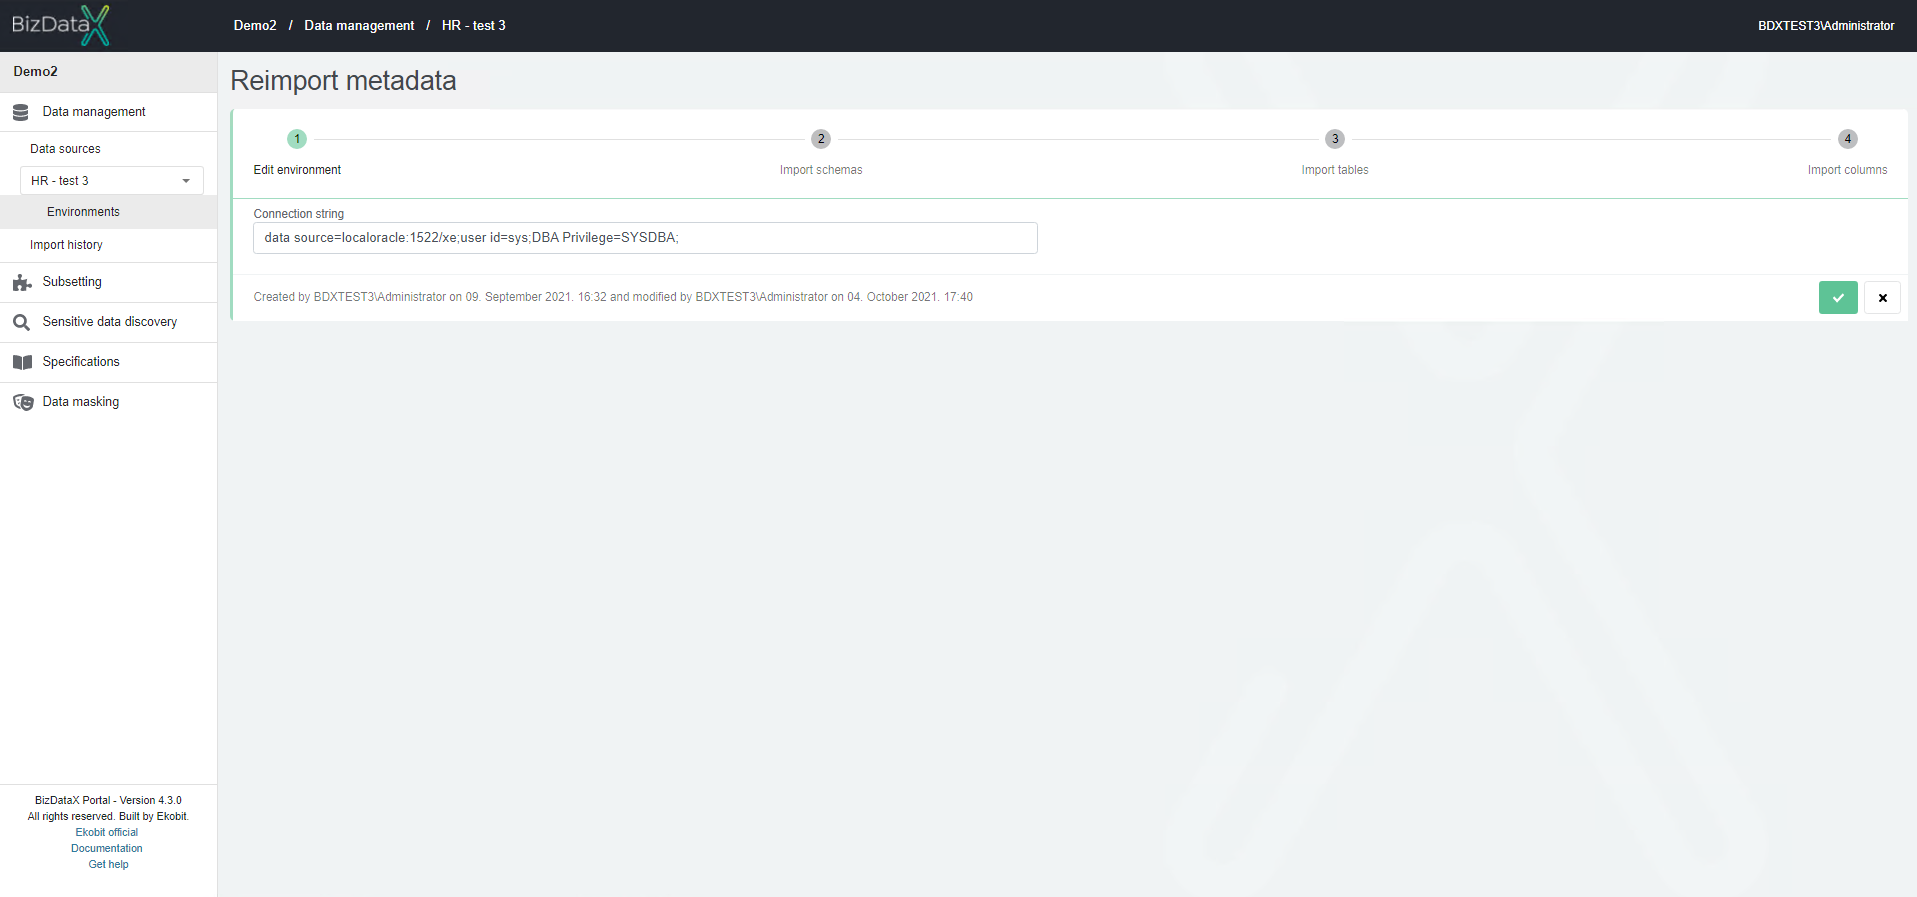 Figure 7: Reimport metadata
Delete Environment
Once the Delete Environment button is pressed, the Delete Environment confirmation dialog pops up asking the user to confirm if he really wants to delete the Environment. After confirming with the Confirm button, the Environment is permanently deleted.
 Figure 8: Delete Environment confirmation message
Deleting the Environment will permanently delete all related data - imported metadata.
Reporting
Reporting functionality offers a way to download and manipulate data from Portal in order to produce meaningful reports. Imported metadata reports contain schema, table and record count information (if available) for selected data source and environment.
In addition, reports come in two main types: static files and files with live data feeds.
Static reports
Static files represent raw data snapshot in CSV or Excel format. They can be downloaded using Export button in the top right corner of the data table and choosing Export to CSV or Export to Excel options.
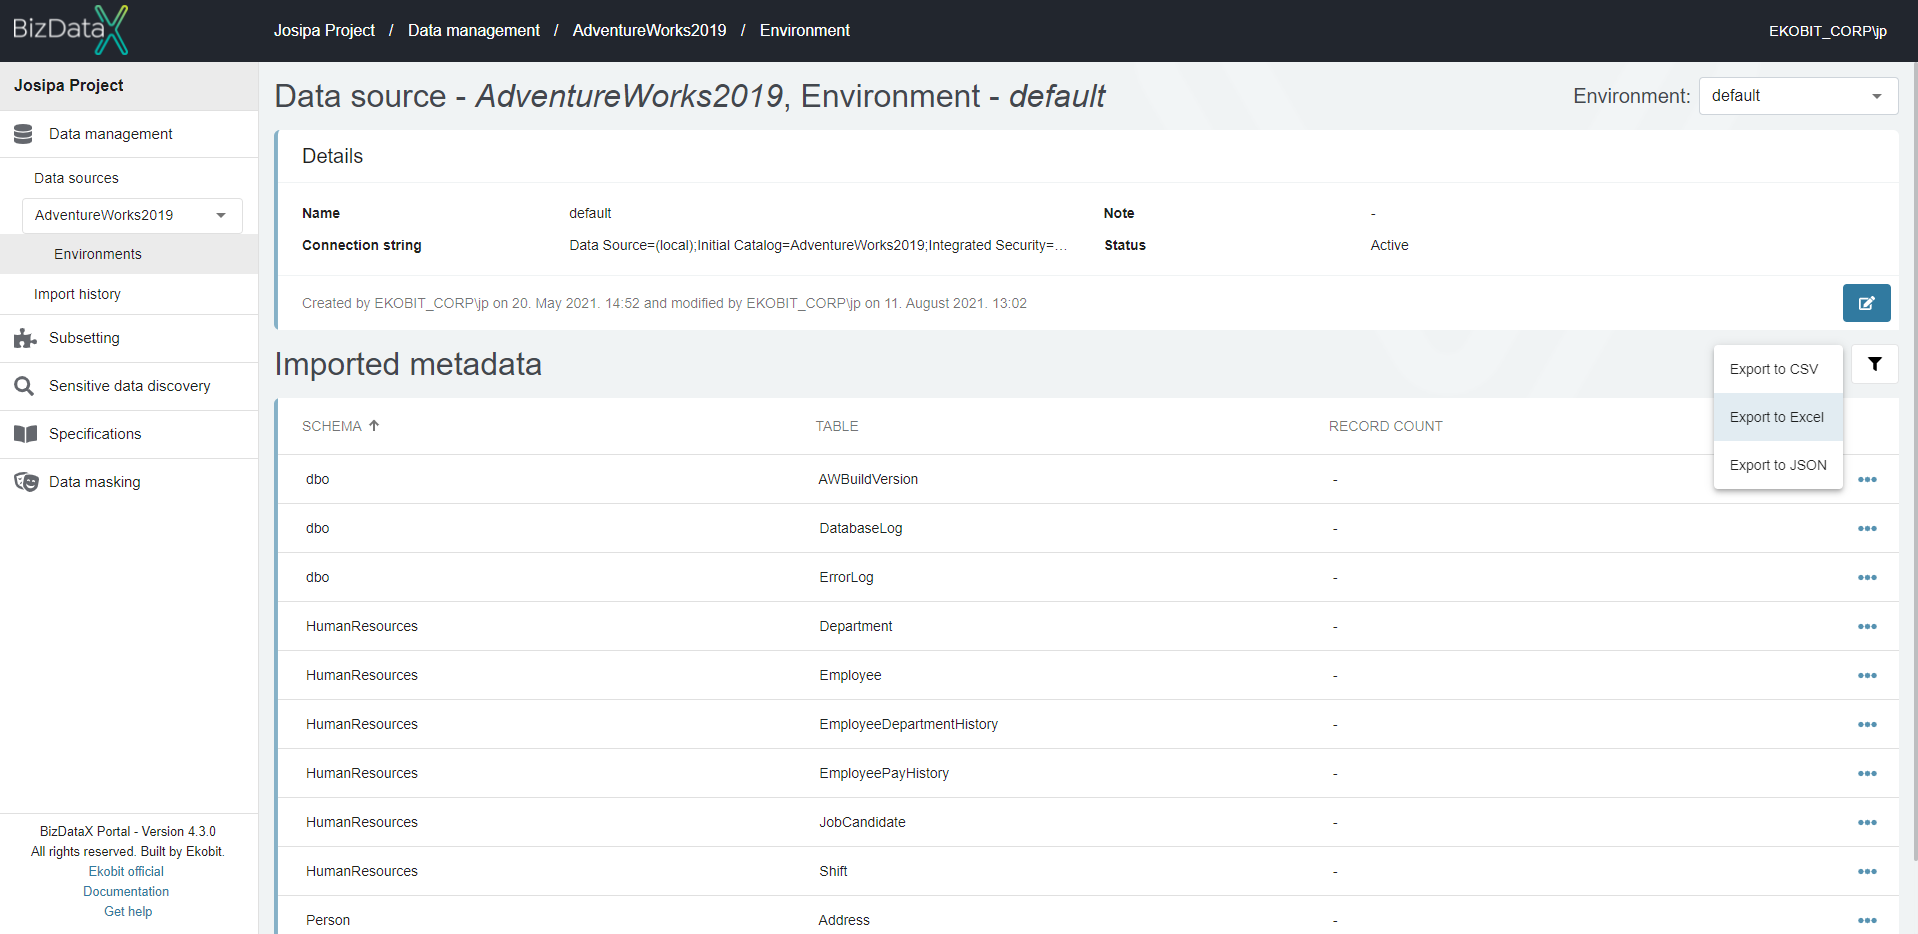 Figure 9: Reporting - export imported metadata
Reports with live data feeds
Files with live data feeds will automatically refresh each time a file is opened, but can also be manually refreshed using Excel. A set of pre-defined reports can be downloaded here. However, custom reports can also be defined using this step-by-step guide:
- Make sure you have Microsoft Excel installed
- Use Portal to find the link for data in JSON format, copy it to clipboard
- The link can be found in the export menu along side the options for downloading files in CSV and Excel formats
- Create a new Excel file
- Navigate to Data tab and select Get Data -> From Other Sources -> From Web option
- A pop-up window will appear, paste the link to JSON data from clipboard
- If Access Web content pop-up window appears, select Windows -> Use my current credentials option
- Power Query Editor will open
- To convert data to table select To Table option and press OK when confirmation dialog appears
- To load partial data use the icon in the header row of the table and deselect information that is of no interest to you
- Press Close & Load option
- Use the loaded data to create custom reports